Content
The basis of the greenhouse is the frame. It is made from wooden slats, metal pipes, profiles, and corners. But today we will look at the construction of a frame from a plastic pipe. A drawing will be provided for each model in the photo for a better idea of the component parts of the structure. So, let's find out how a greenhouse is made with your own hands made of plastic pipes, and what shapes the buildings come in.
Existing types of greenhouses made of plastic pipes
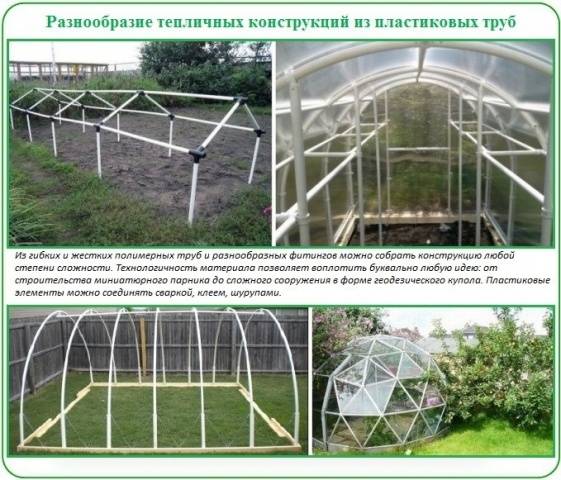
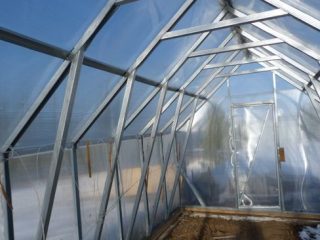
The design of each greenhouse consists of almost identical components. The only difference is the size of the building and the design of the roof, which can be arched, lean-to or gable. The photo shows different options for frame designs made of plastic pipes. Using them you can create a drawing of your future greenhouse.
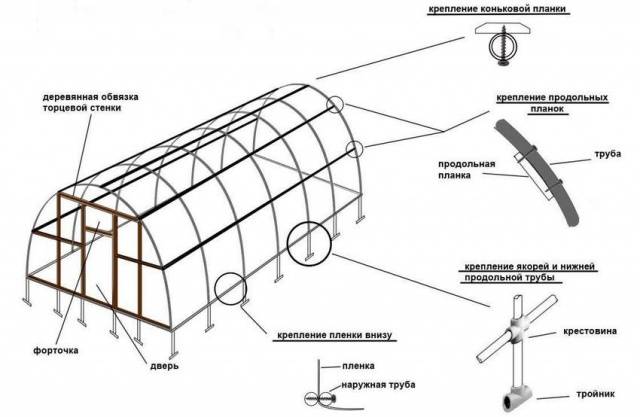
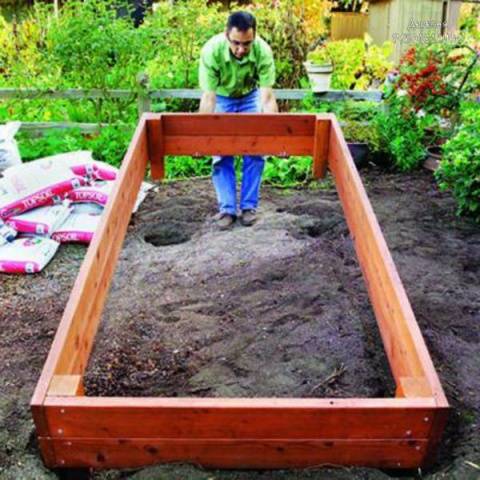
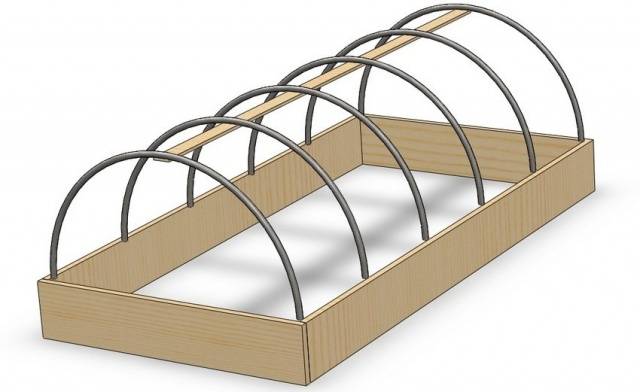
For greenhouses with arched roofs, the lower base - the box - is assembled from wood. Usually the entrance is boards or timber. The pipes are fixed to metal pins fixed in the ground. Sometimes the rods are replaced with wooden stakes, but this design will be short-lived. The pin protrudes from the ground approximately 400 mm in height. Its thickness should correspond to the inner diameter of the tubes. If the made frame will be covered with PET film, it is optimal to make the ends of the building from plywood or other similar material. A door and windows are cut into them. In the case where a polycarbonate greenhouse will decorate your yard, the ends are sewn up with the same material.
Frame structures with gable and pitched roofs are sheathed polycarbonate and polyethylene. Previously, glass was used, but the high cost and fragility of the material made it less popular. Gable and single-pitch frames are secured to a rigid base for better rigidity.
Construction of an arched greenhouse made of polypropylene pipes
The easiest way is to build a greenhouse from purchased materials. Polypropylene pipes come in a set cut to a specific size with fasteners and connecting parts. Below in the photo you can see a drawing of one of these greenhouses. The frame is assembled like a construction set. It does not require a foundation; you just need to level the site. If you make a greenhouse from plastic pipes with your own hands, you have the opportunity to choose an individual size.
Choosing the right location for the greenhouse greenhouse
A greenhouse or greenhouse with an arched structure made of polypropylene pipes must be correctly positioned on your site:
- It is optimal for the construction to choose a sunny place, not shaded by tall trees and buildings;
- it is necessary to provide a convenient approach to the greenhouse;
- It is advisable to install a greenhouse in an area less exposed to wind.
A gardener who builds a greenhouse in compliance with these nuances will receive a structure with minimal heat loss.
Step-by-step instructions for building a greenhouse from polypropylene pipes
Even before construction begins, it is necessary to level the area for the greenhouse. It is advisable to loosen or compact the soil as little as possible so as not to disturb its structure. Based on the finished drawing, the required amount of material is purchased. Polypropylene pipes are suitable with a diameter no thinner than 20 mm. For the end strapping you will need a wooden beam, plywood or any other sheet material.
So, having all the materials and a drawing at hand, we begin to build the greenhouse:
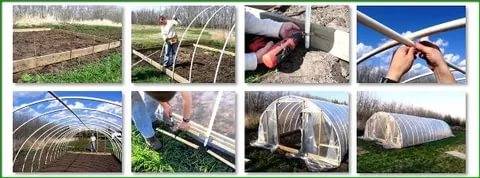
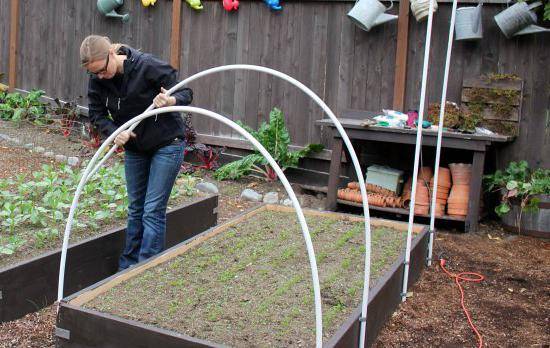
- A simple option for attaching an arched frame, especially for a small greenhouse, is the pin method. The prepared area is marked, transferring the dimensions of the future frame. Metal rods are driven into the ground along the marking lines of the long side walls of the greenhouse. The strength of the frame depends on the distance between the rods. The shorter the step, the more stable the greenhouse will be. A box is knocked down from a board or wooden beam around the perimeter of the frame. Polypropylene pipes are bent in an arc and placed on the pins of opposite walls. The final result should be a skeleton made of arches fixed to a wooden frame.Advice! The distance between the arcs under polycarbonate can be made larger.The weight and strength of the material will make the greenhouse heavy, stable, and strong. A small step of the arcs under the film will not only strengthen the structure, but also reduce the sagging of the film.
To attach the end walls, a frame is assembled from timber with a section of 50x50 mm. The frame of the front wall is made taking into account the door and window. There is usually only a window on the back wall, but you can install another door to make the greenhouse a walk-through. Wooden end frames are fixed to the general skeleton of arches. Additional stiffening elements are installed from timber. At the highest point of the arcs along the frame, the upper element of the screed of the entire structure is fixed with clamps.
- When the greenhouse frame is completely ready, PET film is stretched over it. It is nailed down below using nails and wooden planks. Along the body, fixation begins from the middle, gradually moving to the corners. At the ends of the greenhouse, the edges of the film are collected with an accordion and also nailed to a wooden frame.Advice! In order for a greenhouse made of plastic pipes to have to be covered less often, it is better to use multilayer or reinforced polyethylene.
- The end side can be sewn up with any sheet material, but it is better to make the walls also transparent so that more light gets into the greenhouse. To make film ends, fragments of door and window coverings are cut out of polyethylene. They are attached to a wooden frame with planks or staples from a construction stapler.
At this point, the greenhouse made of plastic pipes is ready, you can begin to arrange its interior.
The video shows the process of assembling a greenhouse from plastic pipes:
Arched greenhouse made of plastic pipes and polycarbonate
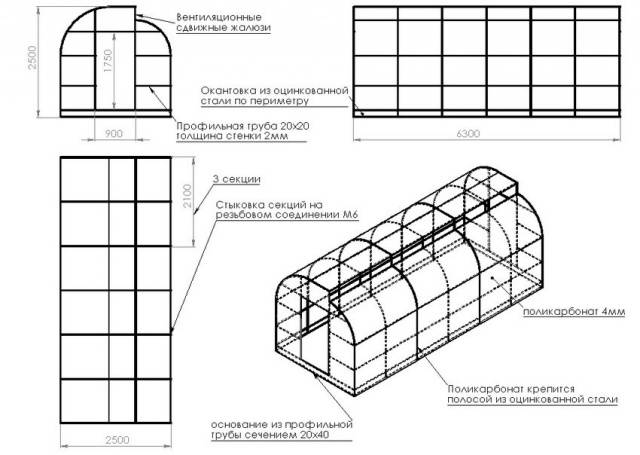
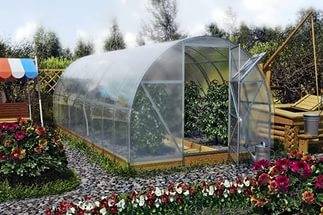
The big advantage of plastic pipes is their long service life.This means that the covering of the greenhouse must also meet the same standards. Any film will have to be changed after a season or even every year. Polycarbonate is an ideal material for greenhouse cladding. The structure will be durable, warm and will last for many years. The photo below provides a drawing of a typical arched greenhouse covered with polycarbonate.
Choosing a location on the site, type and size of greenhouse
If a film greenhouse can be called a temporary structure, then a polycarbonate structure is more difficult to disassemble in order to move it to another location. Here you immediately need to think about its permanent location. The selection of a site is carried out according to the same rules as for a film greenhouse - a bright, sunny place with a convenient approach. In a greenhouse made of plastic pipes lined with polycarbonate, you can grow vegetables even in winter. In this case, you will have to provide a heating system.
The shape and size of the greenhouse are determined by personal preference. The heavier the structure, the stronger the foundation must be made for it. Typically, the size of a greenhouse is determined by the number of crops grown. It is not recommended to build large structures due to the difficulty of maintaining the internal microclimate. It is optimal for polycarbonate greenhouses to build arched roofs 2 m high. The common width and length of the structure is 3x6 m, and the path between the beds must be taken into account. Its optimal width ranges from 600 mm. This is enough for a convenient arrangement of the front door.
Construction of the base for the greenhouse frame
A concrete base for a polycarbonate greenhouse is considered reliable. However, for a small home greenhouse, you can make a wooden base from timber with a cross-section of 100x100 mm.To make the wood less susceptible to rotting, it is treated with an antiseptic and then stapled into a frame.
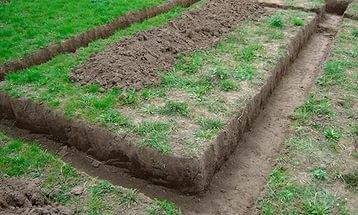
It is necessary to prepare a trench under the wooden box. Wooden stakes are driven in on a flat piece of land, indicating the dimensions of the structure. They are connected to each other with a construction cord, and the diagonals are also checked so that the distance between the corners is the same. If the rectangle turns out to be correct, then the marking is correct.
The depth of the trench is determined by the height of the future wooden box. It should protrude 50% from the ground. The bottom is leveled and covered with a 50 mm layer of sand. A wooden box treated with an antiseptic must be additionally protected from moisture. To do this, take roofing felt and wrap the entire structure. It is necessary that the strips overlap.
The finished box remains to be lowered into the trench, leveled, covered with soil and compacted.
Making a frame from plastic pipes
A frame made of plastic pipes for polycarbonate cladding is assembled in the same way as for a film greenhouse. However, there are some nuances that we will now try to cover:
- It is necessary to take the reinforcement as thick as the inner diameter of the plastic pipe and cut it into pieces of 800 mm. The prepared pins are driven close to the buried box along the long walls so that they protrude 350 mm from the ground. The spacing between the rods is 600 mm. It is imperative to ensure that the opposite rods on both walls are positioned strictly opposite each other, otherwise the arcs placed on them will turn out oblique.
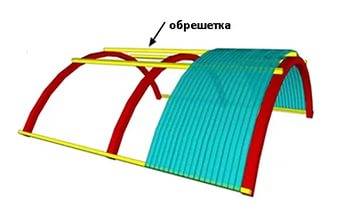
- Plastic pipes are bent in an arc, placed on the driven rods of opposite walls. Each lower end of the pipe is fixed with metal clamps to a wooden box. Stiffening ribs are laid out along all the arcs along the assembled skeleton. In the future they will play the role of sheathing. The connection of these elements is made with plastic clamps.
- To attach the polycarbonate to the ends of the greenhouse, you will also need lathing. Its manufacture begins with the installation of racks at the ends of the building. Take 4 bars with a cross section of 20x40 mm on each side. Two central posts are installed at a distance from each other equal to the width of the window and door. The racks are fastened together with transverse strips.
When the frame is completely completed, you can begin to sheathe it with polycarbonate.
Covering an arched greenhouse with polycarbonate
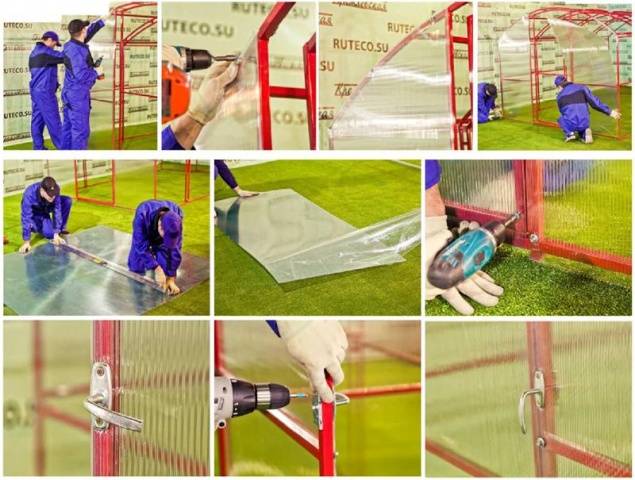
Covering an arched greenhouse with polycarbonate is quite simple. Lightweight sheets bend well, they can be shaped into a frame and mounted independently without outside help. The sheet is placed on the frame with the protective film facing up. In 45 mm increments, holes are drilled across the sheet with a diameter 1 mm larger than the thickness of the self-tapping screw. They begin to fix the sheet from the bottom up, while bending the polycarbonate around the arc. We must not forget to use press washers along with self-tapping screws.
Adjacent sheets are joined together using connecting strips. Corner joints are fixed with a special corner profile.
When the entire frame is completely sheathed, the protective film can be removed from the polycarbonate.
Using HDPE pipes to make a greenhouse on a concrete foundation
HDPE pipes are cheap and easy to use. They are sold in rolls or in pieces. It is more profitable to take a bay to get rid of excess waste. Let's look at another option for making a greenhouse from HDPE plastic pipes on a strip foundation.
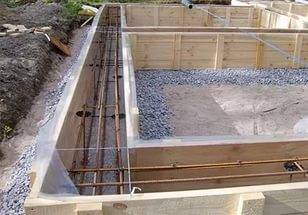
Having marked the future greenhouse on the prepared area, they dig a trench 300 mm wide and 500 mm deep under the foundation. The bottom is covered with a 100 mm layer of a mixture of sand and crushed stone. Formwork is constructed around the trench from old boards, a reinforcing belt is laid inside the pit from metal rods and everything is filled with concrete solution. In order for the foundation to be monolithic, it is concreted in 1 day. The solution is prepared from cement, sand and crushed stone in a ratio of 1:3:5, bringing it to the consistency of sour cream.
While the concrete hardens, they begin to manufacture the frame. First, the bottom box is knocked down from a wooden beam. Arcs from HDPE pipes are fixed to it using self-tapping screws and clamps. Along the resulting skeleton, stiffening ribs from the same HDPE pipe are attached with plastic clamps. It is enough to lay three such ribs, one in the center and one on each side.
The finished structure is fixed to the completely frozen foundation using dowels and metal corners. For waterproofing, a layer of roofing felt is placed between the concrete and the wooden frame. Further work is aimed at installing the end walls and covering them with film or polycarbonate. The procedure is performed in the same way as for the greenhouse options already discussed.
The video shows the installation of a greenhouse made of plastic pipes:
A gardener can independently build each of the greenhouses considered on his own plot.Plastic pipes are lightweight and bend well, which allows you to make a frame without outside help.
