Content
- 1 How can you heat a polycarbonate greenhouse in early spring?
- 2 Heating the soil in a greenhouse with a heating cable
- 3 Heating a greenhouse with underground pipes
- 4 How to warm up the soil in a greenhouse in the spring with an infrared heater
- 5 How to heat a greenhouse in early spring with warm air
- 6 Heating a polycarbonate greenhouse with a gas heater
- 7 How else can you heat a greenhouse in the spring?
- 8 Conclusion
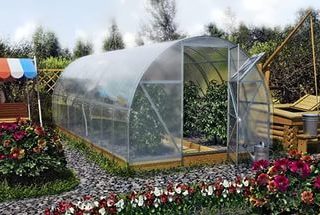
Polycarbonate greenhouses have gained great popularity among summer residents and owners of country houses. Polycarbonate is inexpensive, has a high level of thermal insulation, is resistant to various weather conditions, is impact resistant and is immune to ultraviolet radiation. Such greenhouses can be used all year round or only for one season, for example in spring. The best DIY greenhouse heating projects will help protect your crops from spring frosts.
How can you heat a polycarbonate greenhouse in early spring?
There are many ways to heat a greenhouse in the spring. They differ in degree of complexity, efficiency and cost and are divided into basic and auxiliary. The main heating methods include:
- Solar. Does not require additional costs and is based on the greenhouse effect. This method is effective only during periods of solar activity.Polycarbonate is able to retain light, thus increasing the temperature inside the greenhouse. But in case of frost, the soil and plant roots will be unprotected.
- Biological. It consists of heating the soil by adding biofuel. Most often, gardeners use bird and animal manure mixed with peat, straw, sawdust or bark. You can use a solution made from slaked lime, straw and superphosphate. This method is quite labor-intensive and does not allow timely control of soil temperature.
- Technical. Involves the use of various electric heating devices and devices - electric heaters, heat guns, radiators. When operating a greenhouse only in spring, there is no need to install expensive and complex heating devices.
These and other methods allow you to heat the greenhouse in the spring with your own hands. They have both their positive sides and disadvantages, which must be taken into account in order to make the right decision in choosing a specific type of heating for a polycarbonate greenhouse.
Heating the soil in a greenhouse with a heating cable
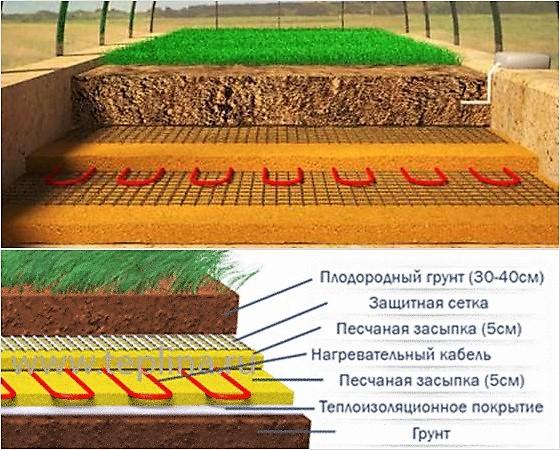
The use of a heating cable is a relatively new way of heating greenhouses in the spring and works on the principle of a “warm floor”. A heating cable has one or more heating elements that produce heat when electric current passes through them.
The advantages of the method of heating the ground in a greenhouse with a cable include:
- safety - they are protected from overheating even when they get exposed to leaves, soil and debris;
- Ease of Management;
- efficiency – expressed in low energy consumption;
- minimal installation costs;
- ease of installation in a greenhouse - does not require its re-equipment;
- independence from weather conditions - a self-regulating cable automatically controls the soil temperature and distributes it evenly throughout the entire planting area.
Installation of the heating cable is quite simple and even a novice gardener can do it:
- The soil is removed in a small layer and sand is poured as a base.
- Lay out a thermal insulation coating, for example, foamed polystyrene, which has a low moisture absorption coefficient. This will reduce heat loss.
- Distribute the sand in a layer of 5 cm. Water it with water and compact it thoroughly.
- Lay the heating cable, fixing it with mounting tape.
- Sand is poured on top in the same layer and watered, preventing the formation of air bubbles.
- The structure is covered with a metal mesh or perforated asbestos cement sheet. This will protect the heating cable from damage when processing the soil with garden tools.
- The top layer is filled with fertile substrate in a layer of 30–40 cm.
A greenhouse using a cable for heating the ground allows you to achieve better results in growing plants and vegetables, compared to conventional conditions, thanks to the following distinctive features:
- eliminates the risk of soil freezing;
- earlier planting of seedlings is possible;
- the harvest period is extended;
- crop growth is accelerated due to soil heating;
- in case of unfavorable weather conditions, optimal conditions for harvesting are maintained;
- self-heating cable allows you to germinate any seeds in a short time;
- temperature control creates favorable conditions for growing heat-loving crops even in Siberia and the north.
When calculating the area for heating the soil in a greenhouse, it is necessary to take into account only the size of the beds. The ground under the paths does not need heating. The use of a heating cable is a convenient and practical solution to the issue of heating fertile soil in the spring.
Heating a greenhouse with underground pipes
A universal way to maintain soil and air temperatures within normal limits in the spring in a greenhouse is heating with pipes using a water system. The main advantages of this method include:
- low cost of maintaining a water heating system;
- condensate collecting on the pipes additionally moistens the ground;
- the system does not affect air humidity;
- uniform heating of the soil and air space.
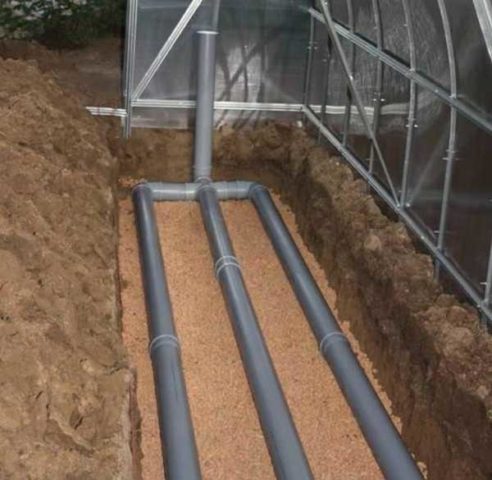
Plastic pipes are currently used to install the water system. They are more affordable than metal ones, moreover, they are light in weight, do not rust and are easy to install. A do-it-yourself greenhouse with earth heating involves creating a system of water pipes.
Installation of water heating with pipes consists of the following steps:
- Remove the soil in a layer of 25–40 cm.
- At the bottom of the dug trench, lay a material that has good thermal insulation properties, for example, penoplex or polystyrene foam.
- Lay plastic pipes and connect them to the heating system.
- Install a water pump that will control the draft and circulation of water.
- Cover the pipes with a layer of fertile soil.
The complexity of this method of heating a greenhouse in the spring lies in the need to maintain the temperature inside the pipes at a level of no more than 40 0 C. Otherwise, the root system of the plants will suffer from burns, which will be reflected in the withering of the above-ground parts.
How to warm up the soil in a greenhouse in the spring with an infrared heater
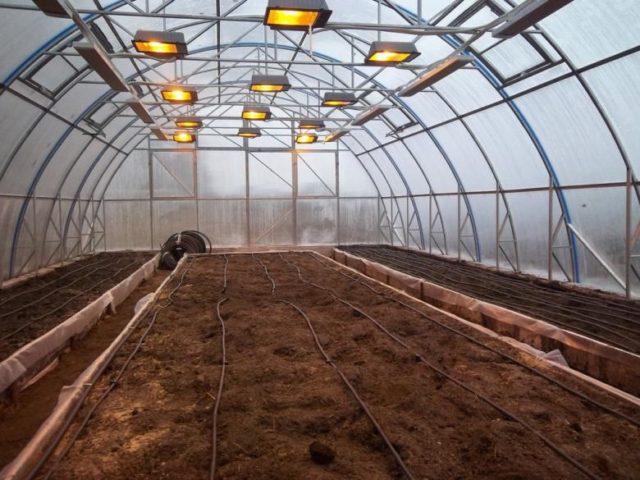
Potbelly stoves, previously used to heat greenhouses, are now obsolete. They have been replaced by newer and more modern heating devices, which include infrared heaters. Using infrared rays, a standard size greenhouse is fully heated within 40 minutes. The maximum heating area can reach 40 square meters. m.
The advantages of using an infrared heater for a polycarbonate greenhouse are:
- simplicity and ease of use;
- efficient heat redistribution, without drying out the air;
- economical consumption of electricity;
- suppression of the growth of dangerous viruses and bacteria;
- reduction of dust circulation;
- creating favorable conditions for plant growth;
- long service life of devices – up to 10 years.
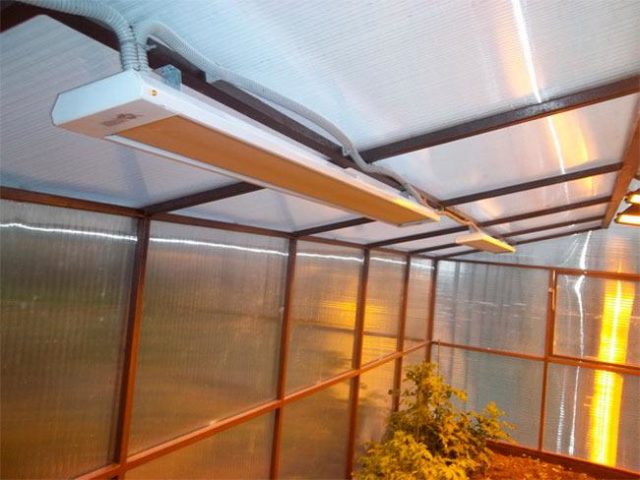
When installing infrared heaters, it is recommended to mount them on the ceiling of the greenhouse. With this arrangement, heating is carried out in the direction from top to bottom, with uniform heating of the air and soil.
Infrared heaters are divided into 2 types, depending on power. In accordance with this indicator, the features of their installation differ:
- Infrared lamps with a power of 500 W are recommended to be placed in places with the greatest heat loss - on windows and walls. The height between the heater and the plant must be at least 1 m.The higher the lamp is fixed, the greater the distance from each other neighboring heating sources should be located - from 1.5 to 3 m. Fixing infrared devices at the maximum height will save money. But if the devices are placed too sparsely, the plants may not have enough heat.
- Infrared heaters with a power of 250 W are lightweight and can be attached using ordinary wire. The distance between adjacent lamps should not be more than 1.5 m. This feature makes the purchase of infrared heaters with low power financially unprofitable. Such devices are first placed above the plants, and as they grow, they are gradually raised higher.
Infrared heaters with a power of 250 W are beneficial to use in the spring to heat seedlings in a greenhouse.
How to heat a greenhouse in early spring with warm air
There are several ways to heat a greenhouse in the spring using warm air. The simplest is to create the following construction:
- A steel pipe reaching 2.5 m in length and 60 cm in diameter is laid in the center of the greenhouse. One end of the pipe must be led outside the greenhouse. Air heated by a fire or stove, flowing through a pipe, allows you to quickly heat the greenhouse space. The disadvantages of this method include a very rapid decrease in air temperature after turning off the heating system.In addition, it is impossible to heat the ground in a greenhouse with heated air, which is why plant roots are defenseless against night frosts in early spring and develop poorly.
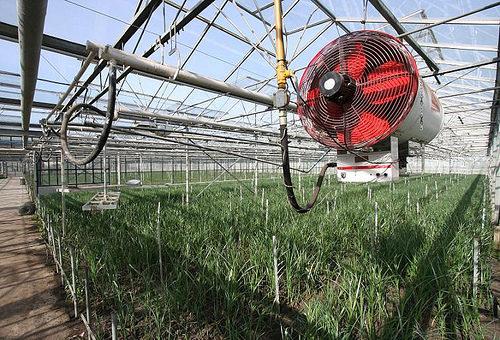
6 - Effective air heating of a greenhouse consists of distributing air heated in various ways through a system of special air ducts, which use a perforated polyethylene hose. Heating elements can be electricity, gas, or wood. The placement of the hoses over the entire area of the greenhouse allows you to quickly warm up the soil and the room.Important! With the help of air heating, the greenhouse can be warmed up in a few minutes. But when using this method, it is necessary to constantly monitor the level of air humidity, preventing it from drying out.
- For large greenhouses, an industrial air heater is used that runs on solid fuel. It is installed anywhere, and the air temperature is controlled independently using an automatic thermostat.
When creating an air heating system for a greenhouse with your own hands, you should remember that the slow flow of air contributes to long-term heat retention, and the movement of the flow from bottom to top warms the soil well and has a beneficial effect on the development of the root system of plants.
Heating a polycarbonate greenhouse with a gas heater
The use of gas heaters allows you to create comfortable conditions for growing seedlings and maintaining the temperature in the greenhouse in cases where centralized or electric heating is not possible.This method has become widespread due to its mobility and low cost.
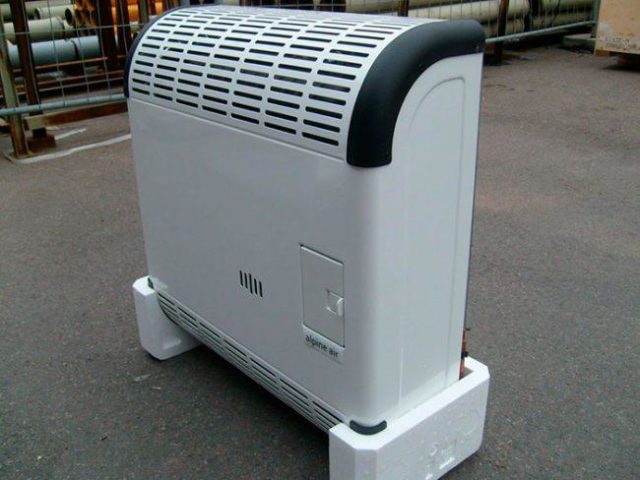
To heat a small polycarbonate greenhouse with your own hands in the spring, you can use a gas convector, which generates an air flow and moves it throughout the greenhouse space. The heating device is relatively economical, but requires the additional creation of a gas pipe system. In addition, the convector must be located at a sufficient distance from the beds with plants.
Larger greenhouses will require at least 2 convectors for uniform heating, which makes this method of maintaining temperature more expensive. Disadvantages also include combustion waste released into the air, which negatively affects the growth and development of crops. To ensure free access of oxygen, it is necessary to equip a ventilation system.
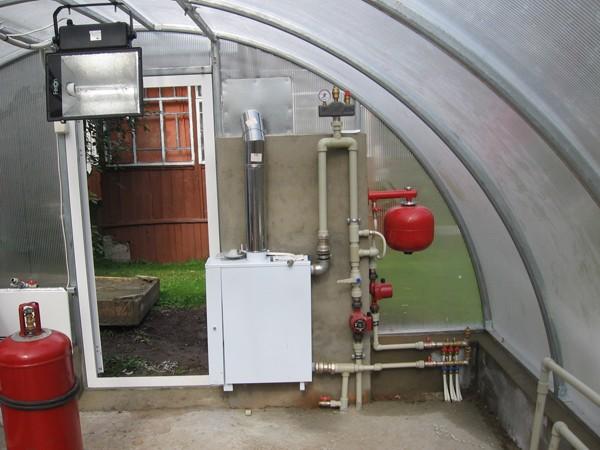
Gas heaters require regular monitoring and monitoring. Fans should evenly distribute carbon dioxide and generated heat around the perimeter of the greenhouse. A factory-made gas boiler can replace gas heaters in a greenhouse and provide heating of the ground with air through pipes. But to heat a polycarbonate greenhouse with your own hands only in spring, such a heating system is quite expensive.
How else can you heat a greenhouse in the spring?
When using a greenhouse in early spring, there is a high probability of temperature changes and sudden cold snaps. In such cases, emergency heating methods will help save plants from freezing:
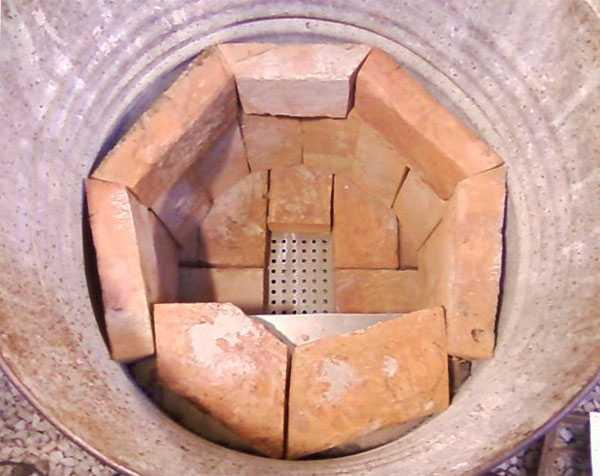
- A barrel with porous bricks, previously soaked in a flammable substance, is installed near the greenhouse. A pipe is laid from the top of the barrel to the ceiling of the greenhouse.During combustion, the bricks will warm up the air temperature of the greenhouse and maintain it for 12 hours. The method is quite dangerous and requires constant monitoring and compliance with fire safety rules.
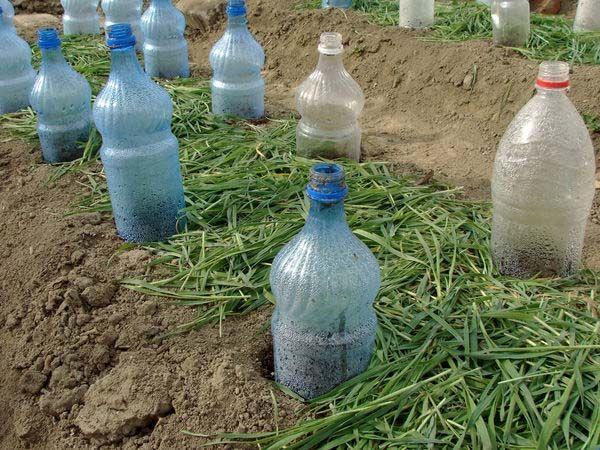
- To heat a polycarbonate greenhouse at night, the following method is suitable. Bottles of water are buried vertically around the perimeter and left open. During the daytime, the water will absorb solar heat, and at night it will release it to the ground. Water evaporation will also create a favorable indoor microclimate.
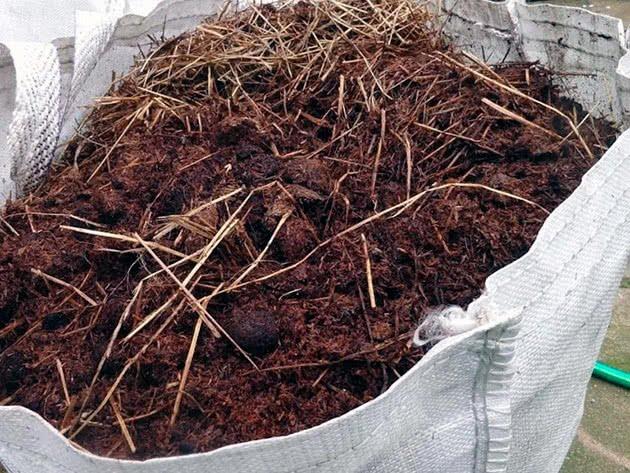
- Heating the soil using horse manure. In spring, you can prepare a special heating pad from natural biofuel. To do this, remove a layer of soil, lay out horse manure mixed with sawdust, then lay out soil 15–25 cm thick. If the layer of soil is too large, biofuel will not be able to warm it up. The soil must warm up for some time, only after this the plants can be planted.
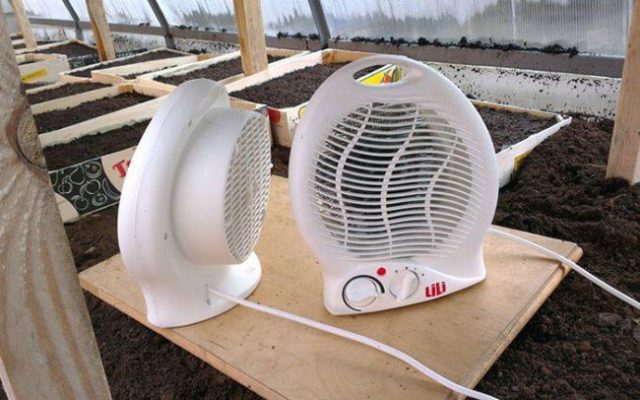
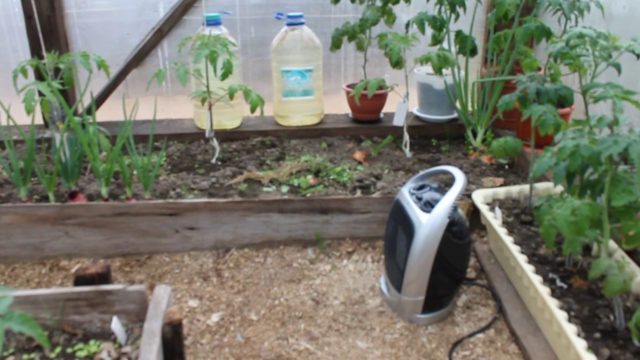
- You can also heat the greenhouse during the spring cold spell using conventional electric heaters. Their placement requires access to electricity. The number of devices required for full heating depends on the overall size of the room. The disadvantage of this method is the drying of the air and the need to control the level of humidity necessary for the growth and development of plants.
Each method can be used to briefly maintain the optimal temperature in the spring in a greenhouse with your own hands. The choice of a particular method depends not only on the size of the greenhouse, but also on the material and physical capabilities of gardeners.
Conclusion
The best DIY greenhouse heating projects will help summer residents navigate the variety of ways to maintain optimal temperatures in the spring and protect plants and their root systems from possible frosts. Each greenhouse owner will be able to choose the most suitable method of heating the air and soil, based on the size of the greenhouse, the necessary materials, the availability of technical capabilities and expected costs. If necessary, it is possible to combine several heating methods.
