Content
To maintain a garden plot at your dacha, you definitely need a shed. Tools and other things that are inappropriate to be in the house are stored in the utility room. Building a garden shed with your own hands is not that difficult, even if this is your first experience in construction work. The main thing is to have the desire, and we will try to describe in detail all the steps of construction.
What is easier to build a shed from?
The easiest way to install a shed on a garden plot is using frame technology. Such prefabricated structures are easy to assemble alone. The basis of the shed is the frame. It is usually assembled from timber, but a metal pipe or profile will also work.
If desired, you can order a ready-made metal frame for the utility unit at the factory. At home, all you have to do is assemble the structure yourself using hardware. A prefabricated shed can be installed in 2-3 days.
When building frame utility blocks, there is no need to pour a reinforced foundation.Such buildings are very light. A simple columnar base will suffice for them. If the construction of a summer cottage shed takes place on difficult soil, then reinforced concrete blocks are used or a concrete strip is poured. You can even build brick sheds or block buildings on such a foundation.
Previously, many summer residents built frame outbuildings without a foundation. You can do this, but provided that the soil in the garden is dense and does not flood. Using this technology, the racks of the prefabricated frame are buried 80 cm into the ground, after which they are filled with concrete. However, the size of a shed without a foundation is very limited. You can build a small shed to store garden equipment or tools, and place a woodshed nearby.
If the garden plot is located on dry and durable soil, from which water quickly drains after rain, the shed can be placed on a sand and gravel embankment. It is made larger in size by 50 cm in each direction than the building itself. A timber frame is laid on top of the embankment, and frame posts are attached to it.
Installing a utility block on a summer cottage without a foundation is not the best option. Even with good wood treatment with protective impregnations, the building will not last long.
Options for constructing country sheds
When building a barn for a summer residence, any material available on the farm is used. You can simply install a ready-made bunker in the garden, which will serve as a small utility unit. Let's look at some options for beautiful sheds.
Household unit from a container
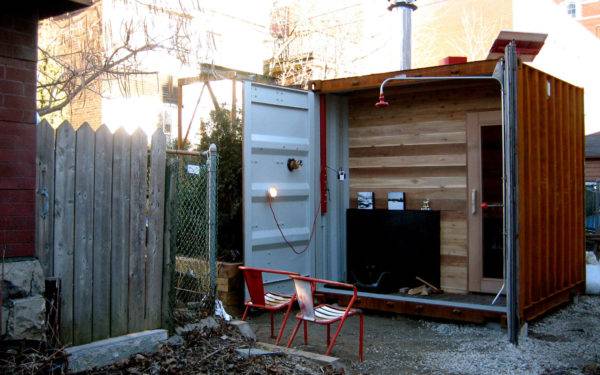
The simplest design for storing garden equipment and tools is a sea or rail container. If you re-equip it a little, then in such a utility unit you can organize a shower, toilet or even a summer kitchen.The containers will make beautiful sheds if they are painted on the outside and lined with clapboard on the inside.
If you managed to get and bring a container to your dacha, then to install it you will need to lay a columnar foundation. We build it from red brick, cinder blocks, or pour monolithic pillars from concrete.
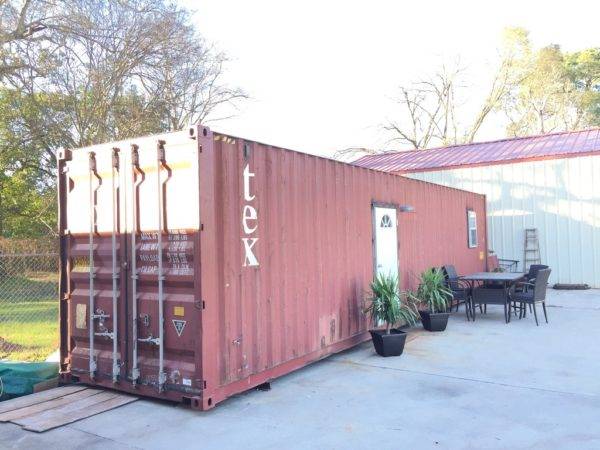
However, installing such a beautiful utility unit can bring problems to the owner if the dacha is still under construction and there is no electricity. The container is a solid metal box. To make a shed out of it, you will need to cut openings for windows and doors in the walls with a grinder. Then you still need to electric weld the door frame.
Wood plank shed
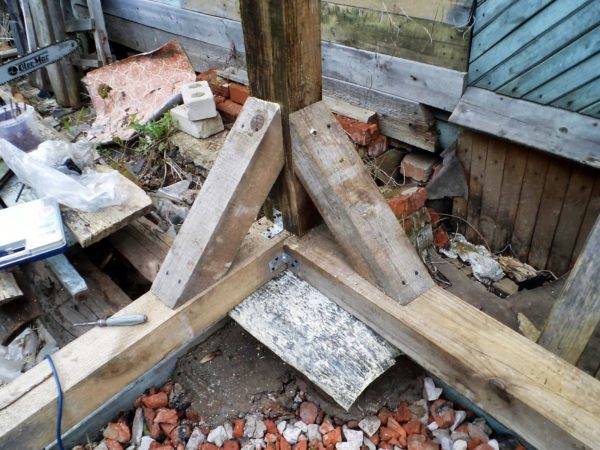
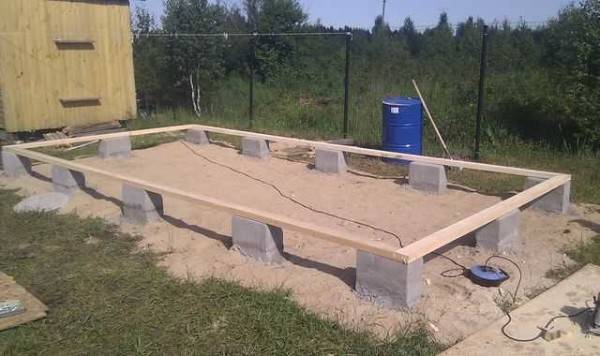
It has always been believed that the easiest way is to build a barn at the dacha with your own hands from boards. If you try to process the wood well, you will get a beautiful garden building. A light barn will need a columnar foundation, which can be made from monolithic concrete. Holes for pillars are dug along the perimeter of the future building in increments of 1–1.5 m. The formwork can be made from old tires from a passenger car, as shown in the photo. In the center of the supports you need to concrete the anchor reinforcement. The lower frame will be attached to them.

The scheme of a utility block made of boards is simple. First, the frame of the lower trim of the frame is assembled from a beam with a cross-section of 100x100 mm. It is laid on a columnar foundation. To protect the wood from moisture, sheets of waterproofing material are laid between the frame and concrete supports.
The racks are made from similar timber to the lower frame.They are strengthened by cuttings. This will make the structure more stable. Another strapping is assembled on top of the racks. For reliability, all connecting nodes are reinforced with metal overhead elements.
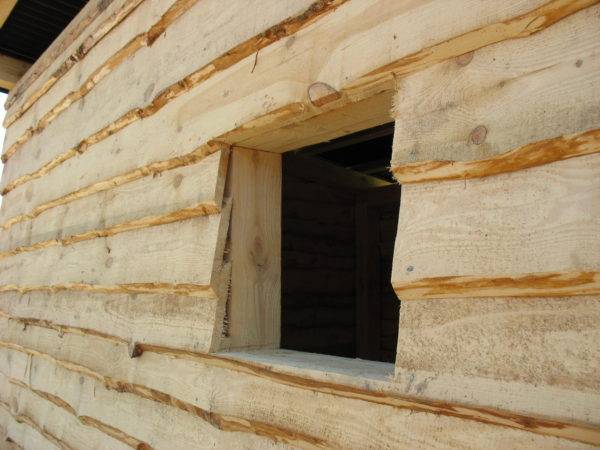
Logs made of boards 40 mm thick are nailed to the bottom frame in increments of 50 cm. The floor of the country house is laid from OSB or boards 20 mm thick. To make the shed beautiful, it is better to use edged boards for cladding the walls. It is nailed with an overlap so that precipitation does not penetrate into the room through the cracks.
Most often, a plank shed project is developed with a pitched roof. It is raised from the front so that a slope is formed towards the rear wall. For floor beams, a board with a section of 40x100 mm is used. It is secured to the upper frame beam using metal corners and self-tapping screws.
Any inexpensive material, such as roofing felt or slate, is suitable for the roof. The most beautiful buildings, of course, are covered with expensive roofing materials: ondulin, flexible tiles, etc.
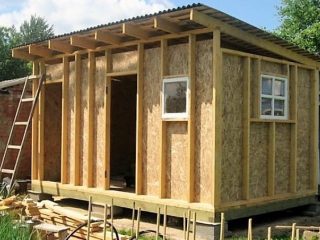
Beautiful utility unit made of OSB boards
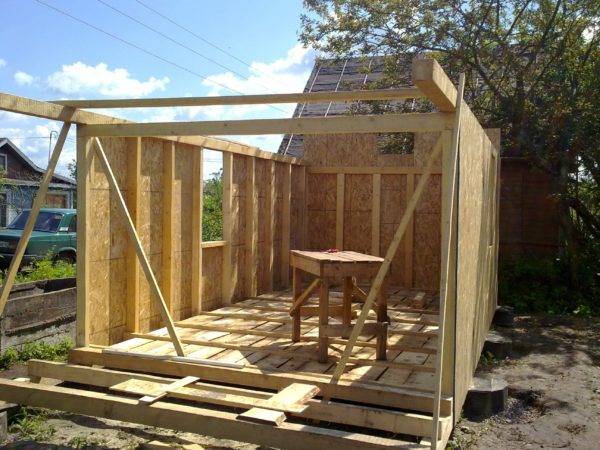
For outbuilding projects using frame technology, OSB boards are a godsend. To install such a country shed, you will have to follow the same steps as when building a structure from a board. The only difference is the installation of additional frame posts with a pitch of 600 mm to strengthen the walls, and instead of edged boards, the sheathing is made with OSB board.
Brick utility blocks
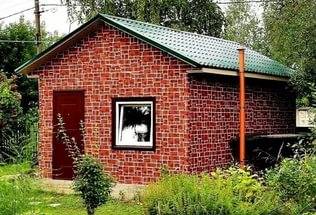
Without accurate drawings and calculations, it will not be possible to build a brick barn. Typically, garden utility blocks for tools are not made of heavy material, but if such a decision is made, then a strip foundation will need to be poured. The walls are laid in brick, and it is important to ensure that the seams are bandaged between the rows. On top of the finished box, the mauerlat is attached to the walls with anchors.It is made from timber with a section of 100x100 mm. That is, it turns out to be an analogue of the upper strapping, as in frame technology. Floor beams are nailed to the Mauerlat, and a roof is erected on top.
Block barn
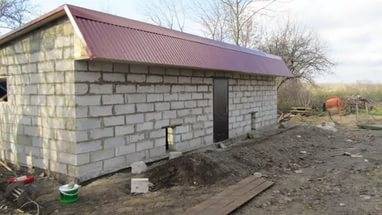
Building a shed from blocks is no different from the technology of constructing a brick building. Sandstone, gas and foam blocks, and cinder blocks are used for laying walls. The design is so strong that in some cases you can do without a Mauerlat. For example, if you install a pitched roof on a cinder block building, then the floor beams can simply be embedded in the masonry.
Step-by-step instructions for building a utility block
Now we will look at how to build a barn at the dacha with your own hands on a columnar and strip foundation. For your reference, we present drawings of various buildings that can be used when drawing up a project yourself.
Deciding on the foundation design
Lightweight dacha outbuildings are installed on a columnar foundation. Supports are definitely needed at the corners of the building, as well as where the partition will be installed. Their pitch depends on the length of the barn, the thickness of the logs and the timber of the lower frame.
Let's say that under small country sheds 2x2 m you can install four supports in the corners. In this case, you need to use logs with a thickness of 50 mm. As the length of the building increases, the pitch of the supports is reduced to 1–1.5 m. If the width of the barn further increases to 3 m, then it is necessary to install additional intermediate supports so that the floor does not sag or use logs 70 mm thick. Here let the owner decide what is more profitable for him. The beam for the bottom trim should always be taken with a cross-section of at least 100x100 mm. Under a thin frame, naturally, you will have to install supports more often.
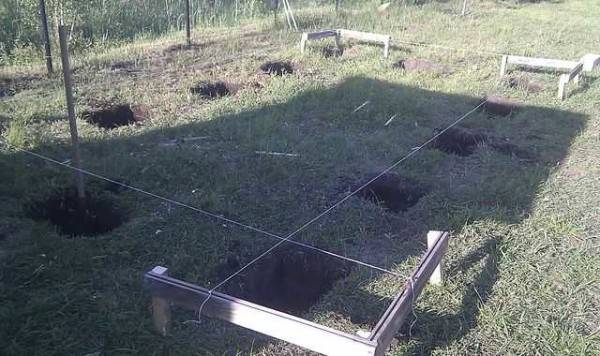
To build a columnar foundation, you need to dig holes 70–80 cm deep, pour 20 cm of sand and gravel cushion, install formwork and fill it with concrete. It’s easier to make a base from ready-made reinforced concrete blocks. They are simply installed in a hole on a sprinkled cushion, after which the gaps are compacted with earth.
If you decide to build a barn at your dacha out of bricks or blocks, then a strip foundation is poured. A trench under the base is dug 60 cm deep. The width of the tape itself should be slightly larger than the thickness of the walls. For example, if the walls are laid out in brick, then their thickness will be approximately 25 cm. Then we take the width of the tape at least 30 cm.
A trench under the base is dug wider than the thickness of the tape, since the free space for installing the formwork is taken into account. The bottom of the trench is covered with crushed stone 15–20 cm thick, and the side walls are covered with roofing felt.
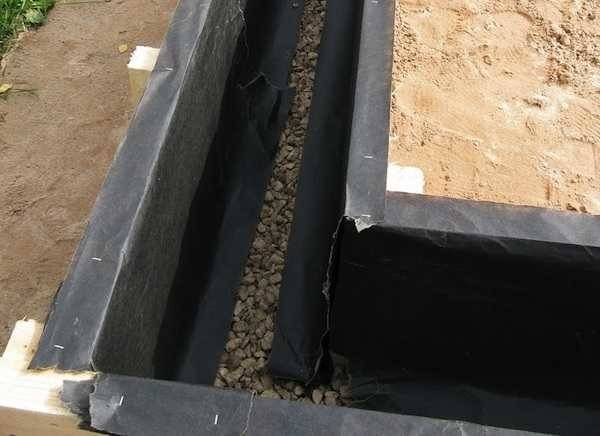
A frame is made from reinforcement with a diameter of 12–14 mm in a trench. The rods are tied together with wire. The finished metal structure should not touch the walls of the formwork. It is optimal to maintain a gap of 5 cm.
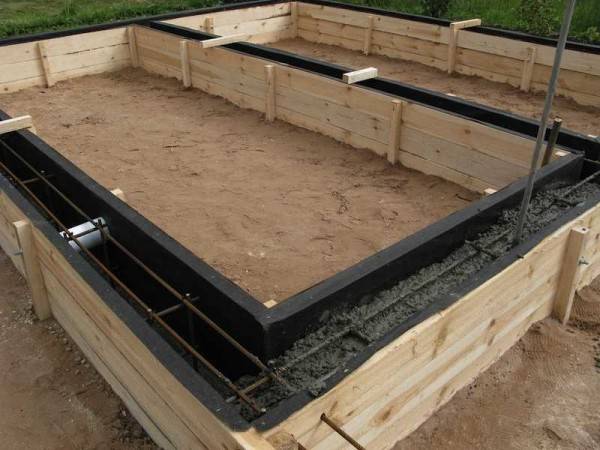
The formwork with a steel frame is filled with concrete mortar grade M-200. Brick walls begin to be erected no earlier than in a month.
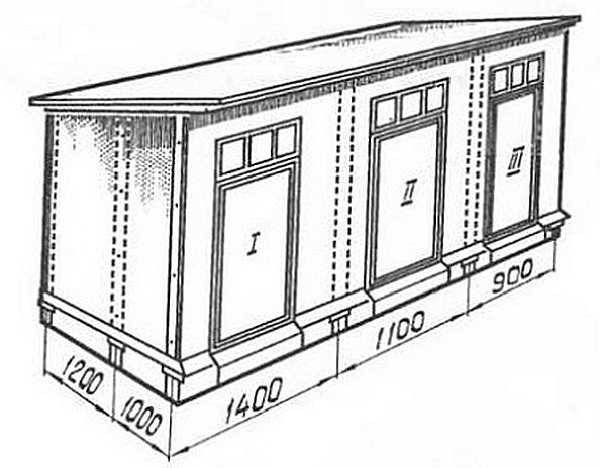
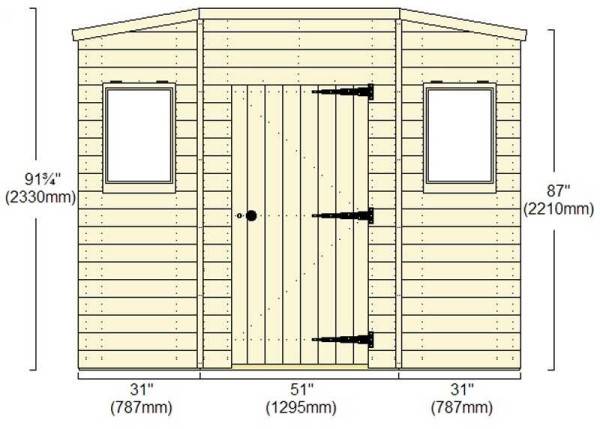
Examples of drawings of country sheds
To develop a project for a country shed, you need to build a drawing. In the photo we have given several examples. The patterns are designed according to the most popular sizes, but they can be adjusted to suit your requirements.
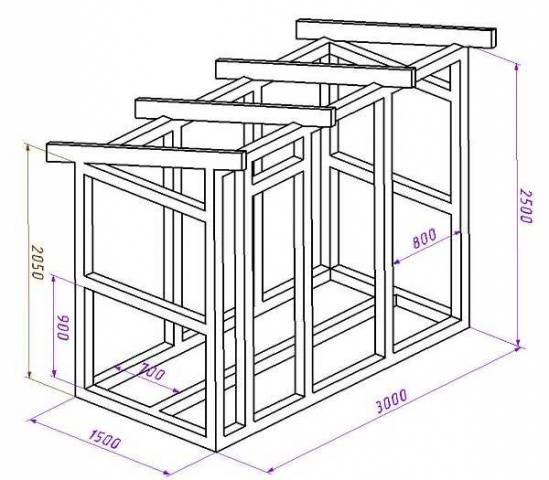
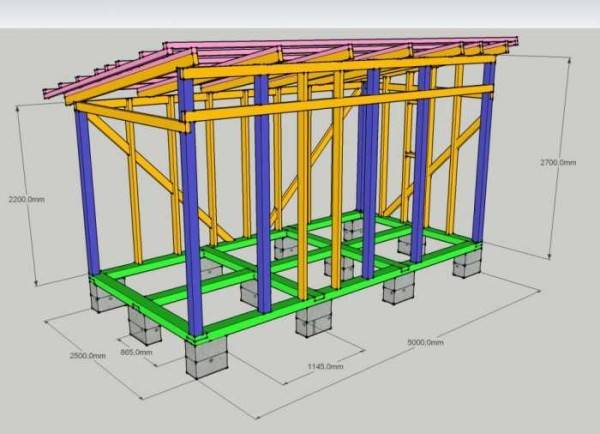
Let's start our review of the drawings with utility blocks equipped with a pitched roof.
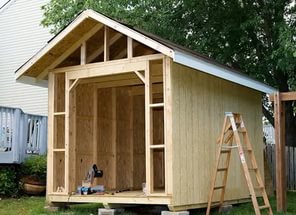
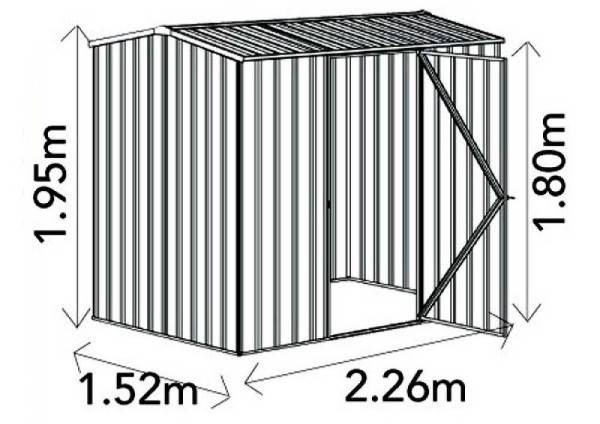
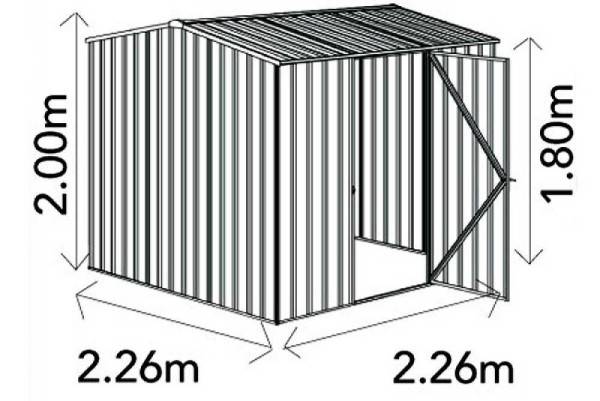
The following drawings show a barn with a gable roof.
And in the end there is a building with a sloping roof. This is not a very good roofing option for a barn, but it can be found in dachas.
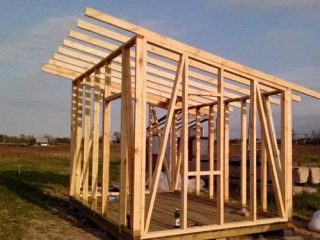
Construction of a wooden shed using frame technology
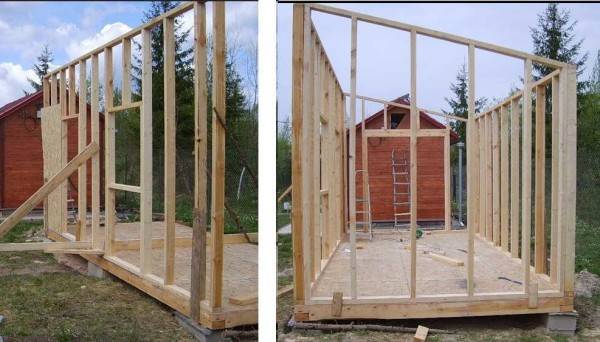
So, it's time to start building the barn itself.Frame technology is most suitable for such country houses. It is optimal to give preference to a utility block size of 6x3 m. It is easier to make a pitched roof. To create a slope, the front wall is made 3 m high, and the back wall 2.4 m high.
The whole process looks like this step by step:
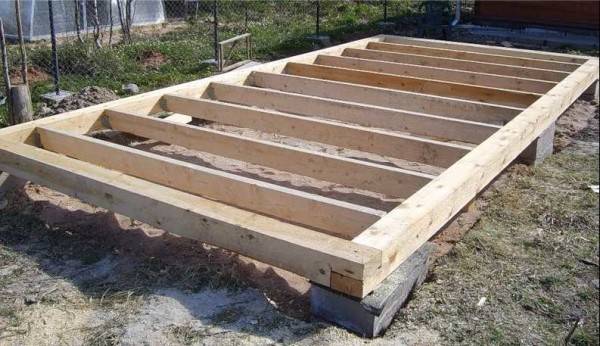
- The lower trim frame is assembled from timber with a cross-section of 100x100 mm or 150x150 mm. The structure is secured to the pillars with anchor bolts, with pieces of roofing felt placed for waterproofing. The corner joints of the frame are reinforced with mounting metal corners. Anchoring the frame to the foundation is especially important in windy regions. Otherwise, the light wooden building may be moved from its place.

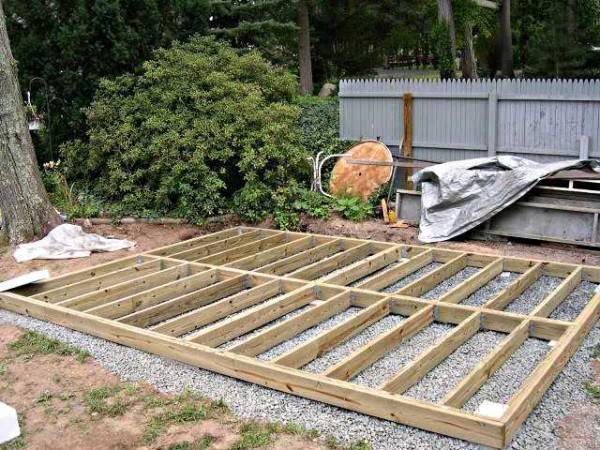
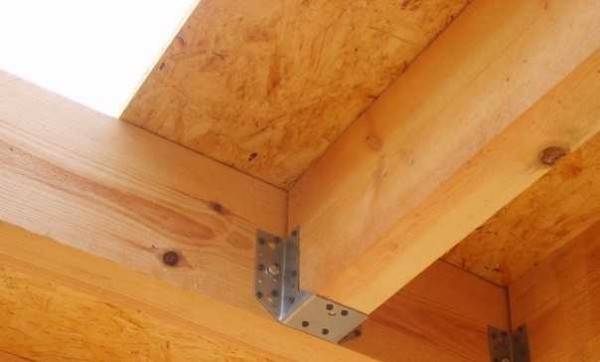
- Logs are attached to the finished frame made of boards with a cross-section of 150x60 mm. Fixation is carried out using steel mounting brackets. The logs must be positioned so that they are in the same plane as the frame. Otherwise, it will be difficult to attach the floor covering due to changes. They will have to be leveled with a plane or placed on each gap of the lining between the joists and the floor covering.
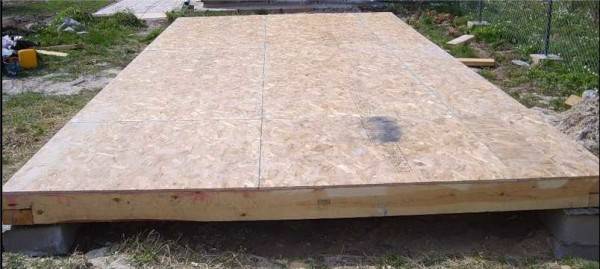
- Construction of the utility block frame can begin after laying the floor covering or without it. Whichever is convenient for you. If the first technology is chosen, then OSB boards 18 mm thick are laid on the logs. You can use board or moisture-resistant plywood.
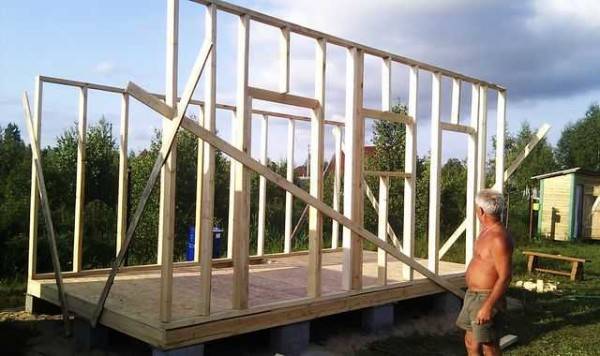
- The racks and top trim are attached to the finished platform. Temporary slopes and supports give stability to the frame.
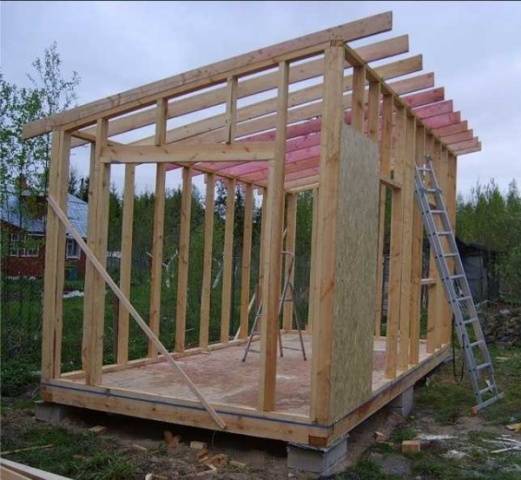
- The top trim will serve as the basis for the floor beams of the pitched roof. They are made from boards with a cross-section of 150x40 mm and laid in increments of 600 mm. All frame posts should be installed at the same distance. They will serve as additional support for the roof. The length of the beams is calculated so that an overhang of about 500 mm is obtained on both sides of the barn.
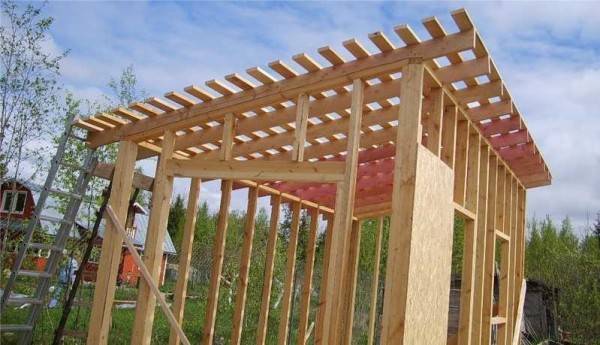
- The sheathing is nailed on top of the roofing lag. A board 20 mm thick is suitable for this. The sheathing pitch depends on the roofing material, as well as the roof structure. The softer the coating and the smaller the slope of the slope, the thicker the board needs to be nailed. Under a soft roof, in general, a continuous sheathing is installed.
- A dacha utility block is usually built cold, so only waterproofing is laid under the roofing. In the case of an insulated version, the thermal insulation is protected with vapor and waterproofing, and a ventilation gap is created under the roofing using a counter-lattice.
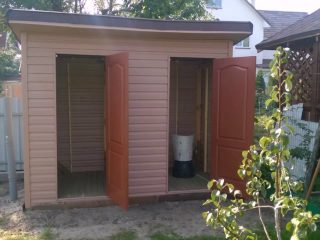
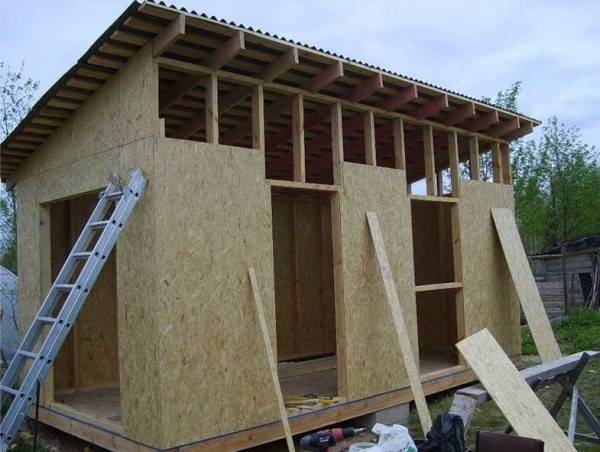
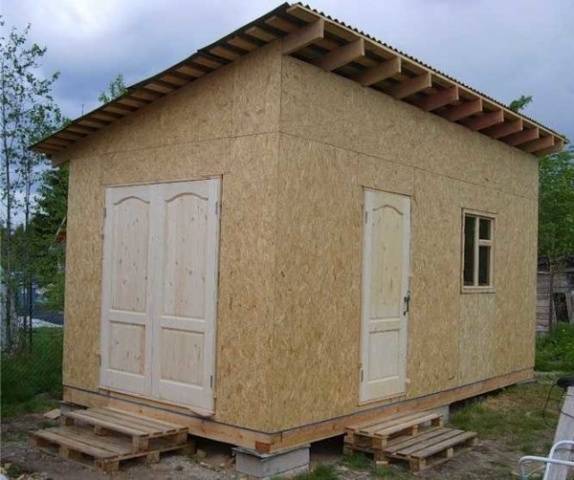
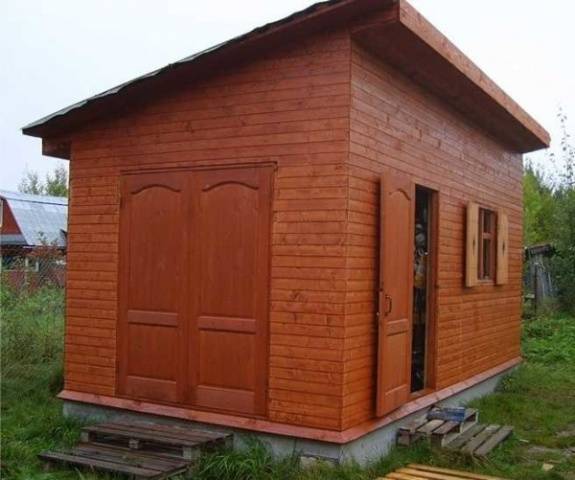
- The construction is completed by covering the frame. It is faster and easier to do this with OSB boards. A 20 mm thick edged board or wooden lining is suitable. The doors are attached to the frame with hinges. You can build a small step near the entrance.
- If OSB boards were used as cladding, then such a barn will not look very nice. It is advisable to additionally cover the top with wooden clapboard, and then paint the building to match the tone of other country houses.
The video shows the barn construction technology:
Conclusion
In general, you can build a shed with your own hands if you wish. After practicing on an outbuilding, you can switch to building more complex buildings.