Content
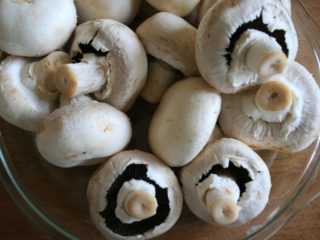
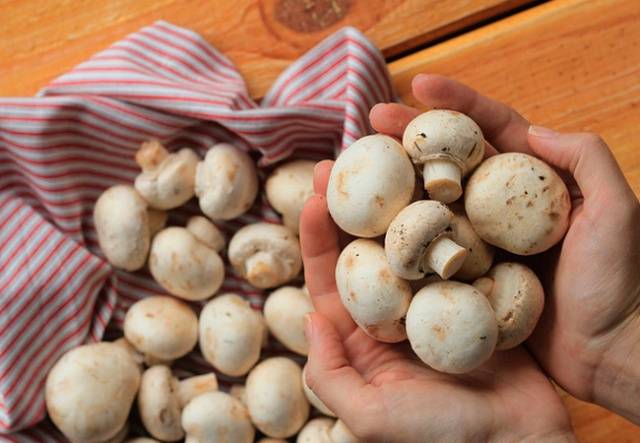
Mushrooms, so tasty and desirable, can be found not only in the forest, but also in your garden bed, basement, barn or greenhouse. You can grow oyster mushrooms at home, winter mushrooms, strange shiitakes and, of course, champignons. It is champignons that are most in demand for mushroom growers, since this species produces the maximum yield in a minimum period of time. They are not picky about care and do not require special, “complicated” conditions of maintenance. Mushrooms must be grown in accordance with the rules of a particular technology. One of them allows you to grow champignons in bags. We will try to talk in detail about all the features and nuances of this method of growing champignons.
Champignons in bags: pros and cons
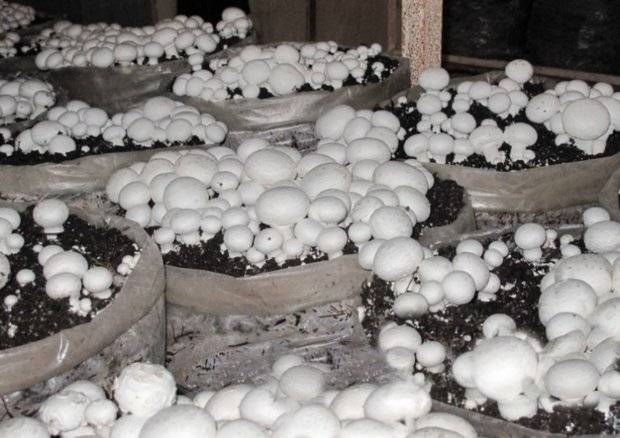
Champignons are absolutely not picky. They can grow in an open garden bed or in some large container, but experienced mushroom growers prefer to use plastic bags - blocks - as a planting place. This decision may seem strange at first glance, but it is fully justified by the following advantages:
- Plastic bags prevent diseases and pests from spreading throughout the entire planting area.
- If necessary, at any time a specific package can be closed or taken out of the room.
- The mobility of the bags allows you to grow champignons seasonally in open areas of the garden and in specially equipped rooms.
- It is convenient to stack the bags in several rows on multi-tiered stands.
- Plastic bags are much cheaper than plastic containers.
Of course, the proposed technology is not ideal, since only manual labor is used to fill bags with soil, care for the crop, and collect grown champignons. However, on a small scale this usually does not cause much of a problem.
Secrets and basics of technology
Growing champignons must be approached with skill, since even the slightest mistake or omission can ruin the plantings, and all the work invested will go down the drain. That is why we decided to describe in detail the entire process of cultivating mushrooms from the moment of soil preparation to harvesting.
The best substrate for “homemade” champignons
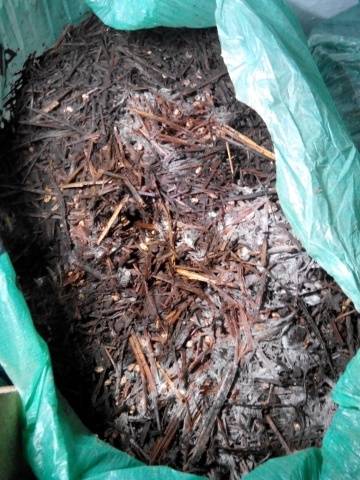
For the successful growth of champignons, it is necessary to fill the bags exclusively with nutritious soil, which consists of 75% horse manure and 25% compost. In this case, you need to use a special compost filler: rye or wheat straw. Additionally, you need to increase the nutritional value of the soil with mineral fertilizers.
Depending on the scale of cultivation, you should stock up on the following components and begin preparing the substrate:
- Soak the straw in a barrel of water.
- Place moist straw and manure on top of the compost in rows. There should be at least 6 layers in the compost for better rotting.
- When laying in compost, the straw is additionally moistened with water and sprinkled with urea and superphosphate.
- After thoroughly mixing all the ingredients, add chalk and gypsum to the compost.
- Place the compost in a pile and leave to smolder for 3 weeks. After this time, the substrate will be ready for use.
When preparing a nutrient substrate for champignons, it is very important to correctly calculate the amount of mineral additives. So, for every 100 kg of compost mixture, it is necessary to additionally add 2 kg of superphosphate and urea, as well as 5 kg of chalk and 8 kg of gypsum. A good substrate for champignons can be checked by pressing: when it is squeezed, the thickness of the soil springs.
Unfortunately, horse manure can be quite difficult to find. In this case, it can be replaced with chicken droppings. This fertilizer is taken in equal parts with straw and supplemented with gypsum and alabaster.

Preparing the seat
Champignons are grown in bags in small quantities on their own farms for personal use and on an industrial scale for sale. The method has proven itself well in many countries and to implement it you need, first of all, to stock up on bags that will act as a seat.
Bags can be made from polymer film yourself, taking into account the following recommendations:
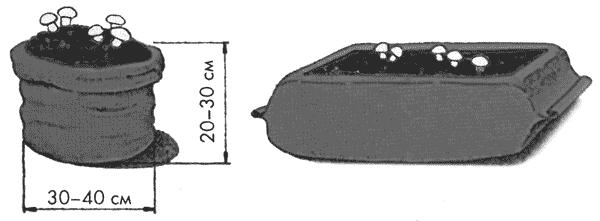
- The bag capacity should be 25-40 kg. It is convenient to work with such blocks. They fit compactly even into small spaces.
- The diameter of the bag can vary from 30 to 40 cm.
- The thickness of the substrate in the bag should be approximately 20-30 cm.
- Bags should not be placed too close, as this may contribute to the spread of viral diseases and pests. The most rational way is to place the bags in a checkerboard pattern.
Bags of the appropriate size can be found on sale or made independently by stitching together a transparent polymer film. An example of making plastic bags for champignons can be seen in the video:
Mycelium selection
Champignons are propagated by mycelium, which is recommended to be purchased from special laboratories for the cultivation of this crop. Purchasing mycelium from a mycelium manufacturer will guarantee the quality and health of the planting material.
For cultivation in private backyards, manufacturers offer two types of champignon mycelium: compost and grain.
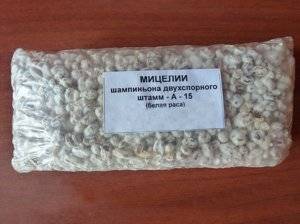
Grain mycelium is sold in small bags, which are recommended to be stored at a temperature of 0-+50For six months. The consumption of grain mycelium when infecting the substrate will be 400 g per 100 kg (1 m2 soil).
Compost mycelium is less productive in comparison with its grain counterpart. It is sold in glass jars and consumed at the rate of 500 g (1 m2 soil). Such mycelium can be stored for a year at a temperature of 00C. Compost mycelium cannot be stored in room conditions for longer than 3 weeks.
Growing champignons at home should be done in a pre-disinfected substrate. The best method of sterilization in this case is heating. You can heat the soil on an open fire. When the heated soil cools down to 250C, it can be used to infect mycelium.
Soil contamination with mycelium
There are two different ways to infect soil with mycelium:
- Take a handful of mycelium and plant it to a depth of 5 cm. Place such bookmarks at a distance of 20 cm from each other over the entire area of the soil.
- Sprinkle the mycelium in a 1 cm layer and cover it with a nutrient substrate 3-5 cm thick.
For the successful growth and spread of mycelium, certain conditions must be maintained:
- indoor air humidity should be 90%;
- nutrient soil in bags should always be slightly moist;
- the temperature of the substrate in the bags should be at +22-+270WITH;
- To ensure that the soil minimally evaporates moisture, cover the bags with champignons with paper sheets. You can water the crop through them.
Under favorable conditions, the mycelium begins to form the body of the champignon within a couple of weeks. At this time, you need to sprinkle a ground cover layer on top of the nutrient substrate, consisting of 8/9 parts peat and 1/9 parts sand. The thickness of the ground cover layer should be 3 cm. After applying the soil, you need to wait 3 days, and then reduce the room temperature to +15-+170WITH.
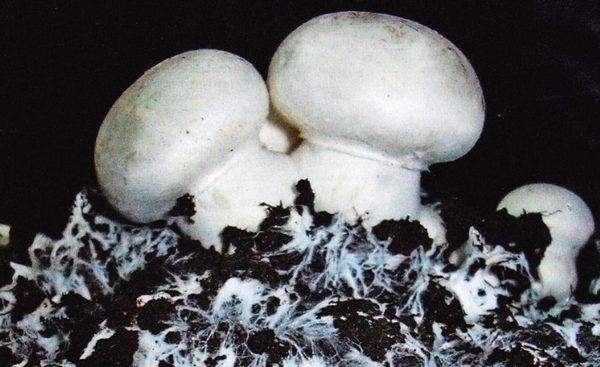
Further care for champignons consists of regular watering of the crop, maintaining the required air temperature and ventilating the room. It is important to remember that the presence of drafts can have a detrimental effect on the crop.
Harvesting
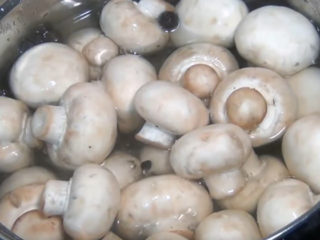
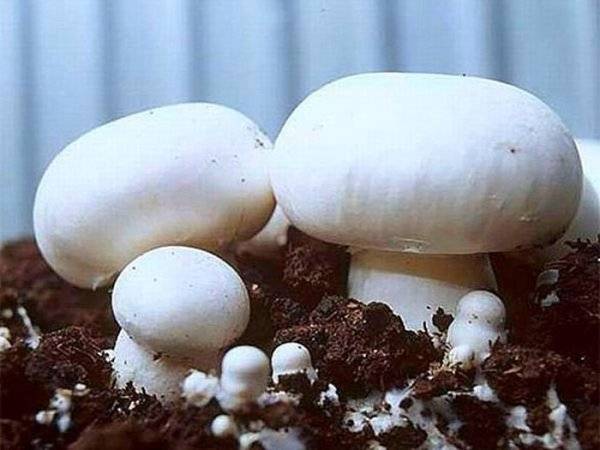
The most enjoyable moment for any mushroom grower is the harvesting process. It occurs approximately 120 days from the day when the soil was contaminated with mycelium.Already at this time, you can see a large number of young champignons in the bags, which can be carefully unscrewed and used for food. It is worth noting that it is better to eat those champignons that have light-colored plates on the inside of the cap. Old, overripe champignons accumulate substances that can in some cases cause poisoning.
It is much more efficient to harvest by carefully twisting the mushrooms. After such harvesting, the mycelium should be sprinkled with a layer of nutrient substrate and moistened with a spray bottle. An example of proper collection of champignons is shown in the video:
The champignon mycelium actively bears fruit for 2 weeks. During this time, subject to the necessary conditions, you can collect champignons every 2-3 days. This allows you to always use only the freshest products for food.
Conclusion
Every mushroom grower can confirm that growing champignons is extremely profitable. So, for 2 weeks of active fruiting from every 1 m2 soil, you can remove up to 20 kg of fresh, aromatic champignons. This amount is enough to provide food for a family. To grow crops, you can occupy a small area in a barn or cellar. Such beds will not “get in the way” and will be able to produce a harvest all year round if mycelium is regularly added.