Content
- 1 Methods for propagating cherries
- 2 Propagation of cherries by cuttings
- 2.1 When can you root cherry cuttings?
- 2.2 Preparing the soil for planting cherries with cuttings
- 2.3 Propagation of cherries by cuttings at home
- 2.4 How to plant cherry cuttings
- 2.5 Rooting cherry cuttings
- 2.6 Will a cherry branch give roots in water?
- 2.7 Growing cherries from cuttings
- 2.8 How to root a cherry branch in open ground
- 3 Propagation of cherries by green cuttings
- 4 Reproduction of cherries by layering
- 5 Cherry grafting is the best method of propagation
- 5.1 What is the difference between grafted and ungrafted cherries?
- 5.2 What can you graft cherries on?
- 5.3 Is it possible to graft cherries onto cherries?
- 5.4 How to graft cherries onto plums
- 5.5 Is it possible to graft cherry onto a pear?
- 5.6 Grafting cherries onto bird cherry
- 5.7 Is it possible to graft cherries onto cherry plums?
- 5.8 Nuances of cherry grafting for sloe
- 5.9 Is it possible to graft cherries onto an apple tree?
- 5.10 Cherry grafting onto rowan
- 5.11 Scion preparation
- 5.12 Cherry grafting dates
- 6 Cherry grafting methods
- 7 How to plant grafted cherries correctly
- 8 Conclusion
Cherry grafting is a fairly common method of propagating this stone fruit tree. It is widely used by gardeners for various purposes, from preserving species to increasing productivity.
However, this matter is quite complex, and it is impossible to do without a detailed study of the issue.
Methods for propagating cherries
There are several ways to propagate cherries. The most common of them is grafting it onto another tree. In addition, you can use the seed method or the vegetative method using cuttings. Some varieties of cherries can be propagated by root shoots.
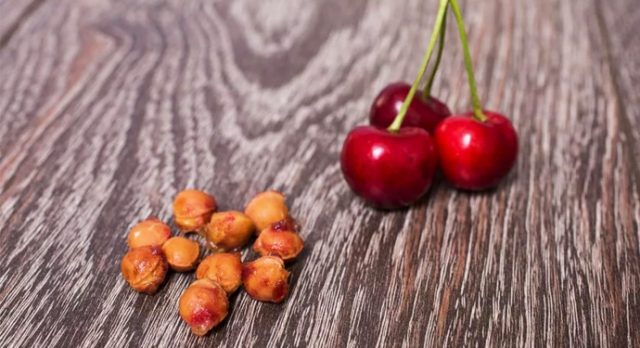
The seed method is the longest and most unreliable. When grown from seed, cherries often lose their varietal characteristics and grow wild. However, there remains the possibility of getting a varietal tree. To do this, you need to very carefully select planting material, using seeds of only the largest and most delicious fruits.
It is very important that the seeds are taken from cherries that grow in the same region. Seed material taken from fruits grown in more southern regions (even sweeter and tastier ones) cannot be used. Seedlings from such seeds will, of course, sprout, but with a high degree of probability they will die in the first winter.
Before planting, seeds must undergo a stratification procedure. This is usually done in winter by placing the seeds in a box with wet sand and placing it in a cold place (you can simply bury it in the snow). In spring, the seeds are sown in prepared soil.
The propagation method by cuttings is not suitable for all varieties.The average percentage of rooting of cuttings does not exceed 10, and only in rare varieties can it reach 50%, which is a very good indicator.
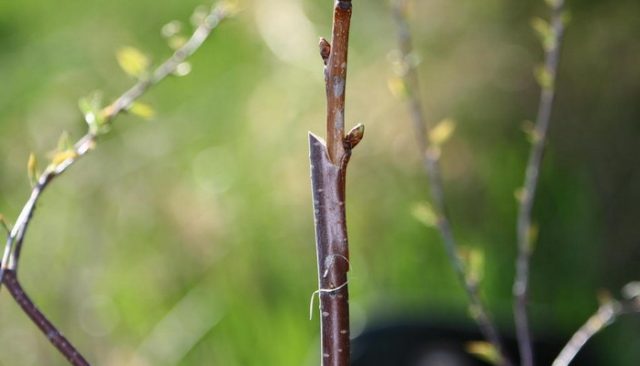
Grafting is the simplest and most effective method of propagating cherries. Its essence is to graft a shoot of the desired cherry variety onto a wild seedling of another fruit tree.
For propagation by root shoots, two-year-old shoots, separated from the main trunk by at least a quarter of a meter, are suitable. They are carefully dug out along with part of the mother root and transplanted to a new location.
Propagation of cherries by cuttings
Cherries propagated by cuttings will retain all the varietal characteristics of the mother tree. Its berries will be just as tasty, and you will have to wait no longer than five years for them.
When can you root cherry cuttings?
For preparing cuttings, layerings from the lower part of the tree that have turned red and hardened at the base are suitable. They are cut off in early June. The length of each should be approximately 30–35 cm. The procedure should be carried out with a sharp, clean knife, in the morning or evening, while it is cool outside. The cut cuttings are immediately placed in water.
Preparing the soil for planting cherries with cuttings
The soil for planting cuttings must be specially prepared. High-quality prepared soil should differ:
- breathability;
- moisture capacity;
- absence of any worms, larvae;
- lack of roots of other plants;
- absence of infections.
Most often, a mixture of peat, river sand and turf soil in a ratio of 1:1:2 is used as a nutrient mixture for planting cuttings.
Propagation of cherries by cuttings at home
Apricots that have recently entered fruiting are best suited for cuttings. The cut is made from below at an angle of 45°, from above at a right angle.The cut cuttings must have 3 full leaves, the distance from the lowest to the beginning of the cut must be at least 3 cm.
How to plant cherry cuttings
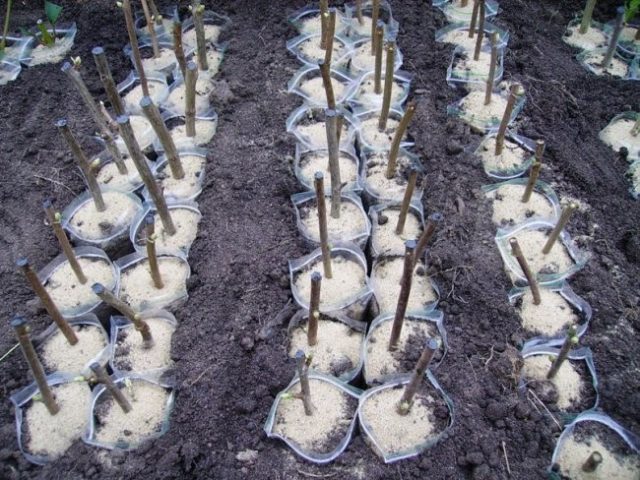
Before rooting the cherry cuttings, they are placed for 16–20 hours in a solution of a root formation stimulator (heteroauxin), immersing them by 2 cm. Then the cuttings are planted vertically in prepared containers with nutrient soil or in a greenhouse under film.
Rooting cherry cuttings
After planting the cuttings, it is important to ensure that the soil does not dry out. Watering should be abundant and timely. The first adventitious roots should appear on the cuttings after 3 weeks, and complete rooting will occur after 1.5 months.
To increase the percentage of rooting of cuttings, you can use the following method. 10 days before cutting, future cuttings are wrapped with several turns of cloth tape at the site of the future cut. During this time, the cambium of the tree bark becomes discolored without access to sunlight, which increases root formation in this place by about 30%.
Will a cherry branch give roots in water?
Cherries, like most other stone fruit trees, are unlikely to be forced to take root in this way. However, there are exceptions. In order for the cherry to take root in water, you need to carry out a number of manipulations:
- In the fall, select several good 1-2 year old side branches.
- Break them without damaging the bark at intervals of 15–20 cm.
- Secure the branch in a state of fracture by tying it to a straight splint branch.
- In the spring, cut the branch at the break points and place it in water.
A dark plastic bottle with the neck cut off works well for cuttings.You need to fill it with rainwater, add two tablets of activated carbon, place the cuttings in it and place them on the windowsill. After about 3 weeks, root formation will begin. After the roots are 5–7 cm long, the cuttings can be planted in nutrient soil.
Growing cherries from cuttings
It is best to keep the planted cuttings in a mini-greenhouse. It is important to provide future seedlings with an optimal microclimate, maintaining a temperature of about +25°C even at night and high humidity. Watering should be done frequently, 5-6 times a day. If rot occurs, you need to reduce the amount of water, but not the number of waterings.
How to root a cherry branch in open ground
Not every branch can be rooted. So it’s unlikely that you’ll be able to grow a cherry from a twig by simply breaking it off a neighbor’s tree and sticking it in the ground. Even specially prepared cuttings taken at a certain period do not always take root. If the timing and parameters are suitable, you can try to make a cutting from it and root a cherry twig in this way.
Propagation of cherries by green cuttings
Cuttings taken from non-lignified shoots of the current year are called green. This method is widely used for propagating many trees and shrubs, including cherries. The advantage of this method is that green cuttings take root much better.
All varietal characteristics of the mother plant are preserved in full with this method of propagation.
Is it possible to grow cherries from green cuttings?
Green cuttings are considered not a particularly effective method for cherries. However, you can try to propagate it this way.
When to carry out green cuttings of cherries
Green cuttings are cut in June, and in regions with short summers - in July. It is better to cut cuttings early in the morning, while it is still cool. You can do this even in cloudy weather.
How to propagate cherries using green cuttings
For green cuttings, young side shoots of the current year, growing at the bottom of the crown on the sunny side of the tree, are best suited. They should not show signs of fungus or other diseases. To take cuttings, you need to select branches at least 30 cm long with large, well-developed buds.
The cuttings are cut with a sharp knife; pruning shears are not suitable for this purpose, as they crush the cut site. The cut shoots are cut into cuttings 8–12 cm in size and placed in water or in a container with damp moss. After completing the harvesting procedure, the cuttings are prepared for planting in the greenhouse. Before this, their lower cut is kept in a solution of a root formation stimulator (Kornevin, Heteroauxin) for 15–20 hours, and then planted in nutrient soil under a film.
Caring for rooted cuttings
Care consists of regularly moistening the soil, as well as maintaining the temperature at +25..+27°C. The greenhouse with cuttings must be ventilated regularly. The cuttings should not be exposed to direct sunlight. If all planting and care rules are followed, rooting occurs in 3–4 weeks.
Reproduction of cherries by layering
The propagation method by layering is used mainly on fruit bushes. Fruit trees are propagated by air layering. This method is widely used for apple and other fruit trees, but for cherries it is used extremely rarely.
Advantages and disadvantages of this method
The advantage of this method is that a ready-made adult seedling can be grown within one season. The disadvantage is that it does not always work on cherries.
How to propagate cherries by layering
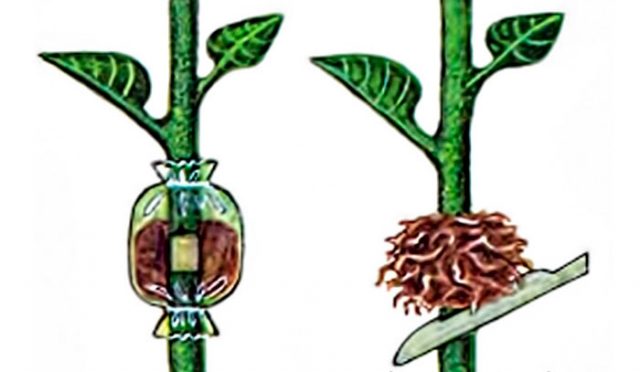
The essence of the air layering method is to surround the growing branch with soil. A bush shoot can simply be bent to the ground and covered with soil, but this will not work with a fruit tree. Therefore, a container with soil is placed directly in the crown of the tree, placing a growing branch of a fruit tree in it.
The process of obtaining air layering is as follows. The shoot selected for propagation is ringed by removing a strip of bark 1.5–2 cm wide from it. Then the cut is treated with a root formation stimulator, covered with a moist soil substrate and wrapped in plastic film. The edges of the film are firmly fixed with tape.
In such a moist soil environment the root system develops. In the fall, the entire shoot is cut off from the mother tree and placed in a greenhouse for growing; after the formation of a full-fledged root system, it is transferred to open ground to a permanent place.
Cherry grafting is the best method of propagation
Grafting is the fastest way to get a harvest. This method allows you to preserve all varietal characteristics, and due to the greater winter hardiness of the rootstocks, increase the frost resistance of the plant itself.
What is the difference between grafted and ungrafted cherries?
Ungrafted cherries have no trace of grafting on the trunk. Such trees are usually grown from seeds. At the same time, they retain all the species characteristics, but not the varietal ones. Grafted cherries have a clearly visible graft mark just above the root collar.
What can you graft cherries on?
Plants are best grafted onto related plants or those belonging to the same species. Sweet cherry belongs to the Plum family, and also includes cherry, plum and cherry plum. Therefore, the best rootstock for cherries should be chosen from this group of plants.
Is it possible to graft cherries onto cherries?
You can graft cherries onto another variety and grow several varieties of cherries on one tree. The method is widely used to save space in the garden, since there is no need to plant pollinating trees. Two or more varieties are found on the same tree and cross-pollinate each other.
How to graft cherries onto plums
Grafting cherries onto plums is done to obtain more tasty fruits and increase productivity. It can be done in several ways, the most effective of which is by splitting. However, such grafting is rarely done, since cherries take root on the plum tree for quite a long time.
Is it possible to graft cherry onto a pear?
Pears and cherries belong to different families (pomaceae and stone fruits, respectively), so such experiments are very likely to end in failure. With enough time and seed material, you can experiment, but the result will require a lot of time and money.
Grafting cherries onto bird cherry
Again, this is an experiment with an unknown end, since it is unknown what will come out of such a hybrid. Even if the scion takes root on a bird cherry rootstock, you will have to monitor it throughout its life.
In Soviet times, such a hybrid was considered possible for the following reason. Sweet cherries were often grafted onto antipka - wild cherries. Previously, this plant was classified as bird cherry, and only not very long ago it was classified as a different species.
Is it possible to graft cherries onto cherry plums?
Cherry grafting onto cherry plum takes root well and is done quite often. It improves the plant's hardiness and helps it grow normally in places with high groundwater levels.
Nuances of cherry grafting for sloe
Thorn is a distant relative plums, so the vaccination may well be successful. However, few people will use sloe rootstock for planting on the site, since it forms a large amount of root shoots, which they will constantly have to fight.
Is it possible to graft cherries onto an apple tree?
For the apple tree, everything that has already been said about the pear above is true. Such a vaccination can only be done as an experiment, which most likely will be unsuccessful.
Cherry grafting onto rowan
Often on rowan vaccinate pomaceous (apple, pear), but stone fruits, as a rule, do not take root on it. It is hardly advisable to use rowan rootstock for cherries.
Scion preparation
For scion you need to use mature lignified cuttings of the first year of life. They must meet the following conditions:
- The thickness is about 7–8 mm, approximately like a simple pencil.
- Short internodes.
- The number of developed growth buds is at least 5 pieces.
- Length from 30 to 40 cm.
It is best to take cuttings from trees no older than 10 years old. Cuttings are harvested in late autumn or early winter, after the first significant frost. At this time, the cold temperature had already killed most of the fungi on the bark, and the cuttings themselves had hardened.
Cut cuttings are usually stored collected in bunches and tied. Any container can be used for storage. The storage location itself may be different; the main requirement for it is not to awaken the tree’s buds until spring.Many people simply store the container outside, burying it in the snow. To prevent damage by rodents, the container is wrapped in nylon or covered with fiberglass.
If the deadlines are missed, they can be harvested in early spring, while the plant is still in a “dormant” state. At this time, cuttings are prepared with a reserve, since some of them may be frozen.
If the grafting is done in the summer, the cuttings are not stored. At this time, delay is extremely undesirable, so the vaccination is done immediately.
Cherry grafting dates
Spring vaccination is the most reliable. At this time, the sap flow of the tree is most active, so the survival rate of the scion is the best. Trees can be grafted all summer until September. A later vaccination simply will not have time to take root.
Cherry grafting methods
There are quite a few methods for grafting a cutting onto a rootstock. It is better for a novice gardener to use the simplest ones, gradually moving on to more complex methods that require significant preparation.
Cherry bud grafting
This method is quite simple. A T-shaped cut is made on the rootstock, the bark is slightly bent. A small part containing a bud is cut out from the scion cutting using the angular method. This piece is inserted behind the bark, the bark is returned to its place and wrapped with tape.
Cherry grafting under the bark
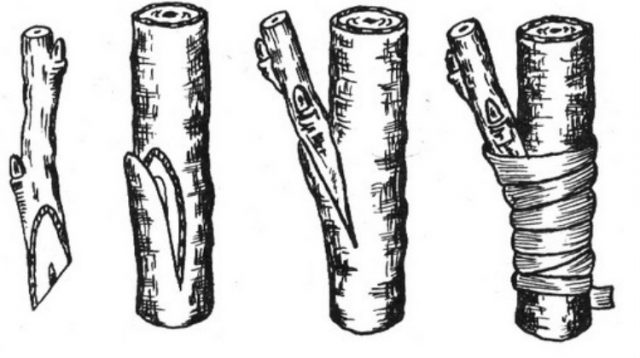
This is a very simple method used to graft many trees, including cherries. It is performed in the spring, during the period of intense sap flow. At other times, it is quite difficult to bend the bark on the trunk of the rootstock. For this method, the thickness of the rootstock should be significantly greater than the thickness of the grafted cuttings.
To carry out grafting, the rootstock is sawn at a right angle. Then a cut is made in the bark with a sharp knife and unbent.The scion cutting is cut with an oblique cut at an acute angle and inserted behind the bark. The scion is fixed, and the entire cut is covered with garden varnish. If the rootstock is quite thick, you can graft several scion cuttings onto one stump.
Cherry budding
Eye grafting is called budding and is usually carried out in June. This procedure is done as follows:
- From the scion cutting, a part of the stem containing a bud is cut out, along with a piece of bark.
- A cut is made on the rootstock trunk, repeating the shape of the cut piece of scion.
- The scion is placed in the recess of the rootstock and securely fixed with tape.
Cherry grafting into cleft
Grafting into the cleft is done in almost the same way as under the bark. The sawn rootstock is split in half using a garden knife. Scion cuttings, sharpened with a wedge, are inserted into it along the edges so that the outer layers of the cambium coincide. You should not touch the cut itself with your hands, this is important. Otherwise the scion will not take root.
After all procedures are completed, the open parts of the grafting site are covered with garden pitch.
Cherry grafting by copulation
When grafting using the copulation method, the thickness of the rootstock and scion should be the same. An oblique cut is made on both parts with a sharp knife; its length should be at least three times the thickness of the cutting itself. The rootstock and scion are folded so that the cambium layers match as closely as possible. After this, the grafting site is wrapped with tape.
In addition to the usual one, improved copulation is also used. In this case, an additional split is made in the middle of the cut of both the rootstock and the scion, which allows the scion to be fixed more tightly. This method greatly increases the number of points of contact between the cambium layers, and the grafts take root faster and more reliably.
Cherry grafting with a “bridge”
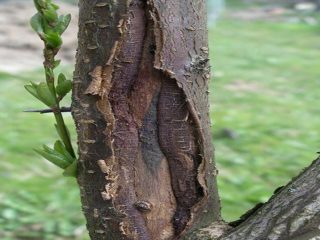
This method is used in emergency cases to save a tree. Often after winter, fruit trees have ring-shaped destruction of the bark (from frost, burns or damage by hares). If no measures are taken, the tree is guaranteed to die, since nutrients from the root system will not be able to reach the crown.
In this case, a bridge is used. The area where there is no bark is simply covered with a kind of bridge from cuttings, along which the movement of juices will occur. The vaccination itself is performed as follows. Above and below the damaged area, two T-shaped incisions are made strictly vertically (straight at the bottom, inverted at the top).
The cuttings are cut at an oblique symmetrical cut and placed behind the bark of the rootstock. The cutting should stand vertically, in the direction of natural growth. There may be several such bridges. After this, the contact points are fixed with tape, and the grafting site itself is wrapped in film to create a greenhouse effect.
Cherry grafting into corner and side cuts
The side cutting method allows you not only to graft another variety onto a tree, but also to turn it in the desired direction. To carry out grafting, it is necessary that the diameters of the rootstock and scion match. This is done like this:
- An oblique cut is made on the rootstock, which cuts both the bark and the wood.
- The end of the scion is cut into a sharp wedge shape.
- The scion is inserted into a cut on the rootstock, the cambium layers are combined with each other as much as possible.
After this, the grafting site is wrapped with tape.
For grafting using the corner cut method, the thickness of the rootstock must be significantly greater than the thickness of the scion. Just as in the “behind the bark” or “into the split” grafting methods, the rootstock is sawed off perpendicular to the trunk.At the edge of the cut, an angular cut is made to the same depth as the thickness of the scion. The bottom of the scion cutting is cut at the same angle.
The scion is inserted into the corner cut. The layers of cambium are combined as much as possible, trimming if necessary. After this, the scion is tightly wrapped with tape, and the cut is covered with garden pitch.
Caring for grafted seedlings
The vaccination site should be inspected regularly. All growth growing below the grafting site should be removed so that it does not take away nutrients. 1.5–2 months after vaccination, a splint should be applied to the junction. This will give the shoot the necessary rigidity and protect it from strong winds or damage by birds. They can be removed after the leaves fall.
How to plant grafted cherries correctly
Grafted cherries are planted in a permanent place in the usual manner. 2-3 year old seedlings are planted in the spring, when the tree is still dormant. It is better to prepare the hole for planting in the fall.
Cherries are planted in holes along with a lump of earth on the roots. The root collar should be at a level of 3–5 cm above ground level. The hole is filled with soil mixture, compacted and spilled with several buckets of water. To better retain moisture in the soil, the tree trunk circle is mulched with peat or humus. The young seedling needs to be tied to a support to protect it from wind damage in the first years of its life.
Should cherry grafting be deepened?
The grafting site is always above the root collar, and it should be above ground level. Violation of this condition can lead to the fact that the cherry simply will not bloom and bear fruit.
All about cherry grafting is in the video at the link below.
Conclusion
Cherry grafting performs many beneficial functions.With its help, you can propagate trees, improve the quality of fruits and increase winter hardiness. Grafting onto dwarf rootstocks can significantly reduce the growth of cherries, thereby facilitating its care and subsequent harvesting.
And grafting is the only way to grow several varieties of this tasty and healthy berry on one tree.
