Content
- 1 How to cook plums in your own juice
- 2 Traditional recipe for plums in their own juice
- 3 Plums in their own juice with pits
- 4 Plums for the winter without sugar
- 5 How to roll a plum in its own juice with cloves
- 6 Quick recipe for plums in their own juice
- 7 Blanched plums in their own juice
- 8 Yellow plum in its own juice for the winter
- 9 How to make yellow plum in your own juice with vanilla
- 10 Cooking plums in their own juice in the oven (or in the oven)
- 11 Canned prunes in their own juice
- 12 Canned plums in their own juice, halved
- 13 Rules for storing plums in their own juice
- 14 Conclusion
Plum in its own juice is one of the options for preparing these fruits for the winter at home. You can prepare them both with and without pits, just the plums themselves with sugar or with the addition of certain seasonings. You can learn how to cook plums in your own juice from this article, which will provide detailed recipes with step-by-step instructions, photos of the finished product and a cooking video.
How to cook plums in your own juice
To prepare this winter preparation at home, ripe fruits, ripened on the tree and slightly unripe, are suitable, that is, those that have almost reached biological maturity, but still have dense pulp. All of them must be exclusively intact, without damage, dents, spots of rot and traces of any infections or diseases, without stalks.
The variety of plums does not matter, you can take any, fruits of any shape and color will do. As for the size, the ideal option is medium, but large and small ones can also be preserved.
The containers in which you can preserve fruit are ordinary glass jars of various sizes, from 1 to 3 liters. They must be intact, without chips or cracks, preferably hardened, that is, those that were previously used for canning. Before placing drains in them, the jars must be washed in warm water and soda, heated over steam and dried. Also sterilize the lids in boiling water. You will also need a large saucepan for sterilization, of such a height that jars filled with water filled up to the hangers can easily fit into it.
Then prepare the plum fruits: wash them several times in warm water, removing all adhering dirt and dust. After this, cut each fruit in half along the longitudinal line and remove the seeds, if so called for in the recipe.

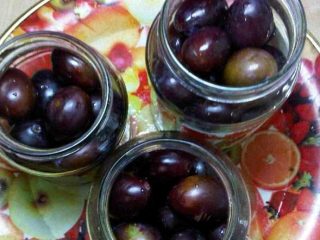
Traditional recipe for plums in their own juice
To prepare plums in their own juice according to a recipe that is considered traditional, you will need a minimum of products, just 2 ingredients:
- plum – 10 kg;
- sugar – 5 kg.
Here's how to prepare plum jam for the winter:
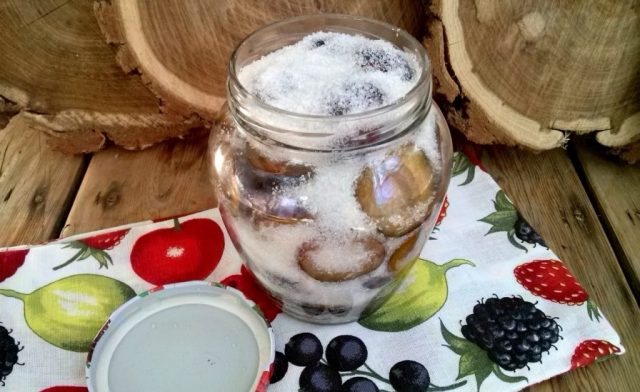
- Remove all stems and seeds from the washed fruits, pour them into 1-1.5 liter jars, sprinkling each layer with granulated sugar. Place more tightly, compact lightly.
- Pour some warm water on top and shake well to mix everything.
- Place a piece of cloth or a special stand at the bottom of a large, voluminous pan, place the jars on it and fill them with warm liquid up to their hangers.
- Place the pan on the fire and bring the water to a boil.
- When the water begins to boil strongly, reduce the heat to low and simmer for 15 minutes.
- Under the influence of heat, the plums will gradually begin to settle, and free space will appear in the jars. It needs to be filled with new portions of fruits and sugar.
- After adding, sterilize again for another 15 minutes.
- After the allotted time has passed, remove the jars from the pan, grabbing them with a special device, and immediately roll up the lids.
- Leave to cool at room conditions for exactly one day. It is not necessary to wrap them; you can leave them as is.
After cooling, plums can be stored both in cellars and indoors. They are sterilized, so they can withstand storage even in warm conditions.
Plums in their own juice with pits
Here, the best option would be slightly unripe fruits, since they are denser than ripe ones and retain their shape better even after prolonged heat treatment. There is no need to remove the seeds from them, so the fruit should remain whole. If you plan to preserve them in 3-liter jars, then the drain should be taken at the rate of 2 kg per 1 container. Standard ingredients:
- 10 kg of freshly picked fruits;
- 5 kg granulated sugar.
Plums for the winter without sugar
For one 1 liter jar you will need about 0.75-1 kg of plums. They can be round or oblong, fully ripe or slightly unripe. The main thing is that they are as sweet as possible, since no sugar is added to them during cooking. It is better to take small plums with dense pulp. The fruits of the Hungarian (Ugorka) variety are ideal.
These plums should be prepared as follows:
- Wash them, changing the water several times, and remove the seeds, carefully cutting each fruit along a longitudinal line with a knife.
- Fill the jars in halves to the top, sprinkling each layer with sugar and distributing it evenly inside the container.
- Place on the stove and sterilize for 10–15 minutes.
- Add plums and sugar when the first batch has set.
- Sterilize again, but for 20 minutes.
- After removing the jars from the pan, immediately seal them with a key using varnished lids and cover with a warm blanket.
After the jars of plums in their own juice without sugar have cooled, which will happen in about a day, move them to the cellar or put them on a shelf in the pantry.
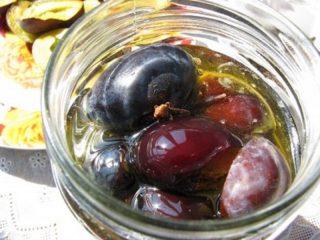
How to roll a plum in its own juice with cloves
This recipe for canning plums in their own juice is different in that, in addition to sugar, an aromatic seasoning – cloves – is added to the fruit to give it a unique smell. Otherwise, you will need the same ingredients:
- 10 kg of fruits;
- 5 kg granulated sugar;
- 2-3 cloves per liter jar.
Sterilize the plums for 15 minutes first, and after adding new fruits to replace the ones that have shrunk, another 15 minutes. After cooking, leave the jars to cool for 1 day in the room. Afterwards, if there is a cellar, then move it to it, where the conditions for storing canned products are better.
Quick recipe for plums in their own juice
This recipe will be useful for those who cannot or do not want to sterilize jars for a long time. Ingredients:
- fruits – 10 kg;
- sugar – 5 kg.
The difference in preparation between this recipe and the previous ones is that:
- This time, the plums are not scattered fresh into jars, but are first boiled in a saucepan along with sugar until juice appears.
- Then they are placed in jars with a capacity of 0.5 to 1 liter along with the released juice.
- Place them in a saucepan and sterilize for at least 15 minutes after the liquid boils.
After natural cooling, they are placed in a cellar, basement, or left in a cool room for long-term storage.
Blanched plums in their own juice
As the name of this recipe suggests, the fruits will need to be blanched before cooking. For this:
- Place them in portions in a colander.
- Dip into boiling water for 5 seconds, then pull out and immediately immerse in cold water.
- Place in jars, sprinkle evenly with sugar, and set to sterilize for 15–30 minutes, depending on the volume.
- After the plums are removed from the pan and immediately sealed.
After they have cooled, they are placed in the cellar, where they will remain until the new harvest.
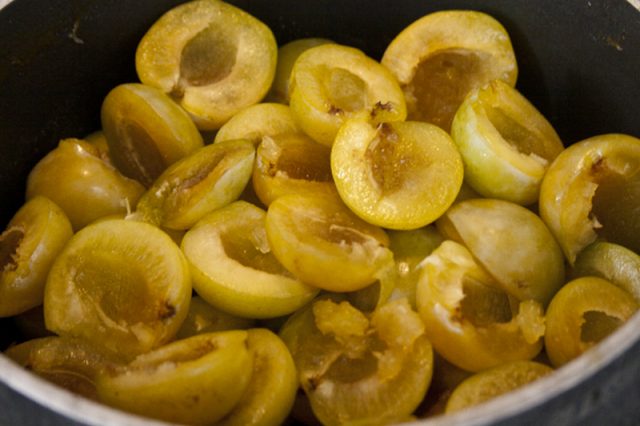
Yellow plum in its own juice for the winter
To prepare plums in their own juice according to this recipe, you will need yellow fruits of any size and variety. Required components:
- 10 kg of fruit;
- 5 kg of sugar.
The cooking method is classic.
How to make yellow plum in your own juice with vanilla
According to this recipe, you will also need fruits of yellow varieties. You will need to take:
- 10 kg of fruit;
- 5 kg sugar;
- 1 packet of vanilla.
You can also cook the preparation in the classic way, but when placing fruit in a container, you will need to add spices to it.
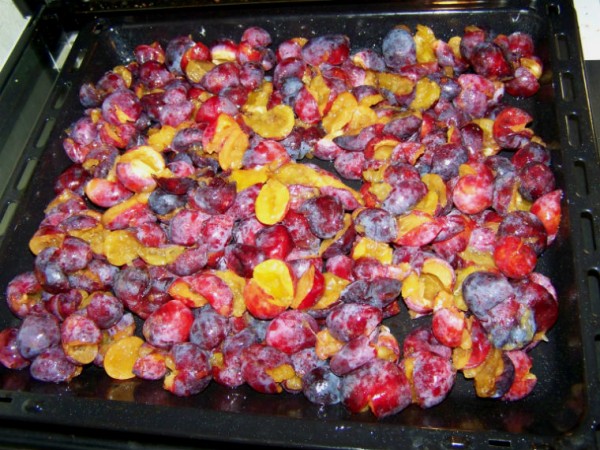
Cooking plums in their own juice in the oven (or in the oven)
The ingredients are the same as in the traditional recipe. Cooking method:
- Sort the fruits, wash them in running water and be sure to remove the seeds.
- Fill 1-1.5 liter jars with halves, pouring layer by layer and sprinkling them with sugar. Place the fruits tightly, pressing them down with a spoon.
- Place the jars in a preheated oven for 40-50 minutes.
- After this, roll up immediately.
Once cooled to room temperature, transfer jars to a cool basement.
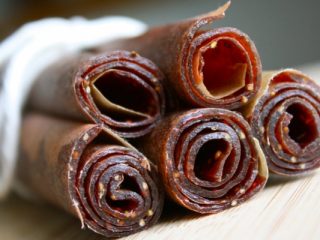
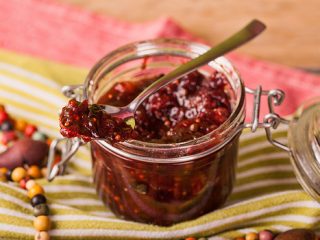
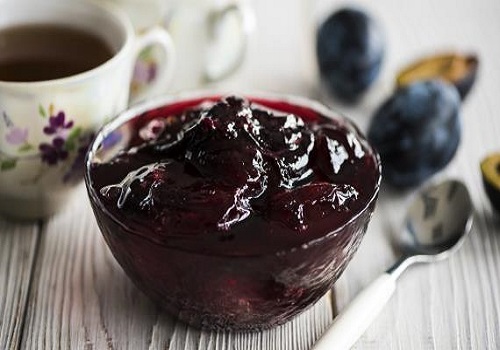
Canned prunes in their own juice
You will need plums that are dense and not very juicy so that they can dry faster. Before you make the jam, you first need to cook the prunes. For this:
- Remove pits from plums.
- Spread them in 1 thin layer outside, in the sun and dry for as long as possible until they acquire their characteristic consistency, color and aroma. They need to be turned over periodically so that they dry well on all sides.
- You can also dry the fruits in the oven of a gas or electric stove.
From 10 kg of fresh fruits after drying, approximately 3-3.5 kg of dried fruits are obtained. After the prunes are obtained, you can start making jam:
- Place it in prepared jars, add sugar (at a ratio of 2 to 1).
- Add a little water and mix everything.
- Place the jars to sterilize for 30 minutes.
Cooling takes place at room temperature. Jam can be stored indoors or in a cold cellar.
Canned plums in their own juice, halved
To prepare jam according to this recipe, you will need to take 10 kg of ripe, juicy, but still dense fruits. Plums can be any color: white, yellow, red and dark blue. You will also need sugar (5 kg). Sequencing:
- Wash the fruits, cut them lengthwise with a sharp knife and remove the seeds.
- Place the halves in jars and sprinkle evenly with sugar.
- Sterilize according to traditional recipe.
After mandatory cooling, send the jars for storage.
Rules for storing plums in their own juice
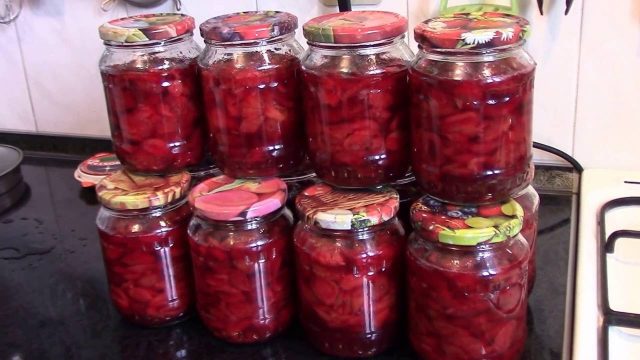
You can store the blanks either in the house at a relatively high temperature, since they have been sterilized, or in a place specially designed for this purpose - in the cellar. Indoors, in an apartment or in a private house, you need to put them in the coldest and darkest place, for example, in a pantry or in the coldest room. The shelf life of plums in their own juice at home is at least a year, but not more than 3 years. After this period, it is not recommended to use plum jam for food; it is better to make new one from the current year’s harvest.
Conclusion
Many people will like plums in their own juice, as they have an unsurpassed taste and aroma. It’s not difficult to prepare, you just need to follow the recommendations given in the recipes. If you do everything correctly and cook the jam as it should, you can enjoy it on cold winter days when fresh fruit is not available.