Content
Purchasing a new mini-tractor is expensive and not everyone can afford it. However, it is difficult for an owner to care for a home farm without equipment. Craftsmen get out of the situation quite simply. They make homemade tractors from old spare parts or remake walk-behind tractors. We will now try to consider how this all happens in general terms.
Features of assembling a homemade tractor
It is impossible to provide exact instructions for assembling a homemade product, since the entire technical part of this process depends on the spare parts available. To understand how to make a tractor with your own hands, we will look at the main components of this equipment.
Maybe someone will not be satisfied with such an answer, because every person is looking for specifics. Let's talk about why this happens. For example, let’s take the owner’s existing motor. It can be diesel or gasoline with air or water cooling. These technical characteristics must be taken into account, since the entire design of the homemade product will depend on this. You will have to install a fan in front of an air-cooled motor. The water cooling system is complex and has a completely different design.
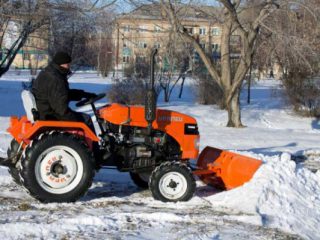
If you decide to collect homemade tractor from walk-behind tractor, then the engine, wheelset and gearbox remain original. All you have to do is weld the frame and add another axle for the wheels. When converting a walk-behind tractor, the original wheel pair is the leading one. It can be located at the back or front. It all depends on what part of the frame the motor will be mounted on.
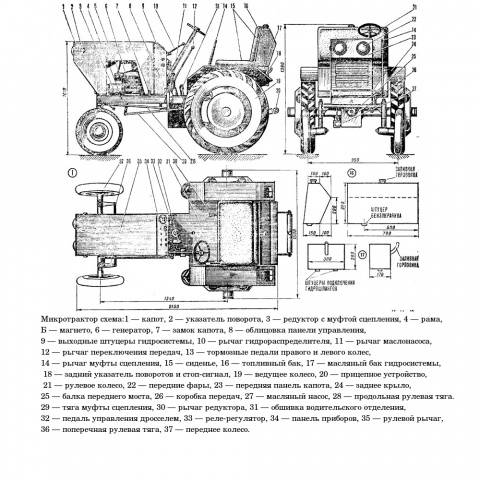
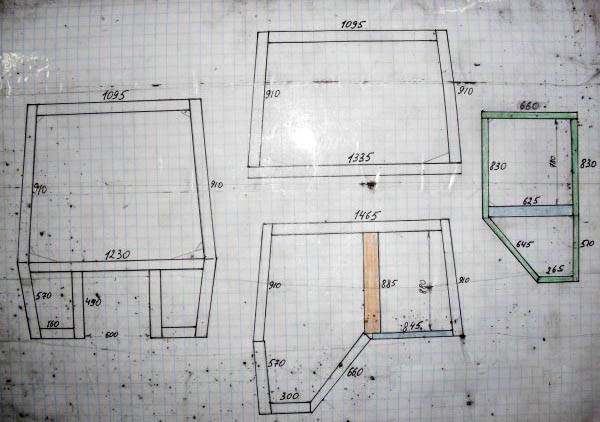
Regardless of the available spare parts, you need to start assembling a homemade tractor by drawing up a drawing. Having an exact diagram at hand will help you figure out what needs to be put where. We suggest looking at the photo for an example of a drawing of a tractor with the layout of all components.
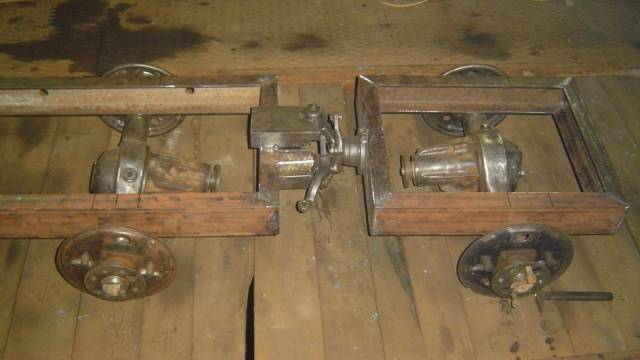
They begin to assemble the tractor with their own hands by making the frame. Regardless of the existing motor, even if you are remaking a walk-behind tractor, the design is made in two types:
- Fracture. This frame consists of two semi-frames connected to each other by a hinge mechanism. A homemade tractor with a breakable frame is characterized by high maneuverability. A motor with a gearbox is installed on the front half-frame. The rear axle and towbar for additional equipment are attached to the second half-frame.

- One-piece frame. The budget option is considered a classic. The frame is a single fixed structure with two traverses and side members. Jumpers are installed for reinforcement. Sometimes the front of the frame is made narrower than the rear. That is, the shape is a trapezoid.
Any type of frame is welded from a channel. For jumpers, a profile pipe is used. Metal corners of different sizes, as well as sheet steel 5–10 mm thick, will be useful.
The video provides an overview of a homemade tractor:
Spare parts for tractor assembly
So, we continue to consider how to make a homemade tractor, and now it’s time to select spare parts:
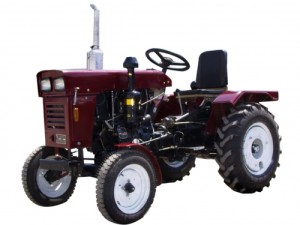
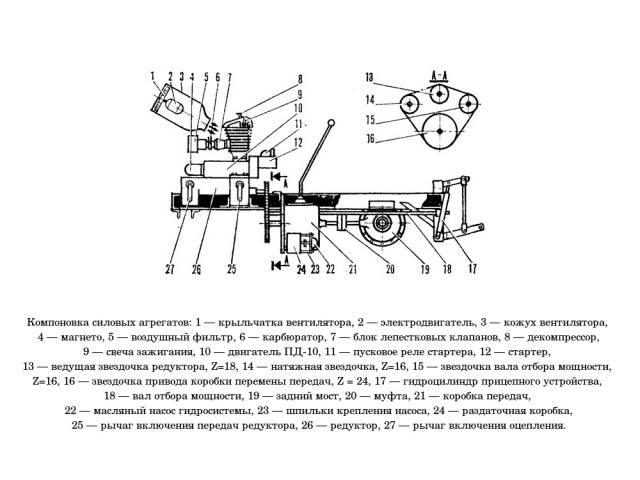
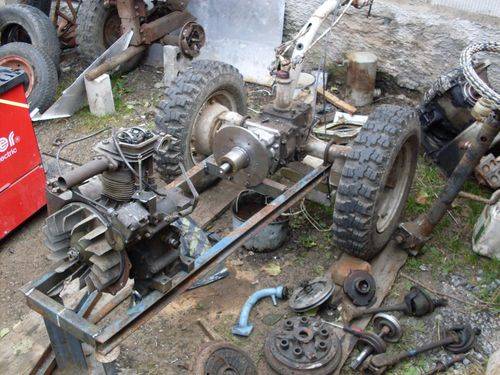
- We have already talked about the engine, but we will stop again. For a tractor, it is advisable to find an engine with a power of about 40 horsepower so that the equipment can cope with any tasks. In general, craftsmen install everything that is on the farm: a motor from a Moskvich, a motorcycle, a power plant, etc. If they remake a walk-behind tractor, then the problem with the motor disappears. It is reasonable to convert a walk-behind tractor into a tractor if its power is more than 6 horsepower. Otherwise, the homemade product will turn out to be weak, and it will be of little help on the farm. In addition to power, it is important to take into account the operating speed of the engine. Speed is not an important parameter. The motor must produce high torque at low speeds. Diesel engines have these characteristics.
- When remaking a walk-behind tractor, the gearbox remains original. For a different engine, the gearbox will have to be selected from other equipment. This unit fits best from a GAZ-51 or 53 car. There is a lot of work to be done to remake the clutch basket so that it fits the mount to the existing engine.
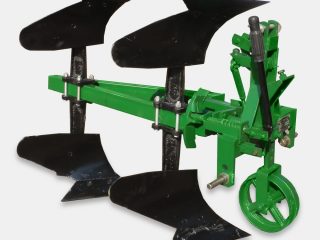
- It wouldn’t hurt to install a PTO on the tractor yourself. Then a homemade product with hydraulics will significantly expand its functionality through the use of attachments.
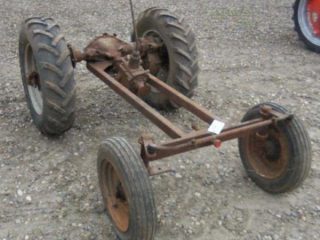
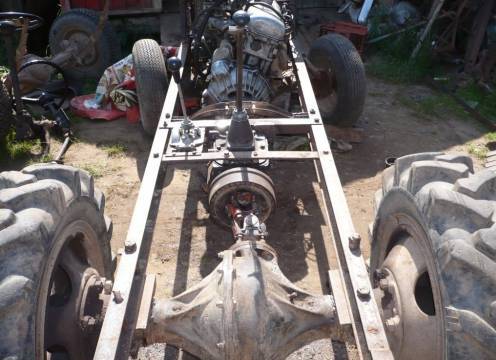
- Wheel sets are usually used from passenger cars. The rear axle is also taken from there. If the axle shafts are too long, they are shortened. When converting a walk-behind tractor, the drive wheel pair remains original. If the engine from a walk-behind tractor is placed on the rear of the frame, then the track width is increased for the stability of the tractor. On a homemade tractor, the front beam will fit perfectly from a loader.You can simply make a balancing beam yourself on one hinge in the center.
- It is better to find the steering control from a passenger car. When converting an MTZ walk-behind tractor, a three-wheeled tractor is sometimes assembled. In this case, the front wheel along with the steering is removed from the motorcycle. But motorcycle or walk-behind handles are inconvenient to control while reversing. Here it is better to give preference to a traditional round steering wheel.
- Another important component is the towing mechanism. It is welded onto the tractor with your own hands to the rear of the frame. The cart will be hooked up here.
- When converting a walk-behind tractor, the original brake system is used. In another case, it is also removed from other equipment. Do the same with the fuel tank.
After installing all the components, the trim is hung on the tractor, a seat is installed, headlights are attached, and electrical wiring is laid.
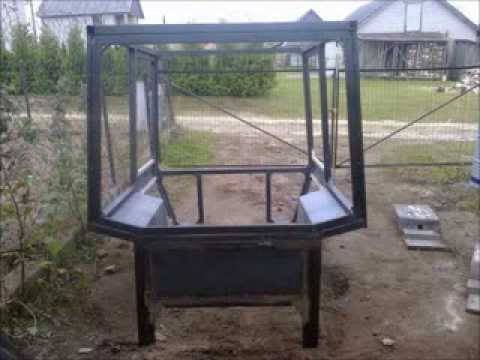
Manufacturing a cabin for the MTZ tractor
In summer, a tractor can be used without a cabin, but the operating comfort deteriorates greatly, and with the onset of autumn, it will generally be impossible to drive the equipment. A homemade cabin for a tractor is made from sheet steel. First you need to make a drawing. Let's take the cabin from the MTZ tractor as a basis. The photo shows a diagram of fragments of the structure. Using it you can assemble a cabin for your tractor.
The manufacturing process of a cabin for MTZ consists of the following steps:
- If the dimensions in the drawing do not suit you, they can be changed. During independent calculations, the front sight glasses are always taken as a basis. The roof is made at least 25 cm higher than the height of the driver sitting behind the wheel.
- The first to assemble the frame is made of wooden beams. All elements are connected with self-tapping screws.
- Next, they begin to build the skeleton of the future MTZ tractor cabin along the outer body of the wooden frame. To do this, adjust the metal pipe to the size of the wooden elements. The connection is made by welding. After checking the parallelism and evenness of all joints, the corners of the structure are covered with a profile.
- The finished skeleton of the MTZ cabin is placed with the roof on the ground, after which the bases for the inspection glasses are welded from the inside.
- Fragments for the roof of the MTZ cabin are cut with a grinder from sheet steel 1 mm thick. It is welded to pieces of pipe with a diameter of 100 mm cut lengthwise. Next, this entire roof structure is attached to the common frame of the cabin. The wings and floor need to be made stronger. Sheet steel 2 mm thick is better suited here.
- The door frame is welded from a profile pipe. It is important not to forget to install gas lifts. Taking into account the location of the side windows, select the angle of the central and rear pillars, after which the cross members are welded.
- The final work is the installation of glass. The interior lining of the cabin is usually made of foam rubber, and leatherette is stretched on top.
At this point, the homemade cabin is ready. Now all that remains is to attach it to the tractor. The outside of the cabin definitely needs to be painted. In addition to its aesthetic appearance, paint will protect the metal from corrosion.
The video shows a homemade cabin for the MTZ tractor:
Assembling equipment at home is a difficult task. A lot of knowledge is required, as well as the ability to perform welding and turning work.