Content
- 1 Mobile shower - the simplest arrangement of country house comfort
- 2 We are drawing up a project for a stationary summer shower for the dacha
- 3 Choosing a place to install a shower in the country
- 4 Preparing the base for a country shower
- 5 We are building a foundation for an outdoor shower at the dacha
- 6 Construction of a drainage pit
- 7 Building a shower stall
- 8 Tips for choosing a shower tank
- 9 Automatic filling of the tank with water
- 10 Reviews from summer residents
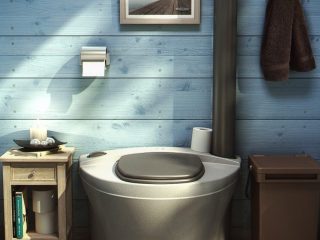
A person who comes to the dacha to work in the garden or just relax should have the opportunity to swim. Best suited for this Summer showerinstalled in the garden. However, the weather may not always please you with warm days, and the water simply does not have time to warm up during the day. The solution to the problem will be a built-in summer shower for the dacha with heating, allowing you to take water procedures in any weather.
Mobile shower - the simplest arrangement of country house comfort
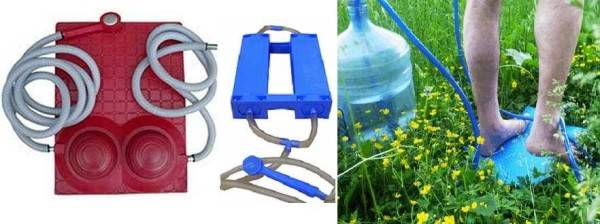
If you visit the dacha very rarely, there is no point in building a permanent building for swimming. In this situation, a mobile shower bought in a store will help. It’s easy to bring the product in your bag to the dacha, and take it with you when you leave. The simplest garden shower looks like a rubber mat with a foot pump built inside. The source of water is any container installed on the ground. Two hoses extend from the pump: one is for drawing water, and the other is for supplying it to the watering can.
The portable shower works by stamping your feet on the mat. Inside the pump there is a membrane, an inlet and an outlet valve.We pressed the mat with one foot - the inlet valve opened and the membrane drew water from the container into the pump. They stepped on the other foot - the inlet valve closed and the outlet valve opened. Water under pressure flowed into a hose with a watering can. The mobile shower can be used anywhere in the country yard. Best on the lawn in the garden.
We are drawing up a project for a stationary summer shower for the dacha
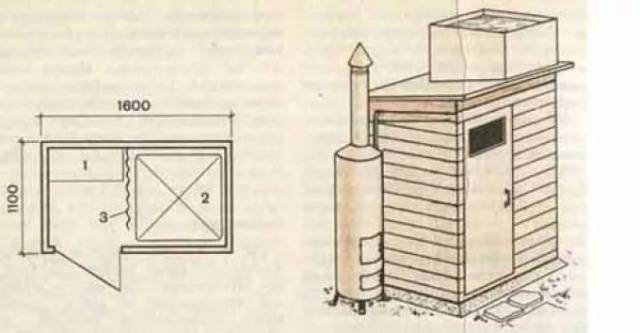
To build a stationary warm shower for a summer residence, you will need to develop a project. Don't be scared, there's nothing complicated about it. For the simplest construction, a regular diagram drawn by hand on a landscape sheet is suitable. The drawing indicates all the dimensions of the future shower stall.
Usually, when building a heated shower with your own hands, you adhere to the standard parameters:
- cabin height – from 2 to 2.5 m;
- width – 1 m;
- depth – 1.2 m.
In some cases, the width and depth of the shower stall can be increased. For example, for obese people or when arranging a locker room. In such cases, the width of the shower stall is increased to 1.6 m.
Choosing a place to install a shower in the country
You can install an outdoor shower in any corner of your summer cottage. There are no special requirements for this building. If you think about it wisely, no one will install a shower stall in the yard. It is better to do this behind the house or in the garden, because for the shower you will have to organize a small drain.It is advisable to place the cabin in a sunny area to organize natural heating of water from the sun. In order to save building materials, a shower stall can be attached to any building on the south side.
If an outdoor shower in a dacha is installed as a separate building, it is advisable not to remove it from the house. After all, it is better to make a water tank with electric heating, which means that you will need to run wiring from the electric meter to it.
Preparing the base for a country shower
Building a shower at the dacha with your own hands begins with preparing the place where the cabin will be installed. According to the size of the shower house, a recess of no more than 50 cm is dug. The bottom of the hole is covered with a layer of sand 15 cm thick, and on top with the same layer of crushed stone. If you rarely use the shower or if no more than two people will bathe per day, the base can be left in this condition. Water will pass through the drainage layer and be absorbed into the ground.
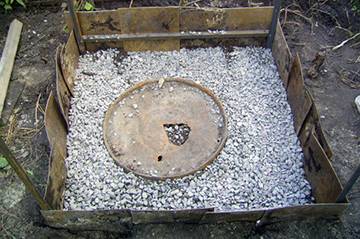
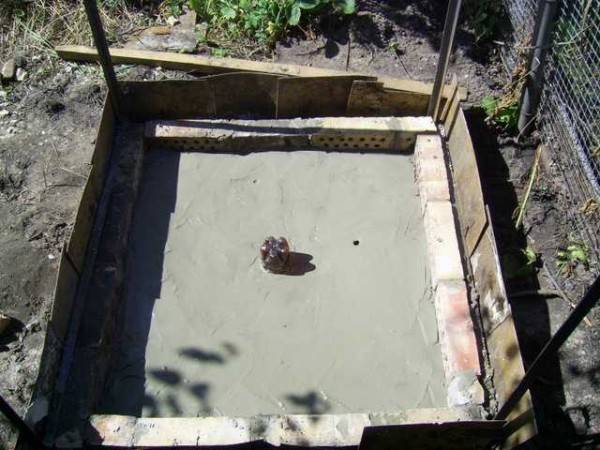
To organize large drains, it is necessary to drain into a cesspool and concrete the base. Alternatively, instead of concreting, the floor can be made from an acrylic pallet.
We are building a foundation for an outdoor shower at the dacha
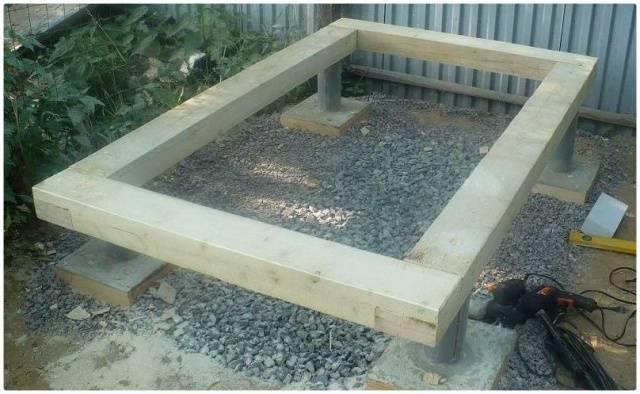
Most often, a columnar foundation is built for a shower in a country house. The photo shows options for its arrangement from different materials. In any case, holes are dug under the pillars with a depth of at least 80 cm. The bottom is covered with a layer of sand and gravel 30 cm thick. Further installation of the pillars depends on the material used:
- Pillars made of brick or any other blocks are laid out on cement mortar.
- Pillars can be made from pieces of asbestos or metal pipes with a diameter of 150–200 mm. They are inserted into each hole and then filled with concrete.
- To fill monolithic pillars inside the pits, formwork is made from plywood.Four reinforcement bars are inserted inside each hole and concrete solution is poured.
In any case, a stud with protruding thread is embedded on each post. They are needed to secure the shower stall frame with nuts. All pillars should rise about 30 cm above the ground, and at the same level.
Construction of a drainage pit
If a lot of people bathe in a heated garden shower, the drainage floor will not have time to absorb a large amount of water. For drainage, you will have to organize a cesspool. It is dug up to a depth of 2 m at a distance of at least 3 m from the shower stall. It is important to place the hole no closer than 5 m from the house and 15 m from the water source.
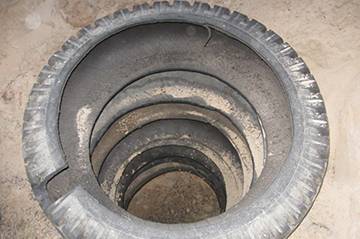
You should not build country cesspools for outdoor showers from expensive materials. It is optimal to use old car tires:
- A hole is dug according to the size of the tires. A hole with a diameter of 100 mm and a depth of about 1 m is drilled at the bottom with a drill.
- On a 2 m long PVC sewer pipe, holes are drilled on the sides. Moreover, perforation is done on a section of pipe 1 m long.
- The pipe is inserted with the unperforated end into the drilled hole. There should be 1 m of pipe with holes left on the surface. This area, together with the end, is wrapped with geotextile. Wire is used to secure the fabric.
- The bottom of the shower cesspool is covered with a 60 cm thick layer of crushed stone. After this, tires are placed on top of each other.
- Further work is aimed at arranging the drain itself. A trench with a slight slope is dug from the floor of the shower stall to the cesspool. It is needed so that water moves by gravity through the pipeline.
- A PVC pipe with a diameter of 50 mm is laid in the trench.One end of it is brought out into the center of the base of the shower stall, and the other into the cesspool. In this case, a window is first cut out on the tire tread through which the pipe is inserted.
The cesspool for the shower is ready, all that remains is to make a lid and attach a ventilation pipe with a cap to it.
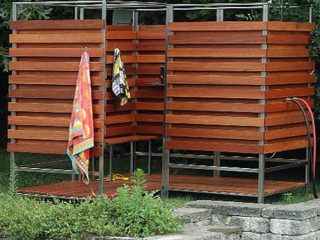
Building a shower stall
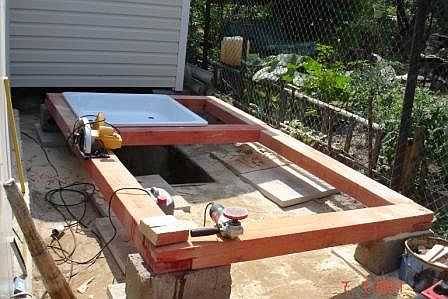
The construction of a heated country shower begins with the assembly of the frame, and the frame of the lower trim is assembled first. The frame can be welded from a steel profile, but it will be easier to use wooden blanks. So, the frame of the lower frame of the country shower is knocked down from timber with a section of 100x100 mm. After this, it is laid on the foundation, secured with anchor studs and nuts.
When the lower trim of the country shower is ready, begin installing the racks. For their manufacture, timber with a cross section of 100x50 mm is used. Racks are placed in the corners of the future shower stall, and two additional ones in front for hanging doors. It is optimal to keep the width of the doorway within 700 mm.

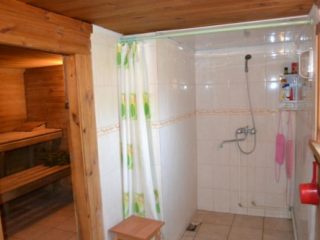
From above, the shower frame is fastened with a frame made of timber with a cross-section of 100x100 mm. That is, they knock down exactly the same frame as for the lower trim. The outside of the finished shower frame is covered with wooden clapboard. It is better to use plastic sheets inside because they are resistant to moisture. The door is knocked down from a 20 mm thick board or purchased from a plastic store. It is attached to the shower stall with hinges on the doorway posts.
For swimming on cool days at the dacha, it is better to equip an insulated shower.Wooden cladding holds heat well, but since there is space between the exterior and interior decoration, it is better to additionally insulate the shower walls. This can be done with 10 mm thick foam sheets.
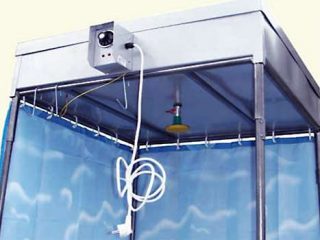
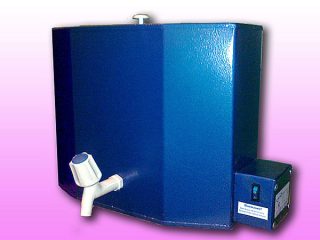
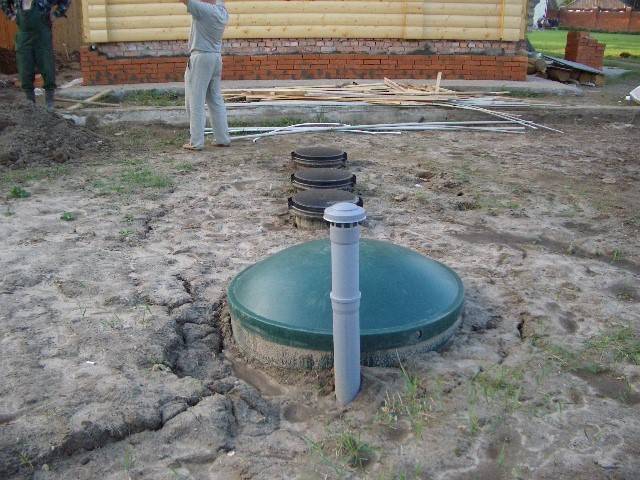
The roof of a country shower is made with a pitch, but in order to save money, a square water container is used instead of a roof. A factory-made plastic tank is selected in such a size that it completely covers the shower stall. Since we are building a warm shower in the country, we must buy a container with water heated by electricity.
Tips for choosing a shower tank
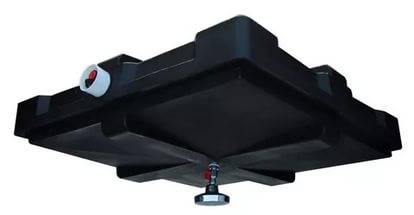
So, we figured out how to build a country shower cabin, now we move on to its arrangement. Instead of a roof, there will be a square-shaped plastic tank. It is better to buy a container that is black. In such a tank the water will not bloom. The dark color also attracts heat, so in sunny weather the water will heat up naturally.
In addition to the built-in heating element, it is better if the shower tank has a thermostat. It will help heat the water to the desired temperature, after which it will turn off the heating element.
Automatic filling of the tank with water
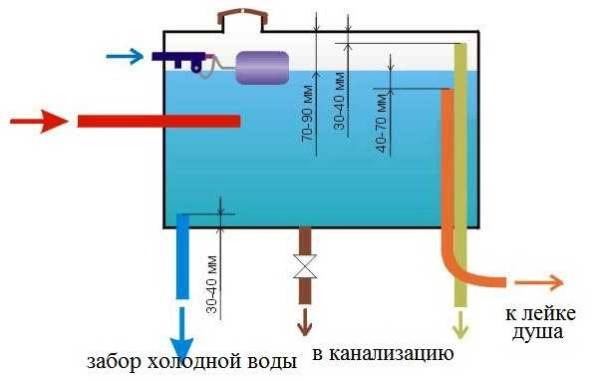
Pouring water for showering into the tank is done manually using buckets from a ladder, but this is a very labor-intensive procedure. It is better to use the proposed scheme to auto-fill from a water supply or well. The water supply is connected through a float, which will regulate its level in the tank. Two control drains are discharged from the container into the sewer system. One pipe (brown in the diagram) is fixed at the lowest point of the tank to completely drain the water for the winter. The second tube (green in the diagram) is fixed at the top point of the tank. Excess water is drained through it in the event of a float failure.
If you secure two more pipes inside the container in the same way (blue and orange in the diagram), then you can install a mixer in the shower. The orange pipe will supply hot water to the watering can, and the blue pipe will supply cold water. As a result, the mixer will make the water warm, as needed for bathing.
The video shows an example of a heated shower:
Reviews from summer residents
Reviews from summer residents will tell you about the positive qualities of using a heated shower in a suburban area.