Content
A lot of modern technology has been invented for snow removal, but shovel and remained an indispensable assistant in this matter. The simplest tool is in demand for cleaning sidewalks by private courtyard owners and city street cleaners. If desired snow shovel with your own hands can be made from any light but durable sheet material. Let's look at several options for making snow removal tools.
Plastic shovel
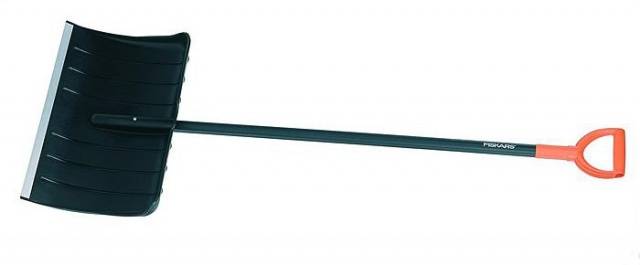
The most convenient for cleaning and throwing snow is considered a plastic shovel. It's easier to buy a scoop in a store. At home, all that remains is to place it on the handle and secure it with a self-tapping screw. A lightweight shovel is very convenient. The strength of the scoop is ensured by stiffening ribs molded from plastic, and the edge of the blade is protected from abrasion by a steel strip.
You can make a snow shovel from a PVC sheet with your own hands using the following method:
- For the scoop you need to find a piece of plastic. The sheet must be break-resistant and flexible at the same time. You can test it by bending, of course, within reason. If the plastic doesn't burst, it means the scoop will turn out great.
- Draw the shape of a scoop on a plastic sheet. The most convenient size is 50x50 cm. Cut the workpiece with a jigsaw. Burrs on plastic do not need to be cleaned. They will be erased while clearing the snow.
- The most difficult job is attaching the handle. It is fixed in the center of the scoop using sheet steel plates.
To make the blade resistant to abrasion, the working edge of the scoop is wrapped around galvanized sheet steel and secured with rivets.
Aluminum snow shovel

Metal shovels win in terms of strength, but they are heavy for clearing snow. The only exception is lightweight aluminum. Soft metal is great for a scoop. Let's look at how to make a snow shovel from sheet aluminum:
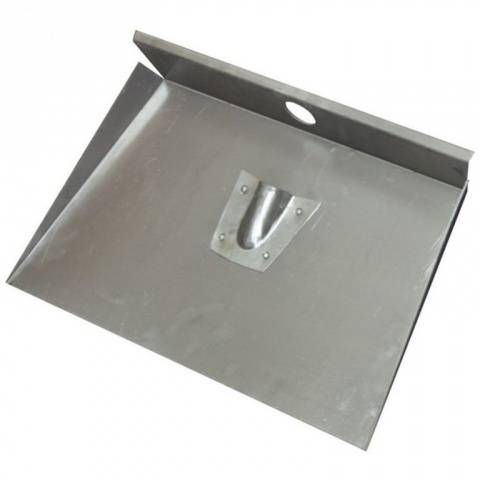
- It is better to make an aluminum scoop with sides. When applying markings to a sheet, the shelves should be marked on three sides of the workpiece. The handle will pass through the backboard, so its height should be 1–2 cm greater than the thickness of the wooden element.
- Aluminum cuts easily. For cutting, metal scissors, an electric jigsaw are suitable, or in extreme cases, you can use a grinder. On the cut out fragment, the sides are folded on three sides. A hole with a diameter equal to the thickness of the handle is pre-drilled in the rear shelf.

- A nest for the handle is attached to the center of the scoop with rivets. It is made from a piece of sheet aluminum. The workpiece is placed on the edge of the handle and an attempt is made to press its edges down. Next, the aluminum plate is tapped with a hammer until a semicircle is extruded. The result will be a scoop, as shown in the photo.
Now all that remains is to take the cutting, pass it through the hole in the back side of the scoop and insert it into the nest. To prevent the shovel being made from falling off while throwing snow, the end of the handle is fixed to the socket with a self-tapping screw.
Step-by-step instructions for making a wooden shovel
To make a snow shovel with your own hands, prepare: plywood, a wide pine board, a beam for the handle, galvanized sheet steel and woodworking tools. If all this is available, then feel free to go ahead:
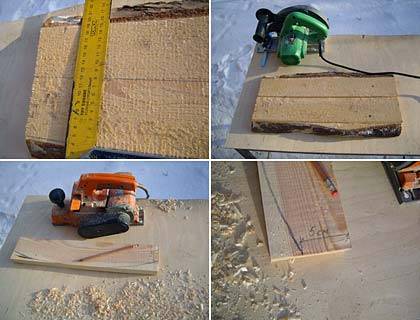
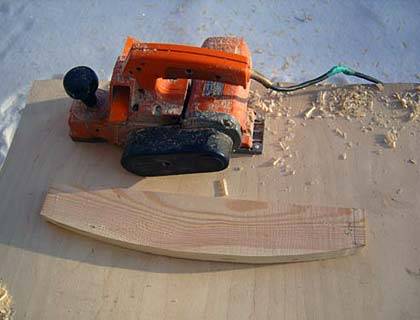
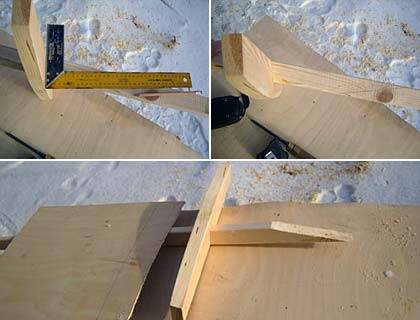
- First, from a pine board 50 cm long you need to make a base for fixing the handle and plywood. That is, the back side of the scoop. Take a board with a width of at least 8 cm. At both ends, 5 cm segments are marked on the end sides. Next, from the center of the side of the board, they begin to cut off the corners with a plane to the marks. The final result should be a workpiece with a smooth and semicircular side.
- The finished part is processed with a plane. You can additionally sand it with sandpaper.
- The handle is made of timber with a section of 40x40 mm. First, the workpiece is given a rounded shape with a plane, and then the handle is carefully sanded with fine-grained sandpaper.
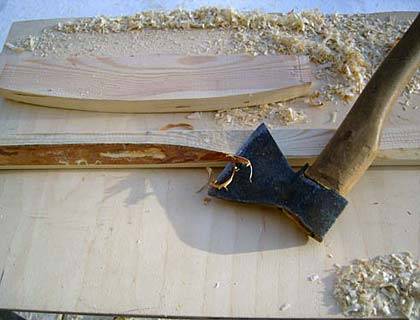
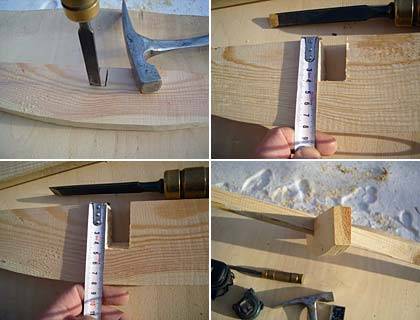
- The next step is to make a seat for the handle on the base. The notch is selected with a chisel in the center of the board. Do this on a flat side. The width of the notch is equal to the thickness of the handle, and the depth is added to the bevel of the handle by 5 mm. To make a notch, first make 2 cuts with a hacksaw, and then remove a piece of wood with a chisel.
- When all the parts are ready, they do a test fitting. The plywood is curved around the base in a semicircle and the cutting points are marked. The end of the handle is cut off at an angle. The cut should be pressed tightly against the plywood, and the cutting itself should lie inside the recess.
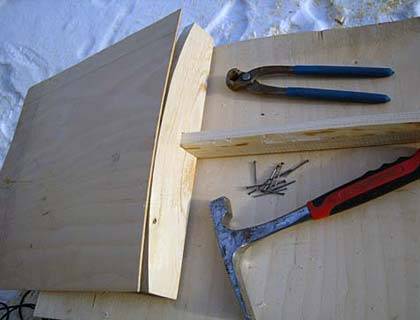
- Defects identified during fitting are corrected. A blade for the scoop is cut out of plywood according to the markings, after which all the blanks are sanded again at the cut points.
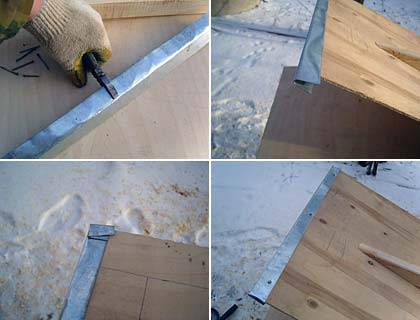
- It's time to connect all the pieces.First, the edge of the plywood is applied to the semicircular side of the base. The first nail is driven in the center. Next, the plywood is pressed to the base, giving the scoop a semicircular shape and, as it bends, the canvas continues to be nailed. Instead of nails, you can screw in self-tapping screws.
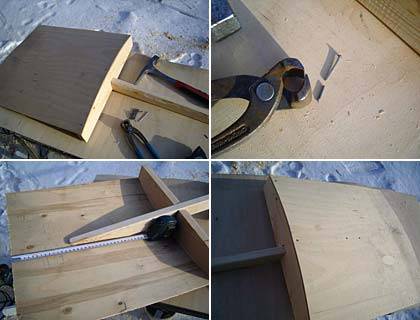
- The finished scoop is turned upside down and the handle is attached. An oblique cut of the cutting is placed in the center of the working blade, and it is inserted into a groove on the base. If everything fits perfectly, the handle is nailed down.
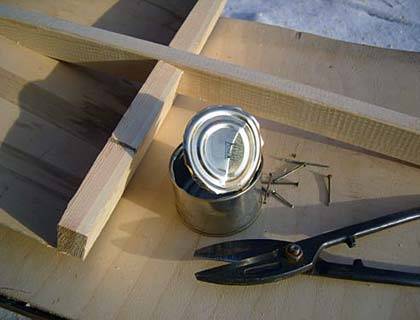
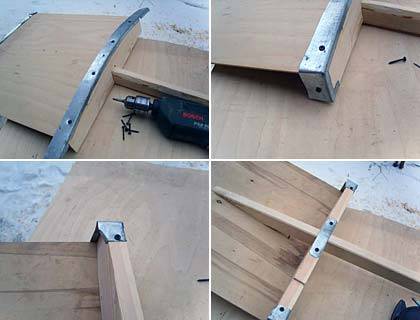
- Now all that remains is to cover the working edges of the scoop with galvanization. To do this, 2 strips 5 cm wide are cut from the sheet. One of them needs to be bent in half lengthwise. The resulting U-shaped blank is placed on the plywood where the working edge of the scoop will be. The steel strip is compacted by tapping it with a hammer, after which it is fixed with rivets.
- The second strip covers the other abrasive part of the scoop - the junction of the plywood with the semicircular side of the base. Galvanized steel is screwed on with self-tapping screws. The edges of the strip can be folded over the sides of the scoop base. To prevent the handle from breaking out of the groove, it is also reinforced with a piece of steel strip.
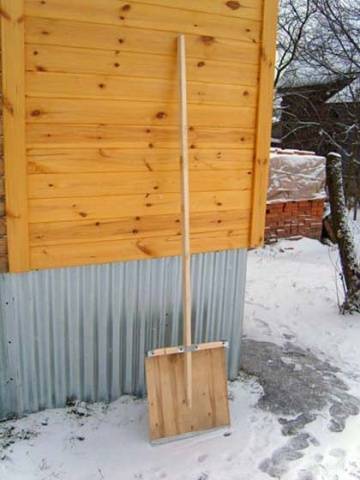
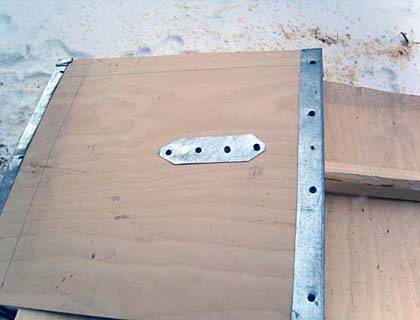
- The shovel is ready, but this is not the end yet. The scoop needs to be turned over. Where the handle is nailed to the plywood, lay a piece of steel strip and screw in 3-4 self-tapping screws. This reinforcement will prevent the working blade from tearing away from the handle under the weight of snow.
Now we can say that the shovel for removing snow with your own hands is completely ready.
The video shows instructions for making a shovel:
Auger snow shovel
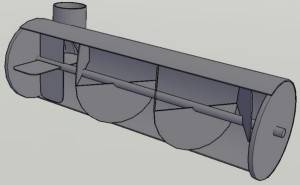
The auger shovel is characterized by high productivity, but it is not easy to assemble. First, you need to draw the correct drawings. Secondly, you need to understand the principle of operation of the auger. A diagram of the factory mechanism can be seen in the photo.We will now look into the operation of auger snow removal equipment.
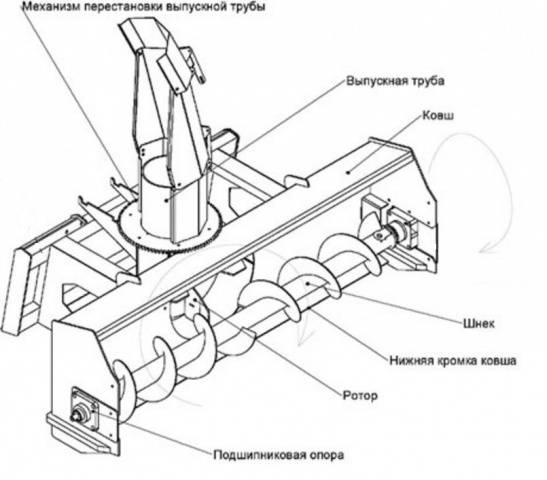
So, let's start with the fact that the working mechanisms themselves - the augers - are installed inside the steel snow collection chamber. Its lower edge moves along the hard surface of the road exactly as a bulldozer blade does. At this time, layers of snow are captured. Rotating screws direct it to the upper part of the chamber, where the outlet pipe is located. It can be located centrally or offset to the side, depending on the size of the shovel. Typically, the central location of the outlet is observed in auger shovels with a width of 1 m or more.
The rotation of the augers directs the snow to the outlet pipe, but they are not able to push it out of the snow receiving chamber. The tossing blades are responsible for this work. They spin together with auger, pushing the supplied snow into the opening of the pipe.
Using the principle of a factory analogue, you can make a homemade auger snow blower. The semicircular body of the snow receptacle can be bent from galvanized steel. A hole is cut in the center or side and an outlet pipe is installed. The sidewalls need to be strong, because the bearings of the rotor mechanism will be attached to them. Textolite or moisture-resistant plywood are suitable for their manufacture.
To make the auger, take a steel rod or pipe with a diameter of 20 mm. This will be the shaft. The blades can be welded from sheet steel or made from thick rubber. In the second option, steel strips need to be welded onto the shaft. The rubber blades will then be bolted to them.
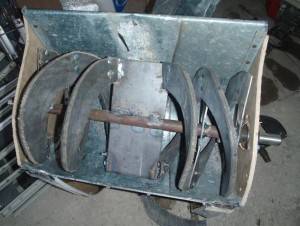
When manufacturing an auger, it is important to maintain the same spiral pitch of the blades and choose the correct direction of rotation.If the outlet pipe is installed in the center of the chamber, then a rectangular throwing blade made of metal with a thickness of at least 5 mm is welded in the middle of the shaft.
Now all that remains is to attach the hubs to the side walls of the chamber, attach the bearings to the shaft and insert the auger into place.
The tool can be used manually, like a shovel. To do this, wheels are attached to the side of the body, and a handle is attached to the back of the camera. For large dimensions, the auger shovel is attached to the front of the walk-behind tractor.
Any snow removal tool is needed only in winter. The rest of the time it is stored in a dry place, preferably away from heating devices.