Content
The art of winemaking takes many years to learn, but anyone can make homemade wine. However, making homemade wine from grapes is a complex process that requires knowledge of technology and some important nuances. When planning to make wine with your own hands, you need to understand that you will have to write down or remember your every step, perform specific actions at a certain time. Therefore, during the period of preparing a homemade alcoholic drink - 40-60 days - you will have to give up other things and almost constantly be at home, because grape wine does not forgive even the slightest violation of technology.
How to cook at home grape wine, this article will tell. Also, here you can find a simple recipe for making a delicious drink, learn about when wine is made with the addition of water, and how else you can improve the taste of grape alcohol.
Secrets of making homemade wine from grapes
The technology for preparing a wine drink is a rather complex and labor-intensive process. Vineyard owners often wonder, “Am I preparing my wine correctly, or is there something else I can do to improve the taste of the drink?”
The wine will turn out tasty, beautiful and aromatic if you make homemade wine from grapes correctly, in accordance with all the recommendations of professionals in this matter. A recommendations from winemakers are as follows:
- To prepare wines, it is better to use special wine grape varieties, such as Isabella, Saperavi, Sauvignon, Merlot, Chardonnay, Pinot Noir and others. This does not mean that table or dessert varieties of berries are completely unsuitable - they can also make excellent wine, but in this case the result may be unpredictable.
- The harvest needs to be done on time: slightly unripe berries with a characteristic sourness are most suitable for winemaking. Although many dessert wines are made from berries that are overripe and withered on the vine. At home, it is better not to wait for it to become overripe, as the berries may ferment and the resulting vinegar will spoil the taste of the drink.
- The best time to harvest is a dry and sunny day. There should be no precipitation for a couple of days before harvesting, as water washes away the valuable white coating from the grapes - wine yeast. Therefore, you cannot wash the grapes before preparing wine; the berries are simply removed from the bunches, cleared of twigs and leaves.
- Winemaking utensils must be sterile so that the fermentation process is not disrupted. Before work, jars and bottles can be fumigated with sulfur or doused with boiling water, and then dried. It is allowed to use materials such as food-grade plastic, glass, enamel coating, wood, stainless steel. Metal utensils are completely unsuitable for this, because they will oxidize and spoil the wine (this also applies to spoons, crushers, and lids).
- Traditional ingredients for homemade wine: sugar and grapes. Water is added only when they want to get rid of excess acid, and vodka or alcohol will make the wine stronger, preserve it, thereby extending its shelf life.
Homemade grape wine recipe step by step
There are simple recipes for grape wine, but there are also many more complex ones: with the addition of other ingredients, soaking apples, herbs or berries in the drink, saturating the juice with the aromas of wood or spices.
Will be discussed here step-by-step recipe for making traditional homemade wine, consisting of only two ingredients:
- 10 kg of grapes;
- 50-200 g of sugar for each liter of grape juice (depending on the natural acidity of the berries and the taste preferences of the winemaker).
The technology for preparing delicious wine consists of several large stages:
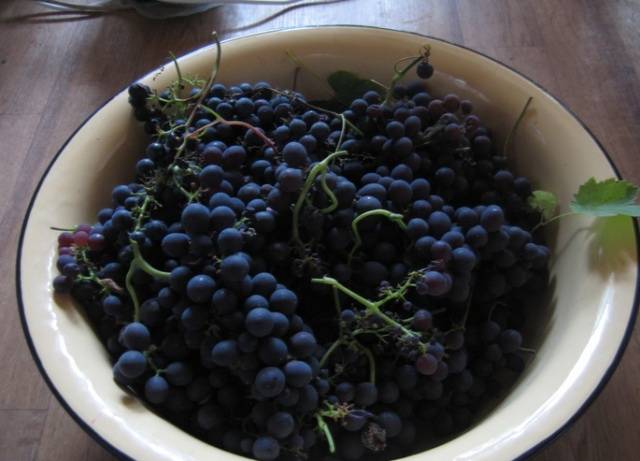
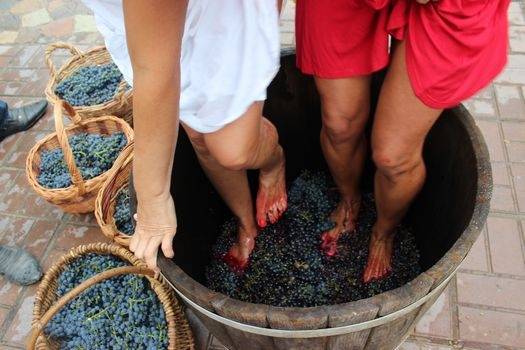
- Grape harvesting and processing. As already noted, it is better to pick well-ripened bunches that do not yet have overripe berries. You should not take carrion bunches, as they may give the finished wine an unpleasant earthy taste. The harvested crop must be processed within two days. First, the berries are sorted, debris and rotten or moldy grapes are removed. Now you need to crush the grapes (by hand or with a masher) and put the resulting mass into a wide basin or pan, filling 34 volumes. Do not grind grapes with a blender, meat grinder or other similar devices; if the seeds are damaged, the wine will become bitter. The dishes with pulp (crushed grape mass) are covered with a clean cloth and placed in a dark and warm (18-27 degrees) place. Here the wine will stand for 3-4 days until the pulp lightens. After half a day or a day, the fermentation process will begin, a cap of peels and seeds will rise above the juice.The wort must be stirred several times a day to prevent the wine from turning sour.
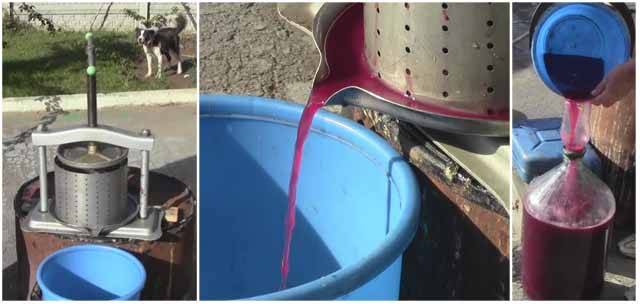
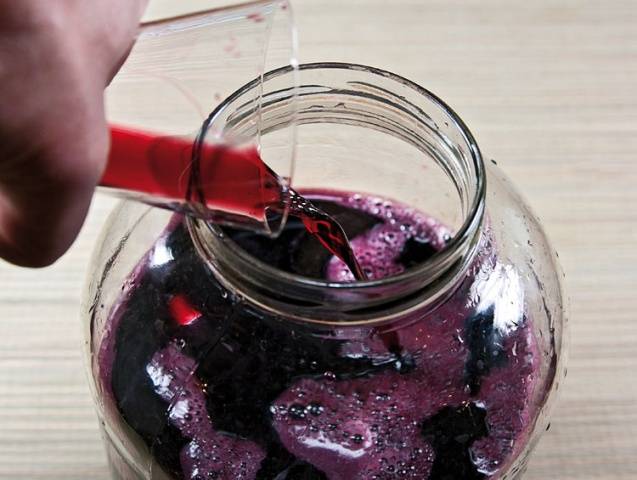
- Juice separation. After a few days, the cap will lighten, a sour smell will appear above the wine, and a quiet hissing will be heard - all this means that the fermentation process has started. Now you need to collect the floating pulp and squeeze it out with your hands. Drain the juice, leaving sediment at the bottom of the container. All collected grape juice is poured into glass bottles or jars, first filtered through several layers of gauze. It is recommended to pour the future wine from one vessel to another several times in order to saturate the juice with oxygen, which is necessary for fermentation. The bottles are not filled to the top - you need to fill no more than 70% of the wine from the total volume of the container.
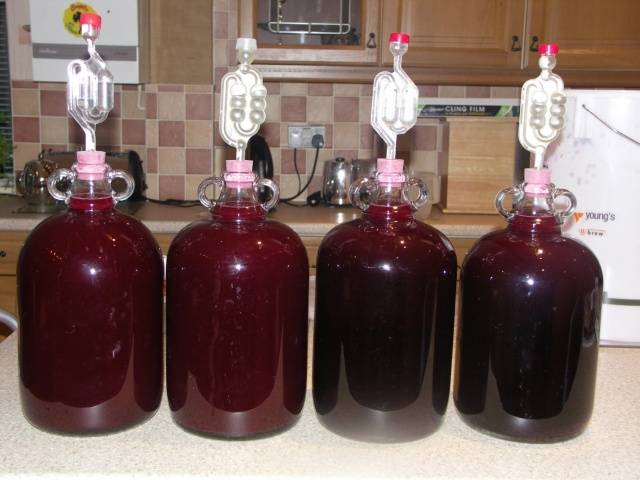
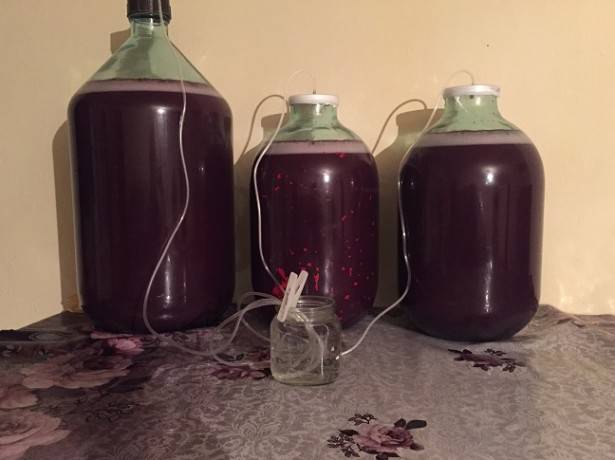
- Water seal. Those who were interested in how to make homemade wine know that the jars must be placed with a glove, pipes or a special lid. The fact is that for effective fermentation (and not souring), the wine at this stage does not need oxygen, and the carbon dioxide released in the process must also freely leave the juice. These conditions can be ensured by a water seal - a design that allows gases to escape freely, but does not allow oxygen into the wine bottle. This device can look different: a tube connecting a container of wine and a jar of water, a special lid for winemaking, a rubber medical glove with a pierced finger.
- The initial stage of fermentation. During this period, active fermentation of grape juice occurs, and the main thing now is to ensure the wine has sufficient temperature. For white wine 16-22 degrees is enough, red needs a little more heat - from 22 to 28 degrees. If the temperature fluctuates or falls below 15 degrees, fermentation will stop and the wine will turn sour.
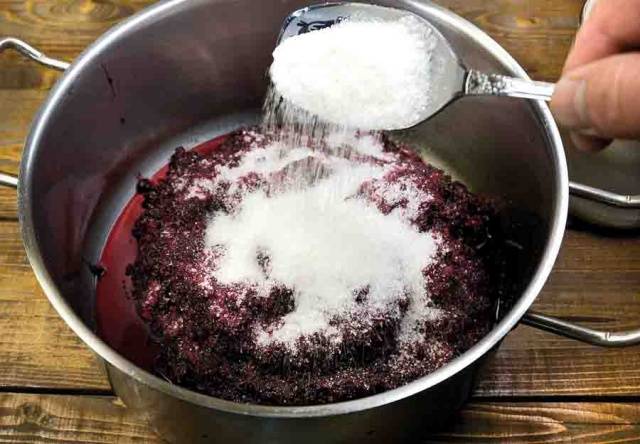
- Adding sugar. This is probably the most difficult stage in making homemade wine. The main task of sugar in winemaking is to be processed during the fermentation process and turn into alcohol. Giving the wine a sweeter and more pleasant taste comes only in second place. Need to know that 2% sugar can be converted into 1% alcohol. Any grape already contains sugar - an average amount of 20% (in most regions of the country). This means that if a wine recipe without sugar is chosen, the resulting drink will have 10% strength. But the sweetness of the wine will be zero, and not everyone likes this type of alcohol. It must be remembered that the maximum concentration of wine alcohol is 13-14%; if there is more sugar in the wine, it will not ferment and will adjust the taste of the drink. You need to determine the sugar content of grapes by the taste of the juice: it should resemble compote or tea in sweetness, be sweet, but not cloying. For normal fermentation, wine should not have more than 15-20% sugar. Therefore, sugar is added to wine in parts, adding the next batch only when the previous one is processed. The first 50 g per liter of juice is added on the third day of fermentation. When the wine becomes sour again, you can add the next 50 g of granulated sugar. This procedure is repeated 3-4 times for 14-25 days at the stage of active fermentation of the wort. People who make wine professionally recommend draining a couple of liters of juice and diluting sugar in them, and only then pouring this syrup into the bottle. You need to stop adding sugar when the wine does not sour for a long time - this means that sugar is no longer processed into alcohol.
- Removing wine from sediment. The fermentation period for homemade grape wine is 30-60 days. You can tell when this process is complete by a deflated glove or the absence of air bubbles in a jar of water.At this point, the wine has become clearer, and a loose sediment appears at the bottom of the bottle - fermented yeast. To prevent the dead fungi from imparting their bitterness to the wine, the drink must be strained from the sediment. One or two days before this, bottles and cans are raised above the floor: you can place the dishes with wine on a stool or on the table. When the agitated sediment settles again, the wine is poured into another container using a small hose (7-10 mm in diameter). The end of the hose is not brought closer than 2-3 cm to the sediment.
- Adjusting sweetness. The active phase of fermentation has ended, the sugar now added will not turn into alcohol, it will only improve the taste of the wine. Add sugar to taste, but do not add more than a glass for each liter of wine. Homemade grape wines can be fortified by adding vodka or alcohol (from 2 to 15% of the total volume). It should be remembered that alcohol will make the wine harder and worsen the natural aroma.
- Maturing homemade grape wine. The production of the drink does not end there; now comes the stage of “quiet” fermentation. It can last from 40 (for white varieties) to 380 days. If the wine has been sweetened, it is necessary to put the water seal back on; when no sugar has been added, a simple nylon cap is put on the bottle. Store young wine in a dark and cool place with a stable temperature - a cellar is optimal. As soon as the layer of sediment becomes more than 2-4 cm, the wine must be drained so that there is no bitterness.
- Storing finished wine. The complete readiness of the drink will be indicated by the absence of sediment in the bottle - now you can bottle delicious wine and store it for up to five years.
How to make unconventional homemade wine
Even the most delicious wine made from sugar and grapes can find a more interesting alternative. Simple, time-tested recipes will help you diversify your range of homemade wines:
- Polish table wine can be obtained by replacing sugar with raisins. In this case, the amount of raisins should be twice the required dose of sugar.
- For cooking wines in Hungarian You also need raisins, but you also need wine yeast. A wooden barrel with such a drink is buried in the ground and kept there for a whole year.
- You can put the wine for fermentation by first placing a bag in the bottle with chopped cloves. When the grapes have fermented, the cloves are removed so that the wine has time to become saturated with the spicy aroma of this spice.
- They even cook lemon wine, adding the zest of one lemon to the wort. When the product has fermented, you can add orange peel, lemon balm and a little mint.
- To prepare the famous Moselle wine You need to evaporate the elderberry and mint in a wooden barrel. When the container is saturated with these aromas, the broth is poured out, replacing it with young grape wine. You can also add a few mint leaves and elderflower flowers.
- Apple drink based on grapes, they do this: they regularly put fresh apples into the fermenting wort, replacing them with new ones after a few days (so as not to ferment).
By following the wine preparation technology described in the article step by step, you can get a wonderful drink at home that will be no worse than expensive store-bought grape wines. And by adding a little imagination, it’s easy to “invent” your own wine recipe, the secrets of which will be passed on from generation to generation.

