Content
- 1 Drip irrigation device for strawberries
- 2 Strawberry planting scheme with drip irrigation
- 3 What tools and materials will be required to manufacture the system?
- 4 How to make a strawberry watering system with drip tape
- 5 How to make drip irrigation for strawberries from plastic bottles with your own hands
- 6 Water consumption and irrigation rate for strawberries using drip irrigation
- 7 Recommendations
- 8 Advantages and disadvantages of using the system
- 9 Conclusion
Drip irrigation for strawberries allows you to maintain optimal humidity in the beds with berry crops. To properly organize the system, you need to study its operating principle and advantages.
Drip irrigation device for strawberries
Photos of drip irrigation for strawberries show that systems may vary in design. But the classic version of the design consists of several parts:
- water pumping unit;
- filtering equipment;
- main pipeline;
- branch pipes and drip tapes.
In some cases, the structure is also equipped with a fertigation device, which allows liquid fertilizers to be added to the soil simultaneously with watering.
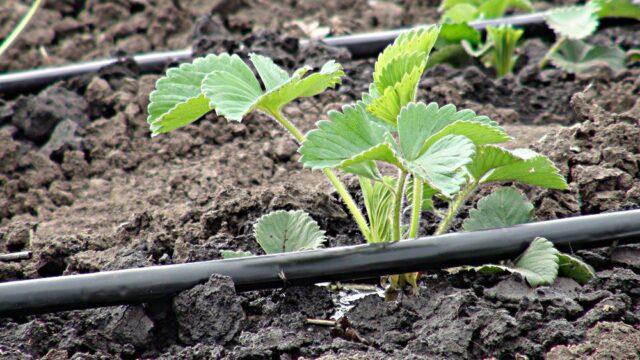
The most popular are tubular and tape drip systems.
Operating principle
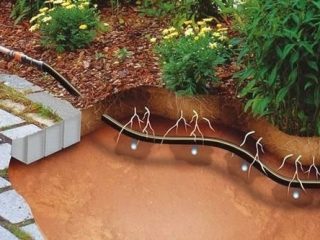
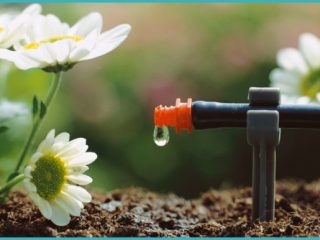
The operating principle of drip irrigation is very simple.Water from the main reservoir flows into tubes or ribbons that are evenly distributed throughout the strawberry beds. Through numerous small holes, moisture passes into the soil in small quantities, literally drop by drop.
When using the irrigation method, the soil does not dry out, but does not become waterlogged. Strawberry roots fully absorb the incoming moisture, the crop develops quickly and brings good yields.
Strawberry planting scheme with drip irrigation
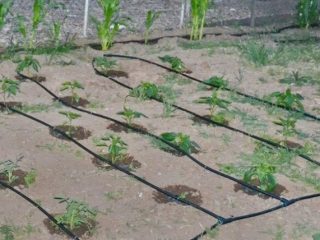
Drip irrigation for strawberries is usually organized when planting the crop on agrofibre. Non-woven dark material on the beds allows you to keep ripening berries clean and also prevents the growth of weeds. But it becomes inconvenient to carry out regular watering, so the drip design is the optimal solution.
Strawberries are planted according to the following scheme:
- The selected area is dug up and 3-4 buckets of humus or compost are added for every 1 m2 soil. After this, the beds are prepared - their width is determined in accordance with the width of the agrofibre.
- The non-woven material is carefully laid over the soil, with its absorbent side facing up. Along the edges of the bed, agrofibre is pressed with bricks or staples so that it does not get knocked down.
- Places for slots are marked on the surface of the nonwoven material. The distance between them depends on the variety of strawberry - for spreading large bushes, leave 50 cm of free space, for small and medium-sized bushes, 30-40 cm.
- In the marked places, make cross-shaped slits 5-7 cm wide and bend the corners inward.
- Strawberry seedlings are placed in the prepared holes, making sure that the roots of the crop are not crushed.
In the middle zone and northern regions, it is recommended to place a drip irrigation system on top of agrofibre when planting. In this case, with the onset of cold weather, it will be easier to dismantle it and store it. In the south, tapes or tubes can be laid underneath the non-woven material. They are installed immediately after preparing the beds, and only then agrofibre is laid on top.
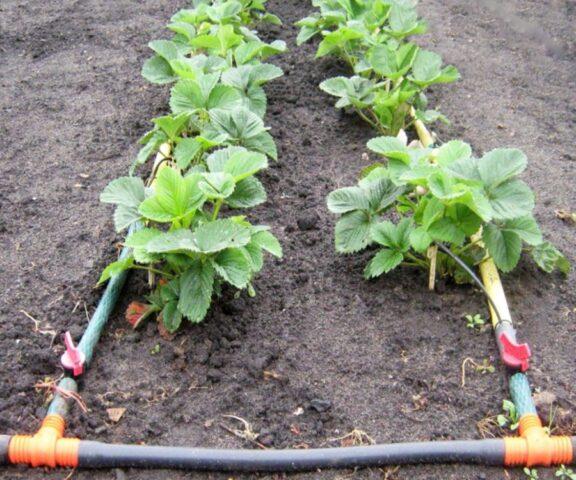
You need to place the drip irrigation system in the garden bed as close to the strawberry bushes as possible.
What tools and materials will be required to manufacture the system?
You can organize drip irrigation of strawberries in open ground with your own hands. To do this you will need to prepare simple materials:
- water tank 200 liters or more;
- plastic pipes with a diameter of 32 mm or more for arranging the main line;
- couplings for connecting pipes to a water tank;
- drip tape with a diameter of 20 mm and a wall thickness of 2 mm;
- connectors - best with a tap, to stop the water supply to a separate bed;
- plug for the free end of the main pipe;
- corners and fittings;
- washers and rubber seals;
- filter for purifying water from mechanical particles.
Videos about drip irrigation of strawberries under agrofibre demonstrate that instead of a special tape, you can use a regular rubber flexible hose of a suitable diameter and thickness.
To set up the system, you will also need to prepare some tools. Namely:
- a hacksaw with frequent small teeth for cutting main pipes;
- a sharp knife for separating the drip tape or hose;
- drill for making holes for connectors;
- adjustable wrench.
It is also advisable to prepare tow for work in order to reliably seal the joints from leaks.
How to make a strawberry watering system with drip tape
According to the classical scheme, drip irrigation of strawberries under the film is organized using a special tape. The first step is to plan the site - this will allow you to calculate how much materials and components will be needed.
The algorithm for arranging drip irrigation is as follows:
- A water tank is installed next to the beds in a convenient place. To ensure good pressure, the tank must be raised at least 2 m above ground level.
- A hole is made in the wall of the container with a slight indentation from the bottom and a tap is installed. A section of the main pipe is attached perpendicular to it.
- The main line is laid along the beds and places on it are marked for future connections with connectors. If necessary, the pipe is secured in several places for reliable fixation, and a plug is placed on the free end.
- Holes are drilled in the line and their edges are carefully cleaned, then rubber seals are installed and connectors are installed.
- A drip tape is connected to the system, with its irrigation holes facing upward. The end is tucked in and wrapped with electrical tape to prevent water from leaking. If necessary, the tape is also secured to the bed with wire staples; it must not be pinched.
The finished system is connected to a water tank. Drip irrigation for strawberries is carried out three times a week in hot weather for 25-45 minutes.
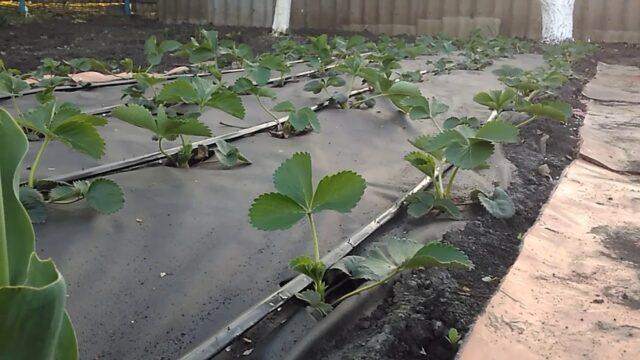
When first starting, the drip system must be turned on for 6-12 hours to properly moisten the beds
How to make drip irrigation for strawberries from plastic bottles with your own hands
The construction of an irrigation system from drip tapes requires a certain amount of money and effort. If the beds with strawberries are small, then you can install a simpler and more budget-friendly structure made from plastic bottles.
The system construction algorithm looks like this:
- Several 1.5-5 liter plastic bottles are washed and dried.
- Several holes with a diameter of about 0.4 mm are made near the bottom. You can use a hot needle, which will quickly and accurately pierce the plastic.
- Warm, settled water for irrigation or a solution of mineral fertilizers is poured into the bottles.
- The containers are placed between two strawberry bushes so that water from holes located on opposite walls flows to both plants.
- Holes are pierced in the plugs for air flow.
The advantage of drip irrigation from plastic bottles is the simplicity of the design. The main disadvantage is that the supply of moisture to strawberry roots cannot be regulated. Water will flow out of the container little by little, but constantly.
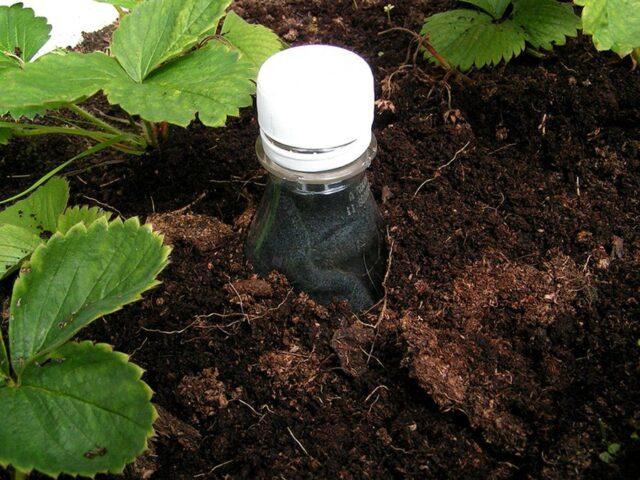
5 liter bottles with drip irrigation of strawberries last on average for 3-5 days
Another method of installing drip irrigation for strawberries suggests making a more advanced system based on a plastic canister. The scheme is as follows:
- A small hole is made in the wall of the bottle and a cocktail straw or a ballpoint pen is inserted into it.
- The tube is secured with sealant.
- The free end of the rod is sealed with a lighter, and then a hole is pierced in it with a needle to allow moisture to escape.
- Place the bottle between the strawberry bushes and point the tube directly under the root of the plant.
Before using for watering, the straw or pen shaft must be thoroughly rinsed.
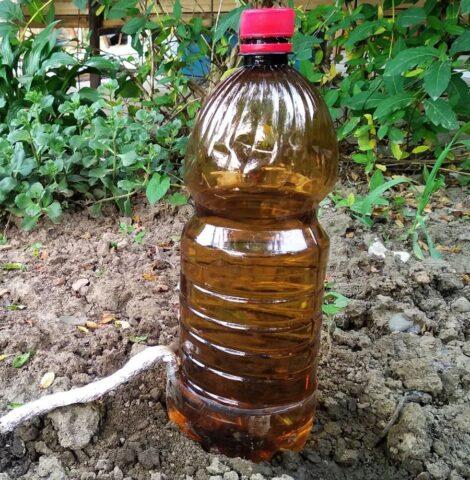
Instead of tubes for a drip system from a bottle, you can use harnesses or small diameter hoses
Water consumption and irrigation rate for strawberries using drip irrigation
A professional drip irrigation system, created using special tapes, does not imply continuous moistening of the beds. It is necessary to turn on the structure from time to time, and the frequency depends on the weather and the stage of the growing season:
- Immediately after planting, strawberries must be watered three times a day for two weeks. Each bush should require at least 500 ml of water.
- After the seedlings have taken root, the interval is increased and drip watering is started only once every 2-3 days, using 3 liters of liquid per 1 m2.
- During fruiting of strawberries, you need to turn on the structure more often. The specific frequency of watering, its duration and water consumption are determined individually. In the southern regions, the soil under plants dries out faster than in the north and Far East.
In general, rare but more abundant drip irrigation is considered more beneficial than constant poor soil moisture.
Recommendations
When using drip irrigation, certain rules must be followed to simplify system maintenance:
- It is recommended to choose plastic containers rather than metal ones as the main reservoir. The reason is that iron barrels rust quickly. As a result, the chemical composition of the water changes, and the resulting sediment can clog the main filters.
- It is allowed to pour not only ordinary liquid into the tank for drip irrigation, but also solutions of mineral fertilizers. At the same time, they need to be stirred very well, otherwise the main part of the fertilizer will simply settle at the bottom of the container.
- With the onset of autumn, before the cold weather, the drip system is dismantled and stored. It must first be cleaned and dried, and then thoroughly rinsed again in the spring before a new installation.
Drip irrigation of strawberries in a greenhouse is no less popular than in open ground. The installation diagrams and algorithms, as well as the rules of use, are exactly the same. Only water consumption rates can differ; they are determined in accordance with the actual rate of soil drying.
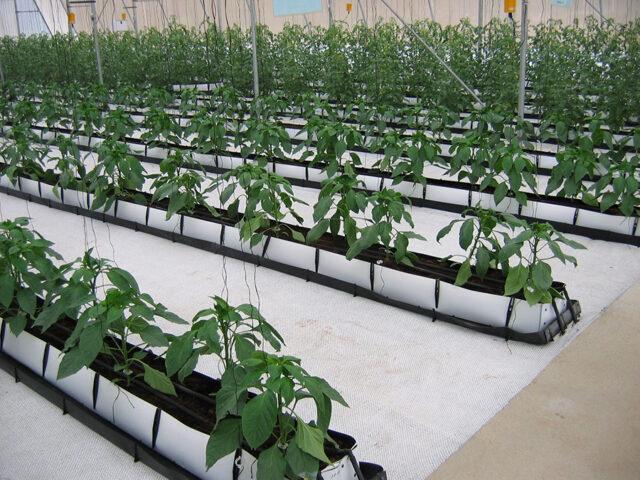
In a greenhouse, drip watering for strawberries is required less often than in a vegetable garden.
Advantages and disadvantages of using the system
Watering strawberries using the drip method has its pros and cons. The advantages include:
- saving water - liquid is consumed approximately half as much as when using other methods;
- the possibility of dosing watering - depending on the situation, you can reduce or increase the flow of moisture to the bushes;
- autonomy - the drip method does not require constant monitoring; strawberries can receive water even in the absence of the gardener;
- the possibility of applying liquid fertilizers - fertilizing can be easily combined with watering without unnecessary hassle;
- Convenience of moistening strawberries when planted densely - when using this method, water does not get on the leaves of the bushes.
Drip irrigation is convenient because it helps prevent the development of fungi. The latter often occur in soil that is too damp, and when using the irrigation method, even in a greenhouse the soil remains moderately moist.
As for the disadvantages of drip irrigation, these include several points:
- construction of a structure requires time, effort and certain monetary costs;
- Blockages may occur in the line and supply tubes, reducing the effectiveness of humidification and causing strawberries to wilt.
With drip irrigation, the roots of the berry crop grow very quickly and abundantly. Sometimes this leads to the bushes intertwining and beginning to interfere with each other’s development.
Conclusion
Drip irrigation for strawberries can be used in an indoor greenhouse or garden. The system is easy to make with your own hands, and it is usually more convenient to use than moistening the plantings in the classical way.
