Content
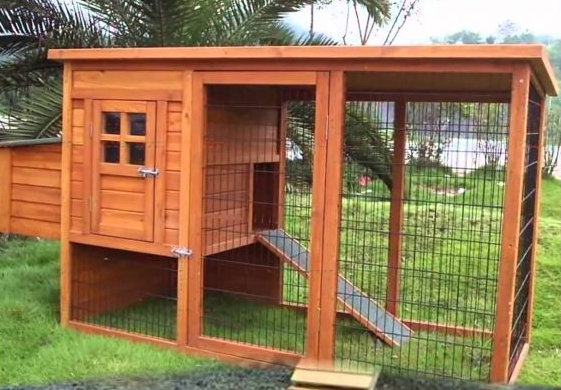
Wooden pallets, used for transporting goods, can be called an ideal material for the construction of simple outbuildings for a homestead. Garden furniture, fences, and gazebos are built from simple materials, so it won’t be too difficult to build a chicken coop from pallets with your own hands. This option will help save money and provide the whole family with eggs and meat.
How to use pallet material correctly
Most buildings based on wooden pallets are made in two ways:
- By disassembling the pallet into separate boards and bars, with their further use as lining or edged boards, from which almost any structure can be made;
- Assembling the supporting frame of the chicken coop from whole pallets. In this way you can quickly make the walls and roof of a relatively large building.
From what material and how to build a chicken coop, each owner decides according to his own understanding.In order to build a free-standing full-size chicken coop from ready-made pallets, you will need to make a strong pile foundation and a timber frame, otherwise the structure will turn out to be unstable and unsafe for the chicken.
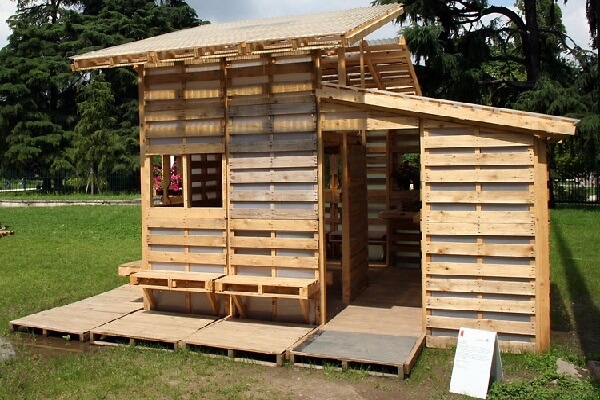
For example, you can build a chicken room from Euro pallets according to the diagram shown in the photo. To prevent the chicken coop from collapsing under its own weight, vertical posts are installed inside the building - supports that support the bulk of the roof and roof frame.
In this case, pallets are used as material for the walls, and the main part - the frame of the chicken coop and the roof - will have to be made from purchased timber and slats, which will significantly increase the cost of construction. In addition, even such a simple version of the chicken coop will have to be sheathed with boards and insulated if the project provides for winter use of the chicken coop.
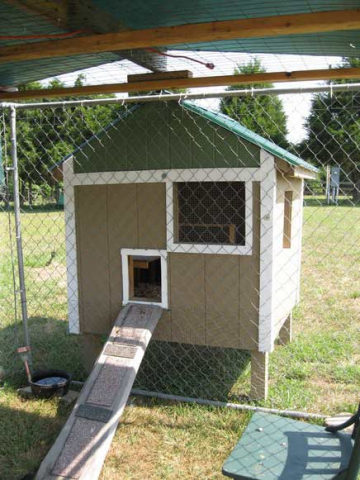
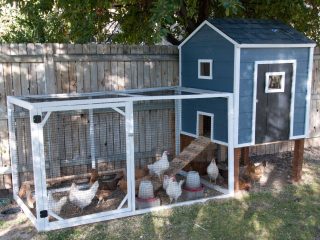
Therefore, if you want to assemble a room for chickens from boards from a pallet, then it is better to build the house itself according to a compact scheme, as in the photo.
We are building a small house for chickens
The boards and bars from which pallets are assembled are, as a rule, treated with an antiseptic during the manufacturing process, so additional coatings with preservatives are not required.
To build a frame version of the chicken coop you will need:
- Knock down the base of the building and the frame of the chicken coop, make windows, an entrance and a door to the room.
- Assemble a gable roof.
- Cover the walls with clapboard or siding panels, hang the door and cover the roofing.
For the version of the chicken coop shown below, construction pallets measuring 1270x2540 mm were used, used for transshipment work at transport hubs, warehouses and marine terminals, photo.
The dimensions of the chicken coop box are 121x170 cm, allowing the assembled body to be transported using a regular onboard Gazelle.
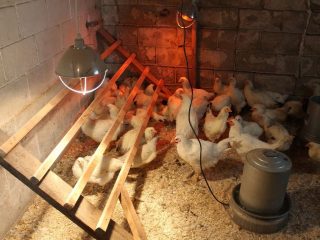
The small size of the room allows you to comfortably accommodate 5-7 chickens.
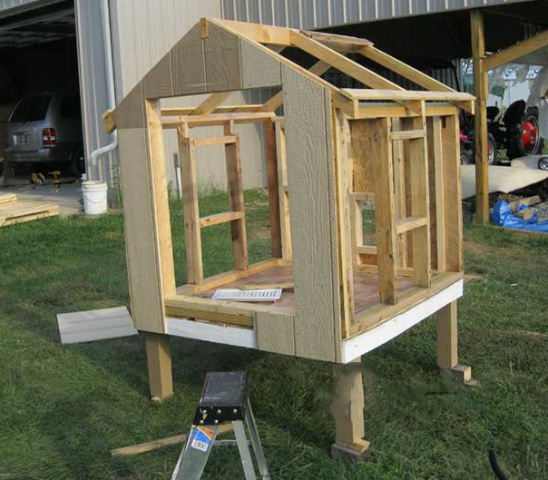
Assembling the base and frame of the building
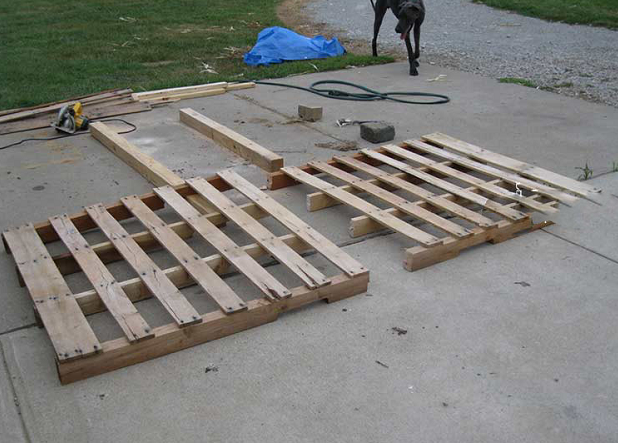
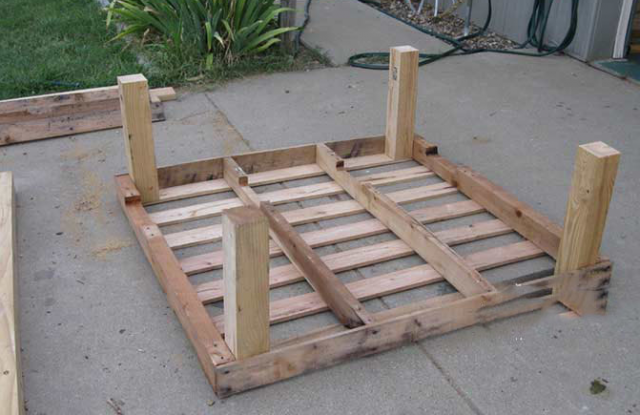
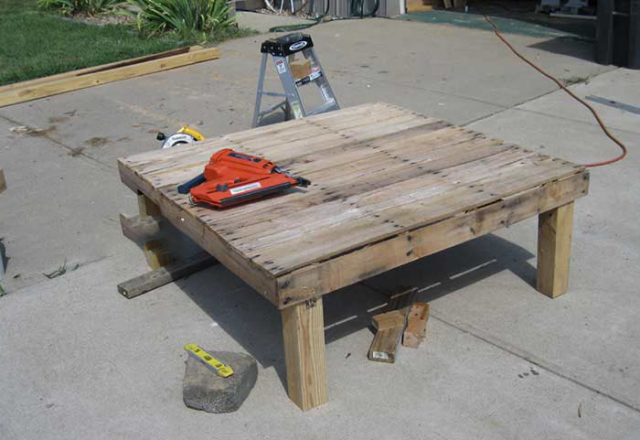
To base the chicken coop, you need to knock down a strong and rigid box that will hold the vertical posts of the frame. To do this, we cut the pallet in half and get a workpiece measuring 120x127 cm. We use the resulting timber in the process of cutting one of the halves to make legs, and sew the surface of the future floor with a board, photo. In the future, it is necessary to lay a sheet of tin or PVC linoleum on the boards so that bird droppings can be quickly and conveniently removed from the chicken coop.
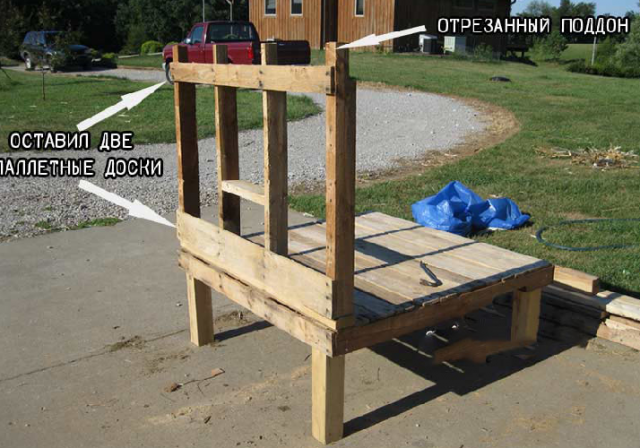
Next you will need to make the walls of the chicken coop. To do this, cut one whole pallet into two halves and remove part of the central boards. Each of the halves of the pallet will serve as the basis of one of the side walls of the building, photo.
We install them on the base and nail them. We use the remaining boards and beams to make windows and the top frame of the chicken coop.
Roof making and finishing operations
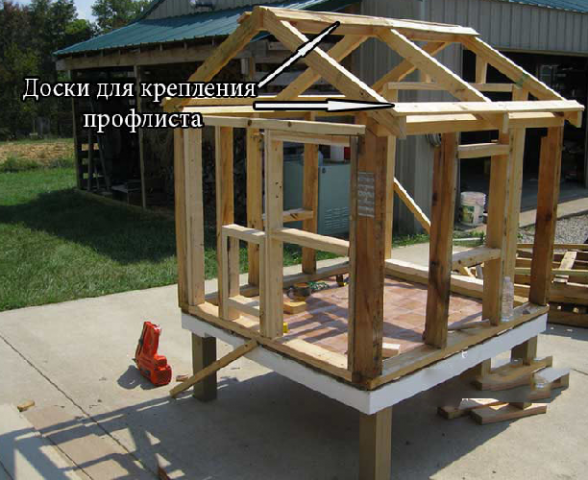
At the next stage, you will need to make a rafter system for the gable roof of the building. The small size of the chicken coop allows you to build a roof frame from two long beams left over from a pallet. After installing the triangles on the top frame of the walls, we connect the tops with a ridge beam, and in the middle part we fill one additional rafter beam.
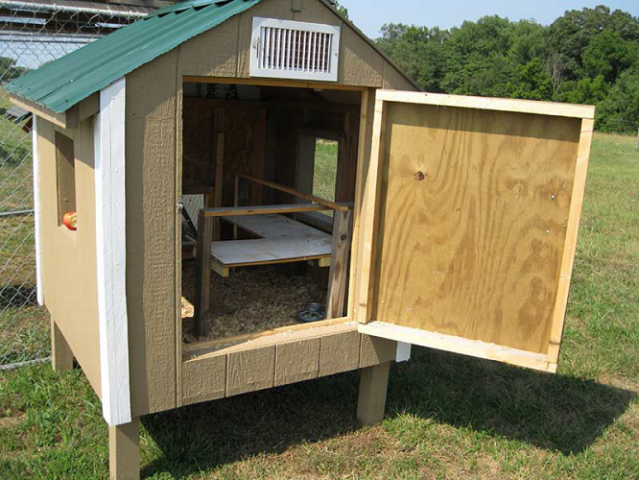
After leveling the rafter system of the chicken coop, it is necessary to install a hatch under the future entrance door. To do this, we cut out a door frame in the shape of the letter “P” from the boards remaining from the pallet and install it on the front wall of the chicken coop. We hammer the back wall with timber and place lintels under the future window. As a roofing covering, ordinary corrugated sheeting is used, laid on a layer of roofing felt. From the remains of the pallet timber, corner vertical posts are stuffed, increasing the rigidity of the entire box.
Inside the building we install two shelves for laying hen nests and two beams for a perch. The walls can be lined with clapboard or siding, as in this case. In the sewn panel cladding we cut out windows for installing a window frame with bars, and treat the inner surface of the chicken coop with acrylic varnish. The outer walls and base of the building are painted with acrylic paints.
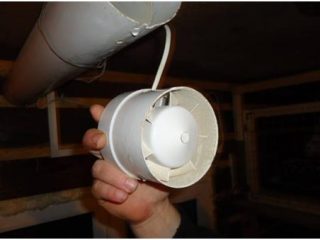
There is no film vapor barrier on the walls; most of the water vapor will be removed due to good ventilation of the chicken coop. The door is made from pallet boards and a piece of plywood, resulting in a lightweight and at the same time rigid structure that does not require reinforcement with steel plates and spacers.
Two boards from the pallet are used to construct a ladder or gangway along which chickens can climb into the room. The lower window or vestibule is closed with a vertical latch and raised with a cord.
Conclusion
Most do-it-yourselfers speak quite positively about the quality of the boards and timber from which the pallets are assembled. In fact, this is the second reason, after the availability of material, why a wide variety of carpentry buildings are so readily built from pallets. The case turned out to be surprisingly heavy and durable.To install on the ground, it is enough to pour and level a layer of crushed stone, hammer in a couple of scraps of reinforcement and tie the chicken house to them.
