Content
The method of increasing productivity according to the method of the American vegetable grower Mitlider is based on the use of narrow beds. The simplest technology does not require large investments and is available to any beginning gardener. Every summer resident is capable of making mitlider beds on his own site with his own hands, you just need to follow the instructions and have the desire.
What is the essence of the Mittleider method?
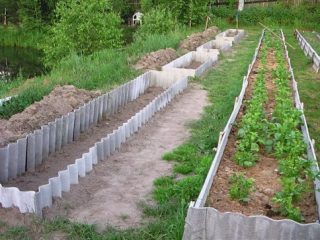
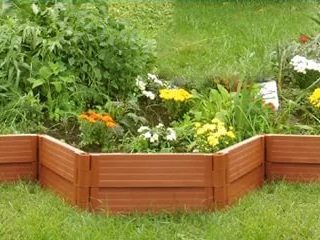
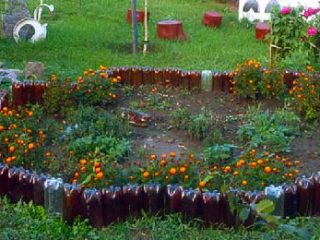
The Mitlider method is based on the specifics of arranging beds and planting vegetables. First of all, let's deal with the cultivation of the land. The famous vegetable grower proves that there is no need to dig up all the soil in the garden every year. The site should be marked out only into narrow beds with wide row spacing. The beds themselves have special requirements. Firstly, they must be long for the entire garden and strictly even. Secondly, earthen mounds must be made on the beds, that is, a kind of edging.
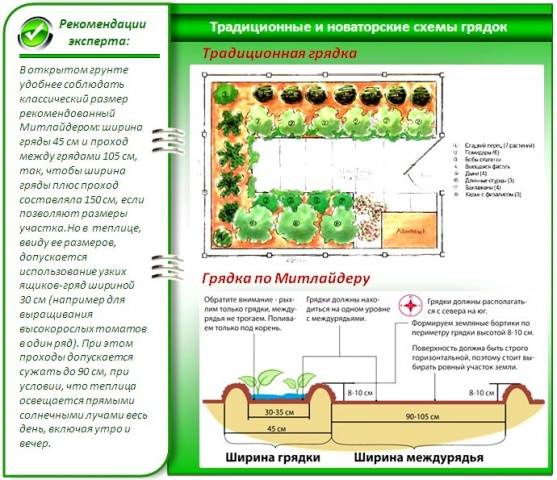
Standard bed parameters:
- length – 9 m;
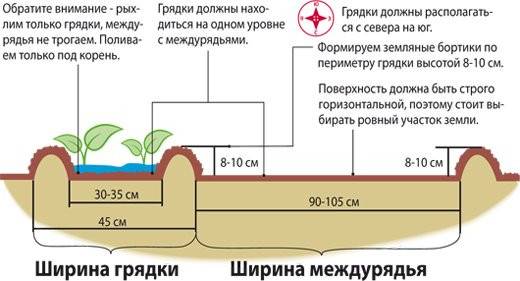
- width – 45 cm;
- height of bulk mounds – 10 cm;
- row spacing – 1.5 m.
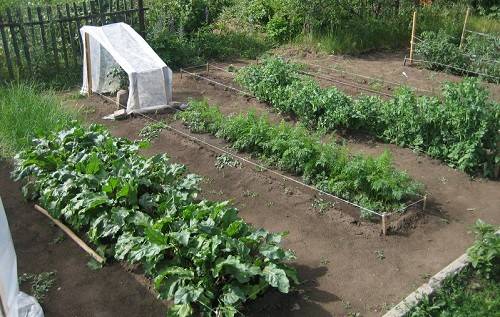
Mittleider justified this size of the bed with optimal space and better access to light for the plants. The garden plot becomes easy to maintain.In a narrow bed, the vegetable grower is able to approach the plants from both sides, which simplifies weeding weed. Wide row spacing creates free space. Plants receive light from all sides. It’s easy to roll a garden wheelbarrow along the rows or lay irrigation pipes.
It’s easy to make a narrow bed according to Mitlider, and you don’t have to make it again every year. The long-term process of operation involves only adjusting the edges of the edging. It is advisable to sow the row spaces with grass. Vegetation will retain moisture in the soil.
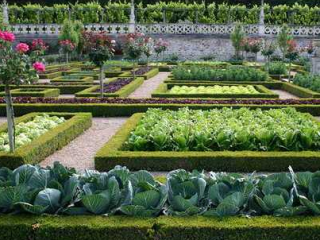
The next feature of the Mitlider method is based on the rules for planting vegetables. Crops are placed in two rows at a distance of 10–15 cm from the earthen border. In this case, a row spacing of 15 to 20 cm wide is formed between the plants themselves. The spacing of plants in one row depends on the characteristics of the variety and agricultural technology of the crop, but in any case, crowding should not be allowed.
Opponents of the technology argue that when using the Mitlider method, the number of plants planted decreases. In other words, the garden space is being used unwisely. To refute such misconceptions, calculations were carried out. Two plots of 1 hectare of land each were taken, where conventional planting was carried out with a row spacing of 70 cm, and according to the Mittleider method. It turned out that the first plot accommodated 43 thousand crops, and the narrow beds accommodated 66 thousand plants.
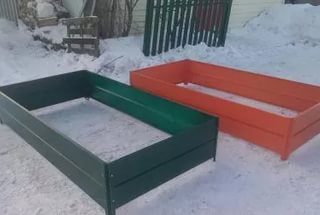
Some domestic vegetable growers have long appreciated Mitlider's beds, but they could not do without their improvement. This is due to saving space in small dachas. So, our vegetable growers reduced the row spacing to 0.9 m, and sown radishes, greens or non-vine beans between the main crops.
Is it always possible to apply the Mittleider method on your site?
The creator of the method himself identified bad places for arranging narrow beds:
- land plots with high groundwater levels;
- in lowlands where there is a threat of flooding after rain or spring melting of snow;
- areas with complex terrain, where hills abruptly give way to depressions, which does not allow for ideal horizontality in the garden bed;
- shaded or windy gardens;
- areas without irrigation water.
Having analyzed all the prohibitions, we can conclude that Mitlider’s beds are not suitable for many domestic dachas. Most suburban areas are located in wasteland without water sources, swampy areas or lands with difficult terrain.
Composition of fertilizers for growing crops
The technology for growing vegetables is not limited to just arranging beds. You will need to prepare two mixtures of fertilizers, and apply them strictly according to Mitlider’s recommendations.
Preparation of mixture No. 1
The first fertilizer mixture is prepared only after determining the properties of the soil. The analysis is carried out independently, using litmus paper, or data on the average annual precipitation in a certain area is found.
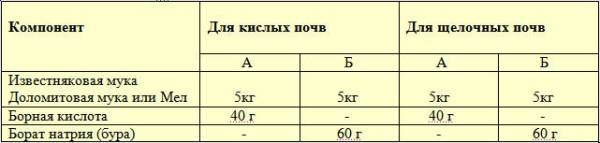
If the annual precipitation exceeds 500 mm or the paper turns red, it means that the soil acidity pH is less than 4.5. In this case, the fertilizer is prepared from the following ingredients:
- lime or chalk powder – 5 kg;
- Boric acid powder - 40 g, but can be replaced with brown acid - 60 g.
If the litmus paper is blue or the annual precipitation is up to 450 mm, the fertilizer is prepared from the following ingredients:
- gypsum – 5 kg;
- boric acid powder – 40 g or borax – 60 g.
The amount of fertilizer is mixed with a large reserve. It can be stored for many years, most importantly in a dry place.
Preparation of mixture No. 2
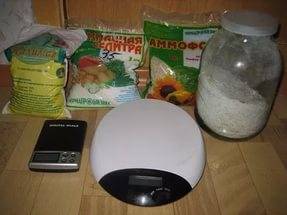
Fertilizer number two consists of substances vital for garden crops. Mitlider derived the general formula for the composition of fertilizer as a percentage:
- nitrogen –11%;
- phosphorus – 6%;
- potassium – 11%.
It is better to buy this composition in a store, since it is difficult to prepare at home. If you have good experience in this matter, to prepare your own fertilizer at a specialized retail outlet, you need to buy all the components, a mixture of which will help obtain the required percentage of substances.
The procedure for independently arranging Mitlider beds
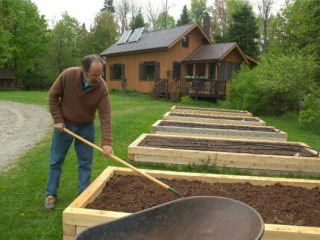
Making beds using the mitlider method begins with fertilizing the soil, provided that the pegs are broken in the area and the cords are stretched:
- Fertilizer number one is evenly scattered along the marked boundaries of a narrow bed. Consumption is maintained at the rate of 100–300 g/p. m. Immediately sprinkle fertilizer prepared according to the second recipe on top. Consumption is 50 g/p. m.

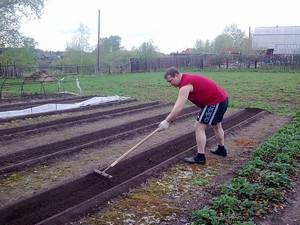
- After applying the fertilizer, the soil is carefully dug up to a depth of a maximum of 20 cm. It is important to make the soil loose, so all lumps are broken up with a rake or other convenient tool.
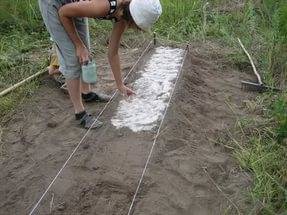
Now it’s time to make the edging, that is, raise 10 cm high earthen mounds from the sides and ends. On a properly formed bed, the distance between the side mounds is approximately 35 cm.
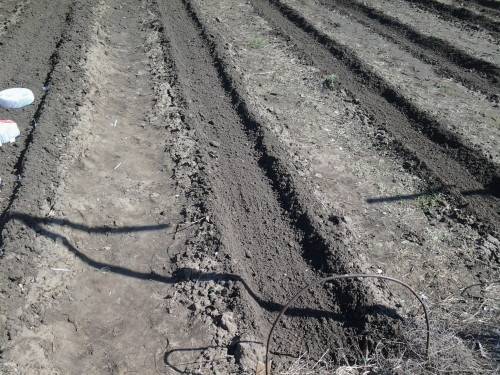
Form the edging of the bed in this order:
- Along the entire length of the bed, the soil dug up with fertilizers is raked strictly in the center;
- On one side, a rake grabs the soil from the center of the mound and shovels it under the cord, forming a side. Here it is important to take about half of the soil from the hill, since the second part will be needed for the opposite side.
- A similar procedure is repeated on the other side of the bed until a border is formed along the entire length.
- When the side boards are ready, the remaining soil is leveled in the center with a rake. At this time, you need to heat up the end sides.
It is advisable to check the finished bed for horizontalness with a laser level. Large defects are corrected, and after achieving positive results, they begin planting.
The video shows the technology for making beds according to Mitlider:
It’s not difficult to make Mittleider beds in your garden, as long as conditions allow. If you have experience in vegetable growing, you can try to improve them.