Content
- 1 Characteristics and description of the Exhibition onion variety
- 2 Advantages and disadvantages
- 3 When to plant Exhibition onions
- 4 How to plant Exhibition onions correctly
- 5 Caring for Exhibition onions in open ground
- 6 Collection and storage of Exhibition onions
- 7 Conclusion
- 8 Reviews of the Exhibition bow
Exhibition onion is a Dutch variety of onion, included in the State Register of Russia in 2000. It has not only good taste, but also unpretentiousness in cultivation, due to which it is popular among gardeners.
Characteristics and description of the Exhibition onion variety
Exhibition, bred by the Dutch company Bejo Zaden, is practically no different in appearance from other varieties of onions. But upon careful study, the characteristics of the plant and its unique qualities become noticeable.
Appearance
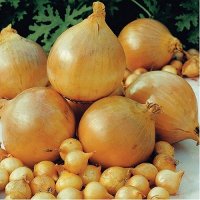
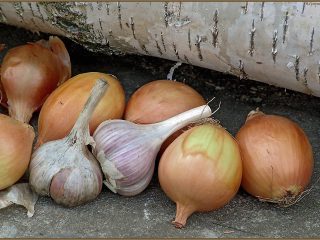
Exhibition onions have large, oval-elongated heads. The fruits are covered with a light yellow husk, which is easily separated when peeled. The flesh of the bulbs is white and juicy, and has a pleasant sweet and mild taste.There is no pungency or bitterness in the Exhibition variety.
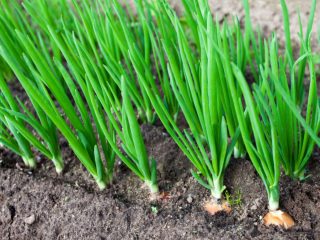
When grown in open ground, onion heads reach an average weight of 170-300 g. When using the seedling method, you can get truly huge turnips weighing 800-1200 g. The feathers of onions are bright green, erect, suitable for food consumption.
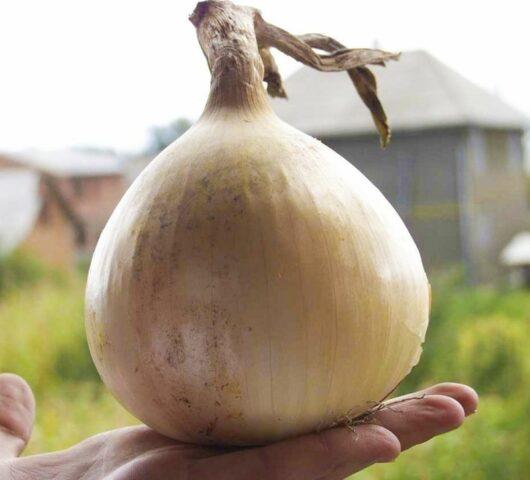
The Giant Exhibition Onion often appears at agricultural shows.
Ripening time and yield
Exhibition refers to the mid-late varieties of onions. About 120 days pass from the emergence of seedlings to technical ripeness. Yield indicators depend on specific growing conditions, but on average from 1 m2 In the garden you can collect up to 5 kg of bulbs.
Turnips contain a large amount of vitamins and minerals, they contain antioxidants and natural sugars. Consuming Exhibition is beneficial for the immune system, digestion and cardiovascular system. Onions are mostly eaten fresh in salads or used as preserves.
Resistance to diseases and pests
Onion Exhibition F1 has average immunity. It is resistant to most fungal diseases and parasites, but can suffer from downy mildew and rot. Among insects, onion fly and stem nematode are dangerous for the variety.
Advantages and disadvantages
Onion Exhibition is popular due to its many advantages. But along with this, the variety also has weaknesses.
Pros: · good productivity; · large turnips; Can be sown before winter; · both bulbs and feathers are suitable for consumption; · soft taste; · no characteristic pungent odor; · several propagation options - by seeds, through seedlings, seedlings. | Minuses: · suffers from some fungi and pests; · when grown in open ground, the bulbs are small; · not suitable for long-term storage. |
The Exhibition bow has more advantages than disadvantages. The main disadvantage of the variety is considered to be poor keeping quality. Turnips cannot be stored in a cool room for more than 3-4 months - even in good conditions they begin to rot. Thus, it is necessary to use the entire harvest within a limited time.
When to plant Exhibition onions
The time for planting Exhibition onions depends on the climate and the chosen growing method. In the middle zone, the crop is transferred to the garden in mid-May. When using the seedling method, seeds can be sown in March.
When growing Exhibition onions in Siberia and the Urals at home, they begin to plant them in February, and in early June they are transferred to the soil. In the south, you can sow the crop outdoors in early or mid-April. Moreover, the seedling method is rarely used; usually the seeds are planted directly into the soil.
How to plant Exhibition onions correctly
There are several ways to plant the giant Exhibition onion. Most often, the crop is grown first as seedlings and then transferred to the ground. But sometimes they use seedlings or plant seeds directly in the garden.
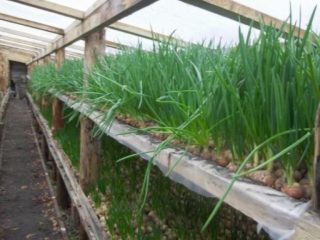
Seedlings
Growing seedlings allows you to get the largest and juiciest bulbs possible. The algorithm looks like this:
- The seeds are soaked and disinfected.
- The material is sown in a nutrient substrate.
- Water generously from a spray bottle.
- They put it in a shaded place under a film for a week and a half, and then transfer it to the light.
Seedlings are grown for an average of two months, and in May or early June they are transferred to the garden.
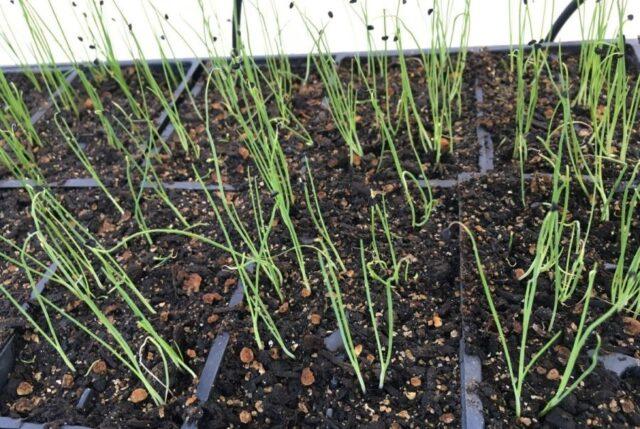
Before transferring to an outdoor garden, Exhibition onion seedlings must be hardened off
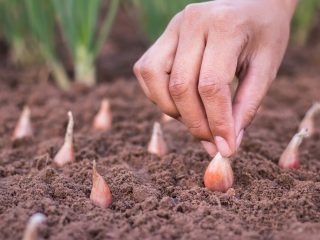
Onion sets
You can grow Exhibition onions from sets, although the method is not particularly popular, since planting material cannot be found on sale. But small turnips can actually be purchased from some private traders, so the method is still worth considering.
Sevods are planted in the ground in early May or in home containers at the end of winter. The material is first soaked in a weak solution of potassium permanganate or in a fungicidal agent to protect Exhibition from fungus. Then the bulbs are buried in a nutrient substrate, properly moistened and grown under standard conditions and rules until fully ripe.

To disinfect the seeds, you can heat them in the oven at 40 °C
Seeds in open ground
When planted in the ground by seeds, Exhibition sweet onions grow quite small. But direct sowing in the garden allows you to avoid spending time and effort on caring for seedlings and their subsequent transfer to the open sky.
The algorithm for planting onions on the site is as follows:
- Shortly before sowing, Exhibition seeds are placed in a piece of damp cloth, folded in half, and left for 4-5 days, regularly sprayed as they dry. The procedure allows you to evaluate the germination of the material - a high-quality onion should germinate slightly.
- Seeds of the Exhibition variety are soaked for 15-20 minutes in a light pink solution of potassium permanganate.Potassium permanganate fights well against microorganisms and fungi and strengthens the immunity of onions.
- Using a liquid starch paste, the seeds are applied to long narrow strips cut from toilet paper at intervals of 5 cm.
- The soil on the site is dug up and loosened, and 50 g of wood ash is added per meter and the soil is spilled with Fitosporin. The solution is prepared at the rate of 15 ml of the drug per 10 liters of water.
- Furrows about 2 cm deep are made in the garden bed and paper strips with seeds are carefully placed in each of them. The top of the planting is covered with earth.
- The beds are moistened abundantly with a spray bottle, and then covered with film until shoots appear.
If desired, sowing Exhibition onions into furrows can be done without first securing the seeds on paper tape. But in the latter case, the planting procedure will take less time, and the material will be distributed as evenly as possible.
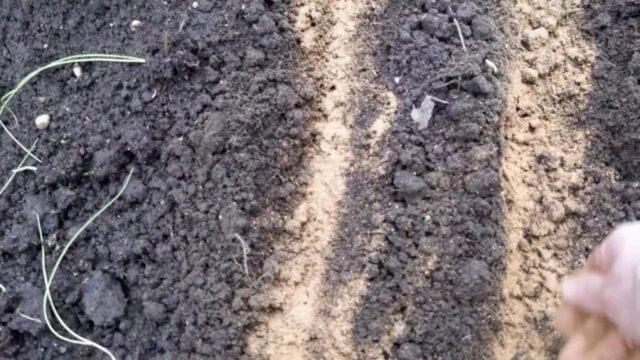
The site for planting the Exhibition variety must be chosen to be sunny and without stagnant water.
Is it possible to plant Exhibition onions before winter?
Most often, the variety is planted in the spring. But it is also allowed to sow Exhibition onions before winter. The landing algorithm will be as follows:
- On the site, choose a well-lit place on a slight hill.
- Prepare raised beds for onions, fertilize the soil with humus and sand.
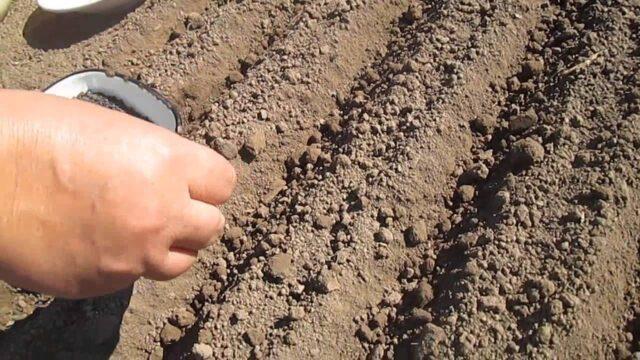
- Make grooves of standard depth, leaving 20 cm between rows.
- Seeds are sprinkled densely into the soil - there is no need to observe intervals, since not all of the material will sprout in principle.
- Cover the beds with soil and water with settled warm water.
Immediately after planting before winter, the giant Exhibition onion should be mulched with sawdust, peat or straw in a 2 cm layer.Organic shelter will slow down the evaporation of moisture and protect the plant from winter frosts.
When planted in winter, Exhibition onions become more hardy and respond better to temperature changes
Caring for Exhibition onions in open ground
The agricultural technology of the Exhibition onion is quite simple. The culture requires the gardener to comply with basic growing conditions.
Watering
With a lack of water, Exhibition onions slow down their development and cannot gain good juiciness. You need to water the plant so that the soil in the beds is always moist. In hot weather, water can be added daily. Watering is usually carried out in the evenings, using pre-settled liquid at room temperature.
But about a month before harvesting, additional moistening of the beds must be abandoned. Otherwise, the bulbs will become not just juicy, but watery, which will shorten the already short shelf life.
Top dressing
Exhibition salad onions are fed three times a season. Organic fertilizers are usually used, for example, mullein infusion.
For the first time, fertilizing is applied during watering 14 days after planting, and then the procedure is repeated twice more with intervals of three weeks. As in the case of moisture, stop fertilizing the onions a month before final ripening.
Weeding and loosening
Exhibition grows well on breathable soils, so the beds are loosened after watering 1-2 times a week. At the same time, the plantings are weeded.Weeds growing in the immediate vicinity of onions harm the development of the crop and rob it of moisture and valuable substances.
Mulching
To slower evaporation of moisture from the soil, it is recommended to mulch the beds with Exhibition onions with straw or sawdust. A layer of protective material not only prevents the soil from drying out, but also slows down the germination of weeds. High-quality mulching allows you to spend less time weeding and loosening the beds.
Pest and disease control
Exhibition onions are considered relatively vulnerable to diseases and parasites. The dangers for him in the area are:
- peronosporosis - the disease leaves a grayish-purple coating on green feathers, leads to lodging of feathers and slows down the development of onions;

The first symptoms of peronosporosis appear on onions already in early May
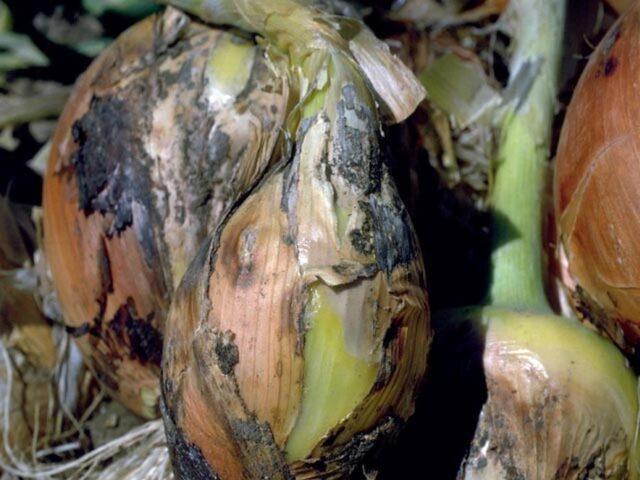
- fusarium - the fungus attacks the root system, the bottoms of the turnips become covered with a white or pinkish coating, the succulent scales soften;

Symptoms of fusarium usually become noticeable only after harvest
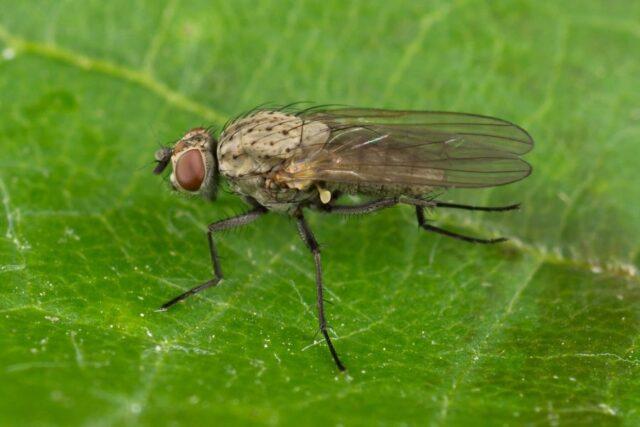
- onion fly - insect larvae feed on onions from mid-May, the heads of the plant rot, and the feathers turn yellow and dry;

Spraying with tobacco infusion works well against onion flies.
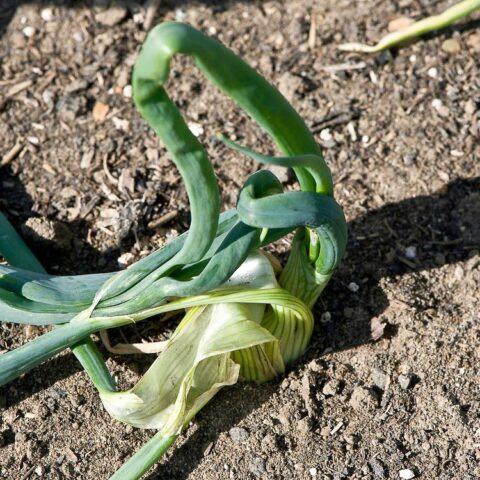
- stem nematode - the pest eats the bulbs, and as a result, the green leaves quickly become discolored and deformed.

When infected with a nematode, the affected plants are simply burned

Cultural diseases are difficult to treat, so fundamental attention should be paid to prevention. Fungi overwinter in plant debris and soil. To prevent infections, the beds must be regularly loosened and freed from debris. Shortly before planting the crop, it is useful to spill the soil with boiling water, fungicides or a solution of potassium permanganate.
Pest control is usually carried out using tobacco infusion, a solution of laundry soap and wood ash. The use of chemicals is not recommended as they may negatively affect the edibility of the crop.
Collection and storage of Exhibition onions
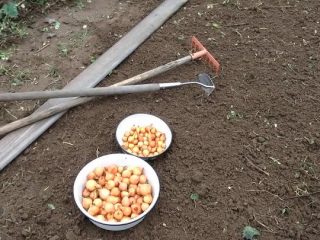
Bulbs of the Exhibition variety are usually harvested in the second half of August after the greenery of the plant turns yellow and fades. You need to choose a sunny, warm day; if it has rained recently, it is better to wait until the soil dries.
The turnips of the crop are mostly located above the surface of the ground, so it is quite easy to remove them from the ground. To speed up the process, you can use a pitchfork, but with caution. The fruits must not be damaged, otherwise the onions are likely to quickly rot during storage.
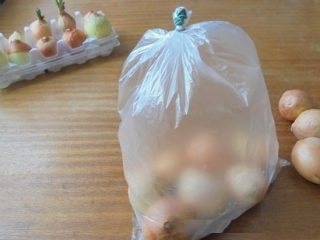
After harvesting, Exhibition needs to be dried from moisture in the sun. Then the turnips are transferred to a shaded, well-ventilated attic. When the necks dry and become thinner, all that remains is to remove the excess husks and place the fruits in clean wooden boxes.
Exhibition onions should be stored in a dark room with stable low humidity and at a temperature of about 5 °C. In such conditions, it retains its taste and value for 3-4 months.
Conclusion
Exhibition onions are valued for their good taste and very large turnips when grown in seedlings. The variety is not suitable for long-term storage, but it is convenient to use for salads and for preserving for the winter.
Reviews of the Exhibition bow