Content
Having your own walk-behind tractor in the household will become an indispensable assistant when cultivating the garden, caring for animals, as well as performing a number of other agricultural works. Nowadays the consumer is offered a huge selection of such equipment, but not everyone can afford its cost. This does not mean that you should abandon the idea of making your work easier. Now we will look at how to make a walk-behind tractor with your own hands from available spare parts from old equipment.
Motoblock device
The general principle of the design of walk-behind tractors of different brands is almost the same. Any unit consists of a motor, gearbox, frame, chassis, clutch and controls. According to this principle, you will assemble a walk-behind tractor with your own hands from old spare parts.
The power of the unit will depend on the engine found. For homemade products, it is better to use an air-cooled motor, for example, from a motorcycle or similar equipment. The walk-behind tractor can even be equipped with an electric motor with a power of 2 kW or more, but it will have to be connected to a three-phase network. It is difficult to find a single-phase electric motor of such power, and if you run a three-phase electric motor through capacitors, some of the power will be lost.
The clutch must be installed on the walk-behind tractor when using any type of engine. This unit is responsible for transmitting rotating torque to the wheels from the motor. It’s good when, along with a gasoline motorcycle engine, you have a native clutch. In this case, you won't have to adjust anything.
All motors have a high rotation speed, and the walk-behind tractor must move slowly. A gearbox installed between the engine and the drive wheelset will help reduce the speed. This unit consists of a set of gears of different diameters, which make it possible to reduce the speed of rotation of the wheels.
Let's start assembling
When all the necessary spare parts have been selected, you can begin assembling the homemade product. The first step is to weld the frame. All components of the walk-behind tractor will be attached to it. For your reference, we have presented the frame diagram in the photo.
You can calculate your own dimensions, as they may differ from the units available. The frame is made of a metal pipe with a cross-section of 32 mm. It’s good if you can bend the solid structure, but the jumpers will still have to be welded.
In the diagram, element No. 8 is needed to attach the mechanism that allows you to tension the chain. The chain gearbox and chassis will be attached to part No. 5. You can also attach a transport cart here.
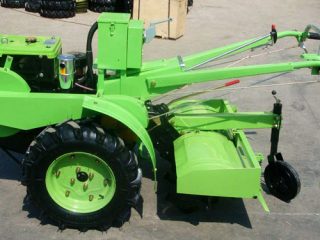
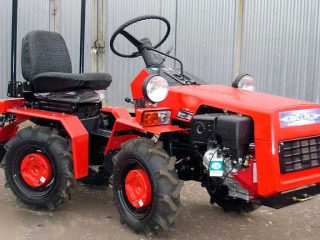
The following photo shows an air-cooled motor. The design of the walk-behind tractor in question uses an engine from “Ant”.
A mount is installed on the common frame of the walk-behind tractor for the engine. Its diagram is shown in the photo. The design is an arc curved from a pipe with a diameter of 32 mm. Three hinges are welded from a steel strip in places corresponding to the location of the motor mounting holes.
The motor mount must move along the frame. This is necessary so that the chain can be tensioned. After installing the engine, they begin to work on the muffler. It is moved to the side so that exhaust gases do not reach the operator.
The next unit is a chain gearbox. The diagram of its device is shown in the photo. The mechanism has two stages, where the speed reduction occurs due to two sprockets with 57 and 17 teeth.
You can make a wheelset for a walk-behind tractor yourself or remove it from old equipment. In our example, the unit was removed from the SMZ motorized stroller. In the photo you can see a diagram of additional attachments for wheels.
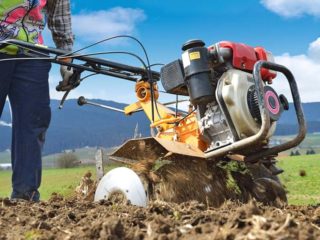
In order for the made unit to be able to cultivate the soil, you need to turn it into a motor cultivator. To do this, a T-shaped bracket is made from a square pipe. Its diagram is shown in the photo.

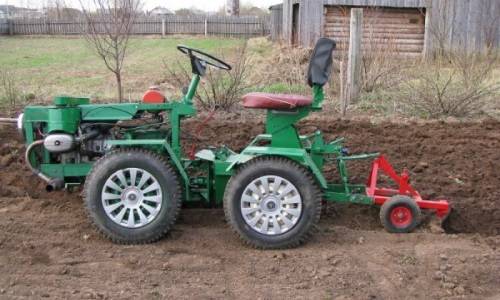
The result was a basic model of a walk-behind tractor. But equipment is needed to perform different tasks, so the next homemade products will be elements of attachments.
The video shows a homemade walk-behind tractor:
Additional equipment for a homemade walk-behind tractor
An assembled walk-behind tractor from old spare parts is only 50% of success. Next, there is no less difficult work to be done on the manufacture of iron wheels and attachments.
Lugs
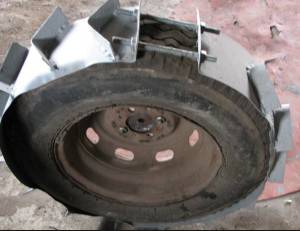
There are many ways to make lugs for a walk-behind tractor with your own hands, and the first of them is the simplest. To do this, take a sheet of steel 3 mm thick, cut a strip from it along the width of the tire tread and weld it on top, bent at an angle of 120O, metal plates. The lug strip on the tire is tightened with two studs.
It is optimal to make lugs for a walk-behind tractor with your own hands according to the factory design principle. The diagram of such iron wheels is shown in the photo.
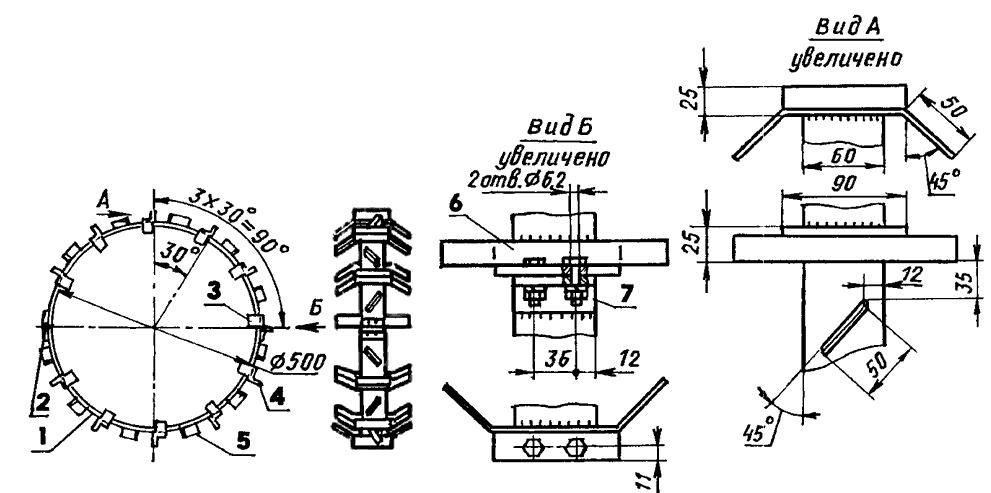
The central disc of the lugs is cut from sheet steel 5 mm thick. Strips 50 mm wide are cut from the same metal, after which rings are formed from them. For two wheels you need 6 pieces. The hooks themselves are cut from a steel strip 8 mm thick. All elements are connected by welding. Axles are attached to the center of the disks. It is better to make them adjustable so that you can change the track width of the walk-behind tractor.
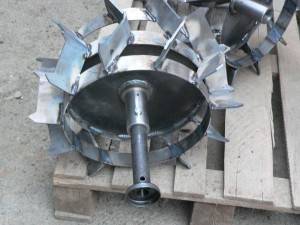
The mass of each iron wheel will be about 10 kg. This will ensure reliable coupling of the unit to the ground.
Plow
To plow the garden, you need to assemble a plow for a walk-behind tractor with your own hands, the diagram of which we suggest looking at in the photo. This standard single-case design is suitable for a unit of any power.
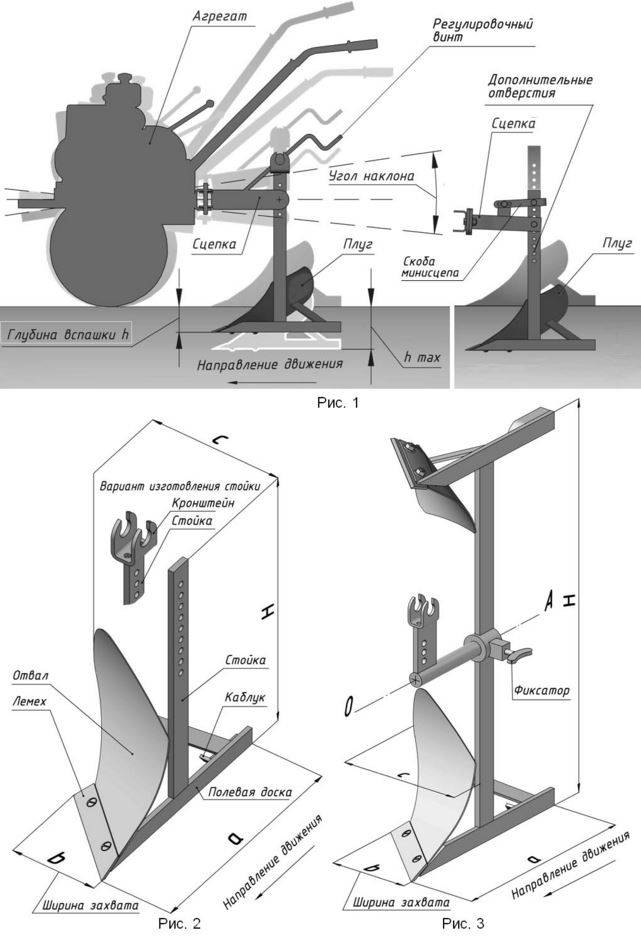
They make a plow for a walk-behind tractor with their own hands using the following technology:
- The stand is made of steel strip 10–12 mm thick. To adjust the angle of inclination and immersion depth of the plow, holes are drilled in one row on the stand. Alternatively, for adjustment, you can make a clamp that moves along the rack.
- The most difficult thing is to bend the blade.For its manufacture, sheet steel 3 mm thick is taken. It is better to bend it according to the model of the factory plow, otherwise you can make a mistake with the angle. The finished blade is hardened by heating it red hot over a fire, and then thrown into alkaline water.
- The ploughshare is made of high-alloy steel. It is attached to the blade with rivets so that their heads do not protrude to the surface.
All elements are assembled according to the proposed scheme. When the plow for the walk-behind tractor is completed with their own hands, they try to plow the ground. If all the elements are kept at the correct angle, and the ploughshare is well sharpened, then the plow will smoothly cut off the layer of earth without jerking.
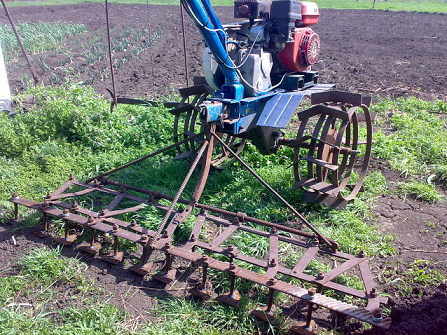
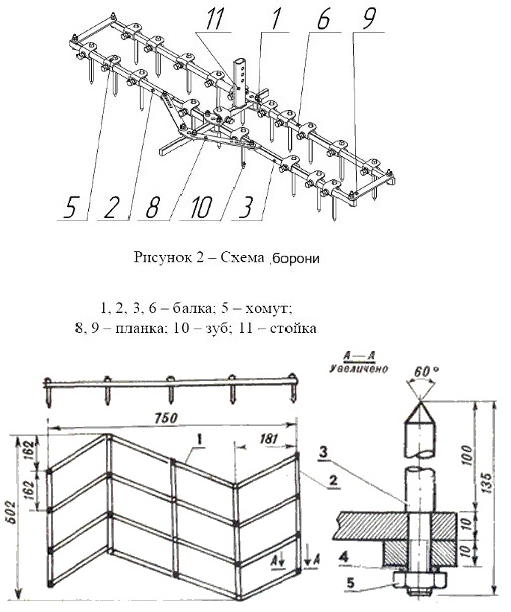
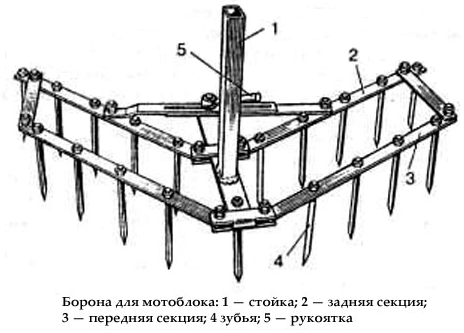
Harrow
The next piece of attachment is to make a harrow for the walk-behind tractor with your own hands, which can be rotary, disc or toothed.
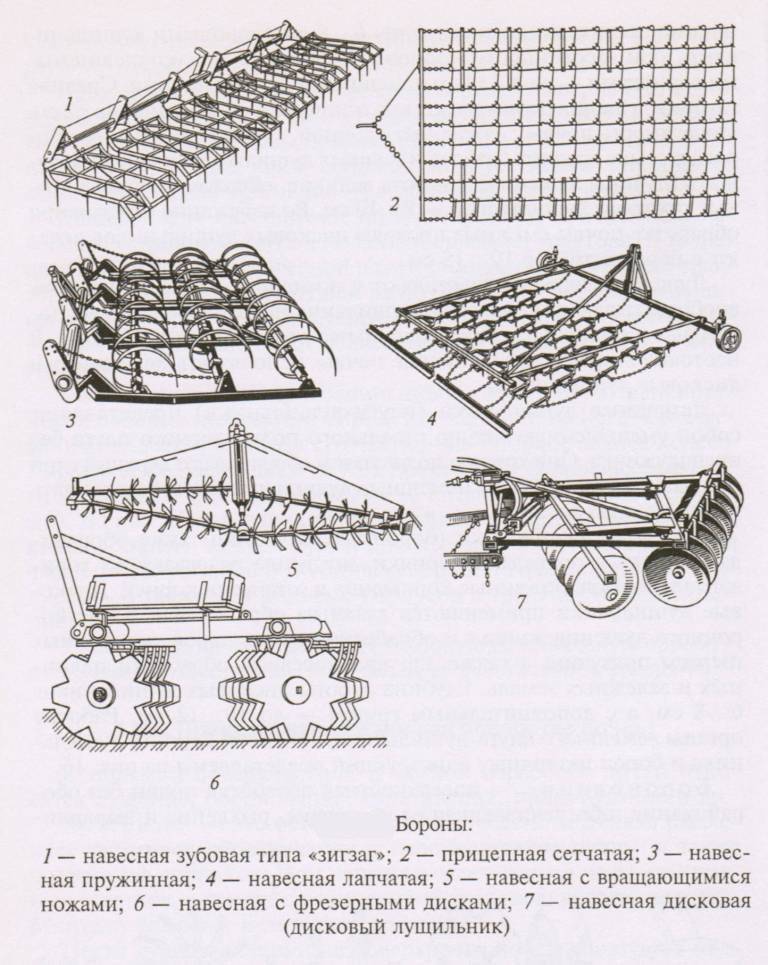
The simplest design is the tooth harrow. To make it, first assemble the frame, and then weld teeth 25–50 mm long at equal distances.
The manufacturing diagram for a tooth harrow is shown in the photo. The frame is welded from a square pipe. It is better not to weld the teeth, but to cut the threads and tighten them with nuts. If they break, it will be easier to replace them.
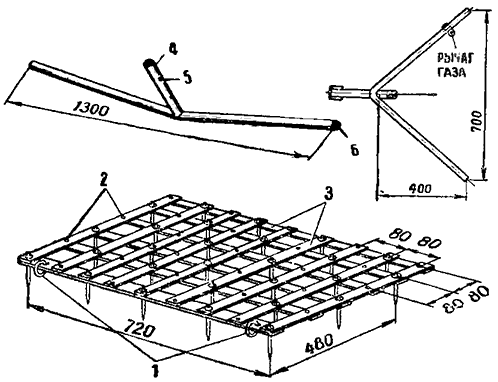
For longitudinal movement in a homemade harrow, you can install a hinge from a GAZ 53 car. In addition to the towbar, you will need two rods. They will provide better controllability of the harrow.
Cart
To transport cargo, you need to make your own cart for the walk-behind tractor, the diagram of which is shown in the photo.
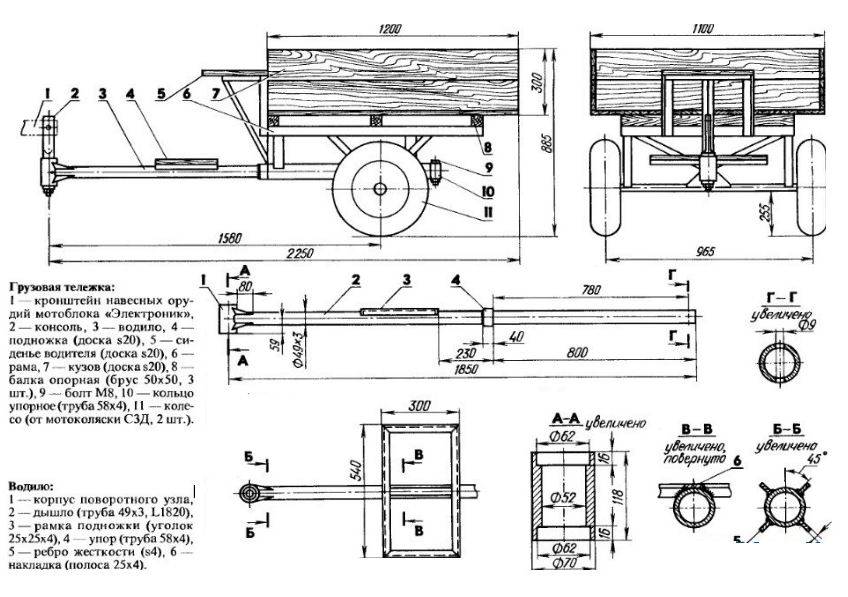
There are different design options: from simple bodies to dump trucks. In any case, be sure to do the following for the cart:
- The frame is welded from a channel, angle or pipe.
- The body can be made with a folding tailgate, opening rear and side walls, or completely fixed ones.The best material for manufacturing is tin, and if it is not available, you can use a board.
- For coupling with a walk-behind tractor, a drawbar is installed. The length is selected individually to make it convenient to operate the equipment.
- The driver's seat can be installed in the body or mounted on a drawbar.
- To connect the walk-behind tractor coupling device to the drawbar, a hinge is needed. It is better to order it from a turning workshop or remove it from other equipment.
- The axle with the wheelset can be removed from other equipment or made from a piece of pipe. But then you will have to grind out the bushings, install the bearings and adjust the hubs with the wheel discs.
If you intend to transport heavy loads, then it is better to make the cart on four wheels. In this case, shock absorbers must be installed.
The video shows a dump truck:
Conclusion
Making your own walk-behind tractor and additional equipment is quite a complicated matter. However, the cost savings are impressive.