Content
Preparing the hive for winter begins with examining the bee colony and assessing its condition. Only strong families will survive the cold. The beekeeper will have to do a lot of work in the fall related to cleaning the hives and insulating them. It is important to prepare the place where the houses will stand all winter.
How to prepare a hive for winter
Preparation of hives for wintering begins in the fall. If the apiary is slightly neglected, people begin to look into the houses from the end of August. During the inspection, the beekeeper reveals:
- State of the brood. An excellent indicator is its increase or preservation without changes, but in good quality. If the brood decreases, the beekeeper urgently takes measures to restore it. If a colony has lost brood, the bees from that hive will not survive the winter.
- A healthy uterus. The queen should be fine. A family with a weak or sick uterus cannot be left in the winter.
- Quantity of feed. There should be a sufficient amount of honey and beebread in the hive for the winter. When stocks are low, the beekeeper takes measures to increase them.
- The presence or absence of diseases. Even if the family is healthy, the bees and the hive are sanitized in the fall.
- General condition of the house. The hive is inspected for cleanliness inside and structural integrity. Be sure to evaluate the condition of the honeycombs and prepare the nest for winter.
Inspection is the first step in preparing hives for winter.
The video shows how to avoid mistakes when preparing for winter:
How to store hives with bees in winter
The beekeeper's autumn concerns involve more than just inspecting the hives. It is necessary to prepare the place where the hives will stand in winter. Conventionally, there are two methods of wintering: in the wild and in shelter.
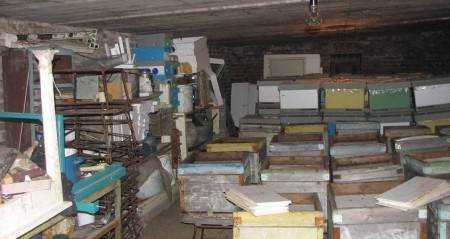
The second option is suitable for cold areas. In the southern regions, hives remain outside in winter. Omshanik is considered a professional shelter. A specially adapted building is erected above ground, underground storage in the form of a cellar or a combined winter hut semi-buried in the ground. The construction of an omshanik requires costs and is justified in a large apiary.
Amateur beekeepers adapt existing outbuildings for omshanik:
- An empty barn is considered a good place for hives to stand in the winter. Preparing the room begins with insulating the walls. The floor is covered with sand or dry organic matter: straw, leaves, sawdust. The hives are placed on the floor, but it is better to place boards.
- A large basement under the floor of the building is similarly suitable for storing beehives. The downside is that it is difficult to move the houses in and out due to the inconvenience. Preparing the basement under the floor begins with arranging ventilation.Vents are left in the basement of the building to circulate fresh air. The floor is covered with a board. Before bringing in the hives, the basement is dried.
- A cellar is similar to a basement. If it is empty in winter, the room can be used for hives. Preparation requires similar activities. The cellar is being dried. The floor is covered with sand, and boards can be laid. The walls are disinfected with lime. Provide natural ventilation.
- The greenhouse is used to store beehives in regions where winters are not too harsh. Film construction will not work. The greenhouse must be durable, covered with glass or polycarbonate. Optimal preparation of the greenhouse is based on insulating the walls with foam sheets. The hives are usually placed on stands.
- The high-temperature wintering method is rarely used by beekeepers and only by professionals. The process involves storing the hives in a heated room with an air temperature of + 15 OC. The bottom of the house is kept in the cold. In winter, the bees will sink to the bottom to cool and will not fly out of the hive.
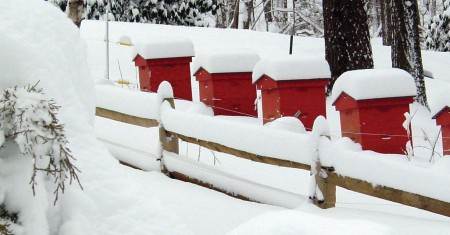
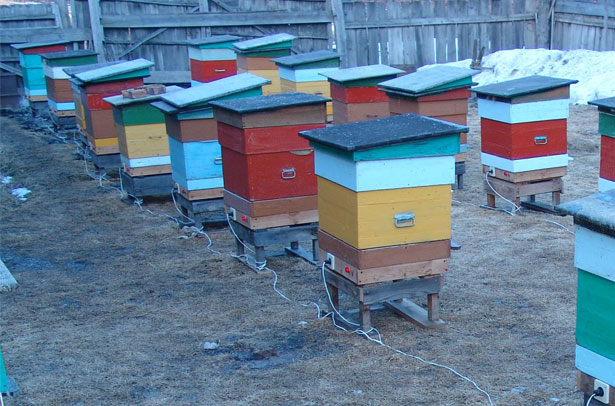
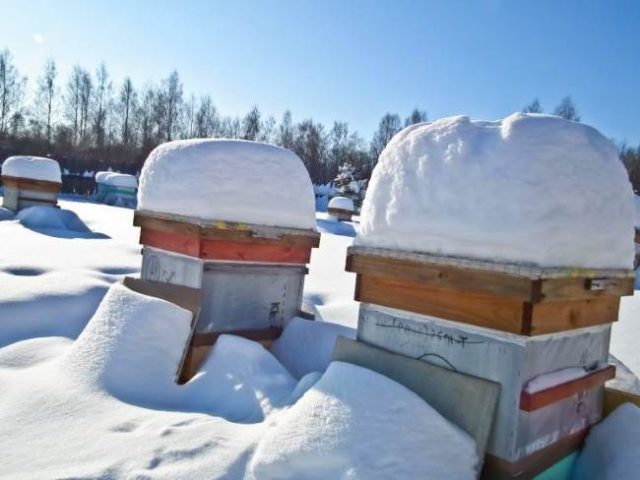
Wintering in the wild is the easiest way, suitable for southern and snowy regions. Preparation requires careful insulation of the houses. The hives are placed close to each other and protected from the wind. In winter, the houses are additionally fenced with snow embankments.
How to insulate a hive for the winter
The process of insulating hives is a mandatory step in preparing for winter. The procedure is simple and usually consists of standard steps:
- The hives are covered with polystyrene foam, mats of straw, and reeds, but they cannot be completely clogged. A ventilation hole is left on top for air exchange.
- In winter, the hives are placed on stands. If this is not done, the bottom of the house will freeze from the ground.
- When there is a lot of precipitation, snow walls are built around the hives to protect them from the wind. The height is approximately halfway up the house. Moreover, it is important to make a distance of about 20 cm from it. It is impossible to fill the bee housing with snow.
- If there is a snowstorm outside, the beekeeper needs to dig out the hives as soon as possible. Snow blocks the ventilation openings. The humidity inside the house increases, and as the snow melts, water will enter the nests through the entrance.
Simple preparation rules will help your apiary survive the winter outside.
Why do you need to insulate bees for the winter?
An insulated winter hive guarantees the safety of the family. At the end of the honey collection, the bees inside the hives gather in clubs and warm each other. When the temperature drops below the permissible norm, insects increase activity and begin to consume more food. Artificial insulation of the apiary by the beekeeper guarantees the safety of bee colonies. Additionally, feed is saved.
How can you insulate hives?
Natural and artificial materials are used for insulation. The main requirement is to protect insects from cold frosty winds. It is easier for bee colonies to survive frost than sharp gusts of icy wind.
How to insulate a hive outdoors for the winter with polystyrene foam
If the apiary winters outside, polystyrene foam is considered a good insulation material for hives. Expanded polystyrene is perfect, but it is more expensive. Preparation for insulation begins with cutting foam boards of the required size. The fragments are attached to the hives with dot-tack glue. The houses must be placed on stands. The bottom of the hives is covered with foam plastic for insulation.
The disadvantage of the material is the attractiveness of the loose structure for rodents. After insulation with polystyrene foam, it is advisable to protect the walls of each hive with plywood, slate or tin. Another disadvantage of polystyrene foam is that it does not allow air to pass through. A thermos is formed inside the hive. The beekeeper will have to regulate the ventilation. As it gets warmer, the hole in the tap hole is opened more, and when it gets colder, it is closed a little.
Insulating bees for the winter with natural materials
With the help of natural materials, you can similarly prepare the hive for wintering, if they are used correctly for insulation. The crumbly insulation of moss, sawdust, and small straw is placed in covers made of durable fabric. The resulting pillows are placed under the lid of the house. To protect against bees, a mesh is placed under the insulation.
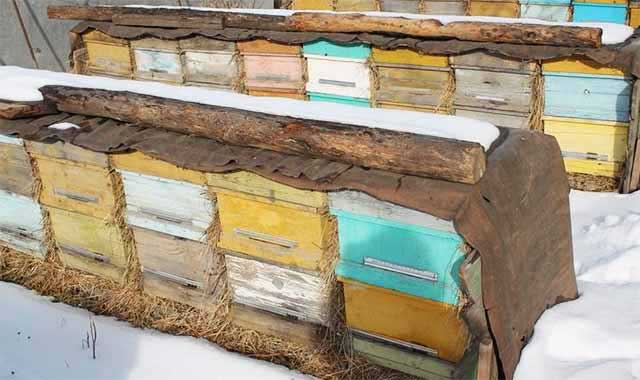
External insulation is carried out with blocks of hay or coarse straw. The natural material is covered with a tarpaulin against rain. The disadvantage of this method of insulation is the susceptibility of thermal insulation to destruction by rodents. In addition, cold bridges are formed due to the loose fit of the blocks.
Providing ventilation in the hive in winter
Ventilation of the hive in winter is ensured in 3 ways:
- through the bottom (entrances and mesh bottom);
- through the top (holes in the lid);
- through the bottom and top.
Each method has its own pros and cons. The choice is made individually, taking into account the design of the hive, the method of wintering, the strength of the family, and the material used for insulation. One thing is important - ventilation is required.Moisture forms inside the hive and must be removed.
It is recommended not to close the hive entrances for the winter, but to equip them with adjustable dampers and cover them with mesh. For polystyrene foam and polyurethane foam hives this will not be enough. Additionally, the solid bottom is replaced with a mesh bottom. It is important not to overdo it with ventilation. If a draft occurs, the bee colony may die.
Proper ventilation is based on three rules:
- The air supply must be uniform. This will allow you to maintain optimal temperature and humidity inside the hive in winter.
- A well-insulated and ventilated hive helps to avoid drafts in the hive.
- Infrequently, but periodically it is necessary to check the condition of families. Based on the behavior of insects and their number, the beekeeper will determine how much to open or cover the entrances.
Natural materials used for insulation help to avoid drafts, retain heat and not interfere with ventilation.
Watch the video for more details about insulation and ventilation of hives:
Which entrances should be opened in the hive for the winter outside?
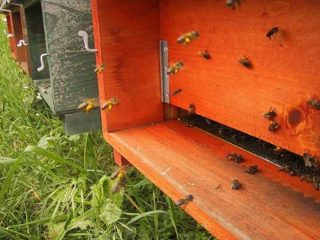
It is recommended to open the upper and lower entrances in the hive for ventilation in the winter when the apiary is wintering outside. A net is installed as a barrier structure. If the hive does not have an upper entrance, 10 cm of canvas is folded back at the back wall. The ventilation gap is covered with hay, moss or other insulation that allows air to pass through.
Hive heating
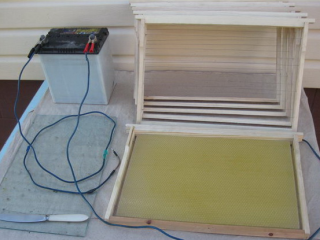
The amount of water secreted by bees in winter is directly proportional to the amount of food consumed. Ventilation helps remove moisture. However, even with careful preparation, natural air exchange is slowed down in winter. As frost intensifies, thermal insulation may not cope with its functions if the hives are located outside. It will get colder inside the houses.The bees will begin to consume more food, and the humidity will double. Families in such conditions weaken and begin to get sick. Artificial heating of hives not only increases the temperature inside the house, but also dries out the air. Insects overwinter easier and consume less food. In winter, bottom heaters with a power of 12-25 W are used for heating. The temperature under the frames is maintained at about 0 OWITH.
Heating in the spring begins from the moment the bee colony is ready to develop. Dates vary for different regions due to weather conditions. Optimally navigate by insects. The signal is the first cleansing flyby. After turning on the heating, the bees begin to consume a lot of food and water, often flying outside to empty their intestines. The temperature in the hives is raised to + 25 OC. The uterus increases egg production.
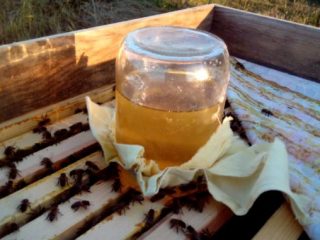
When the air temperature outside warms up to + 20 OC, the heaters are turned off. The bees themselves maintain the optimal temperature in the brood zone. During heating, it is important to take into account that the air dries out. Insects require water. During this period, drinking bowls must be prepared.
Electric heating of hives is carried out in winter and spring using factory or homemade heaters. Outwardly, they resemble dielectric plates with heating wires located inside. Even film heaters from the “warm floor” system are adapted. Lamps and heating pads are primitive heaters.
Features of preparing hives of various modifications for winter
The principle of preparing hives of different designs for winter is the same. However, there are small nuances that require consideration.
Warre Hive
The inventor called his hive “simple” because its design allows bee colonies to be kept in conditions close to nature. A special feature of preparing a Varre hive for winter is that there is no need to remove excess honey, as is done in all frame houses. The first step is to remove all the cases filled with honey. In the main hive there is 48 dm2 cell Bees need only 36 dm for the winter2 honeycomb with honey. Extra 12 dm2 contain up to 2 kg of pure honey. He remains in the combs to spend the winter inside the hive.
If there is not enough honey for the winter, do not disturb the bees in the nest. An empty housing with a feeder is placed under the hive.
Hive Ruta
For the Ruta hive, preparation for winter is similarly slightly different from other models. In a single-hull house, the space near the nest is reduced by installing two diaphragms. The canvas is placed on the frame and the edge is folded back at the wall. The roof liner is placed higher, then the ceiling comes, another tier is placed on top, and the roof completes the pyramid. With the onset of winter, insulation is installed instead of the diaphragm, and the upper entrance is covered. Ventilation is provided through the gap formed by placing the slats under the ceiling.
Preparing a double-hull hive for winter
In the Rutov double-hull hive, the lower tier is allocated for the nest. A feeding trough is organized on the upper tier. The number of frames with honey for feeding is determined by the development of the bee colony. If the bees have not deposited a supply, an empty housing is added in August. The family is fed sugar syrup.
Caring for bees in winter
In winter, the beekeeper periodically visits the hives. Often this is not necessary to do so as not to disturb the bees again. You definitely need to visit the apiary after a snowfall and remove the snow. The hives are periodically bugged. If the bees buzz monotonously, everything is fine inside the home.When a loud intermittent noise is heard, the bee colony has problems that the beekeeper will urgently have to solve.
During wintering, the hive should not be subjected to vibration or illuminated inside with bright light. Alarmed bees will leave the house and quickly freeze in the cold. If illumination is required, it is optimal to use a red lamp.
Conclusion
Preparing the hive for winter must be done carefully and carefully. The safety of the bee colony and its further development depend on the quality of the procedure.
