Content
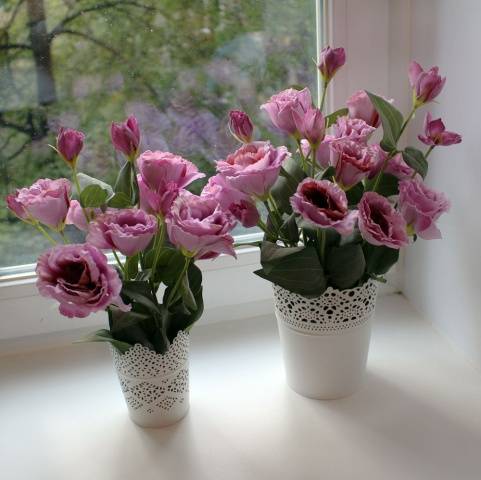
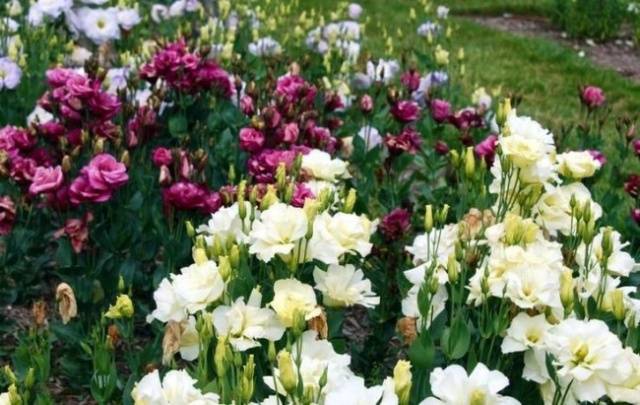
Despite the wide variety of annuals that can be grown in garden plots, the appearance on sale of such an exotic flower as eustoma several decades ago could not go unnoticed. These flowers are very beautiful both when cut and when grown as a houseplant. Despite its beauty and exotic appearance, many were not afraid to plant it even in open ground and were not mistaken - eustoma feels good even in flower beds of regions with difficult weather conditions. For example, in the Urals it may well decorate flower beds from July to the end of August.
As it turned out, this charming plant is almost impossible to propagate in any other way except from seeds, and therefore the method of growing eustoma from seeds is the main one if you want to have this beauty at home or in the garden. But quite a lot of questions arise, starting from when to plant and ending with what and how to feed it. This article will tell you about all the nuances of growing eustoma from seeds.
Description and features
Eustoma is native to Central America; in nature it can also be found in the southern states of the USA, Mexico and the northern part of South America.The plant belongs to the Gentian family and is a perennial. In Russian climatic conditions, it is usually grown as an annual, since it is quite difficult to preserve it in rooms with central heating in winter. But this is quite realistic for owners of private houses with cool and bright verandas. But still, over the years, eustoma loses its attractiveness, so it is best to renew it every year from seeds.
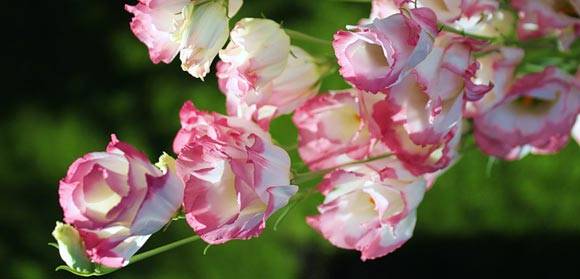
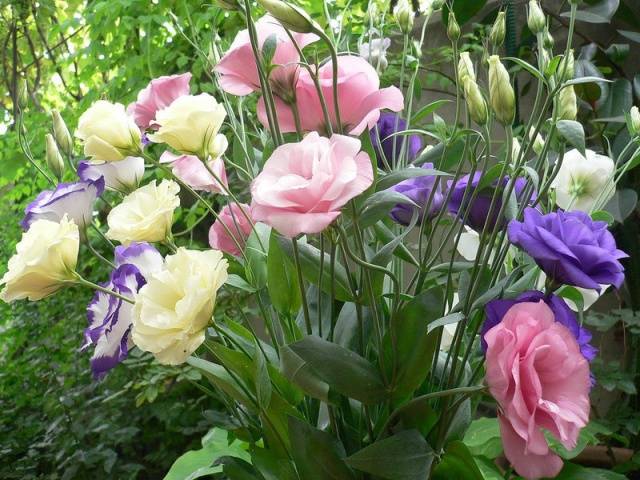
Eustoma flowers in an unopened state most resemble a rose, hence many peoples use such names as “Irish rose”, “French rose”, “Japanese rose”, etc. One of the varieties, Roussel’s eustoma, has an additional name – lisianthus. Therefore, all the most luxuriously flowering forms of eustoma are often also called lisianthus.
This flower has many varieties of a wide variety of colors. But for flower growers, the most important thing is to know that there are two main groups of eustoma - dwarf, no more than 25-30 cm high, for indoor growing, and cut ones, up to 1 meter high, which are ideal for growing in the garden. The leaves of these plants have a very attractive bluish-blue hue, and the flowers themselves can be either regular or double.
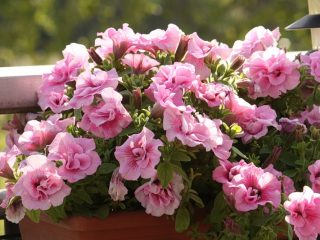
Despite the fact that growing eustoma from seeds is generally no more difficult than growing petunia, familiar to everyone from childhood, this flower still has several features. First of all, eustoma has a very long growing season.This means that from germination to flowering it takes an average of 5 to 6 months. Low-growing varieties of eustoma have a slightly shorter growing season. And in recent years, early-flowering hybrids have appeared that are capable of blooming almost 4 months after sowing. Nevertheless, you need to pay attention to this point when purchasing eustoma seeds. And sowing its seeds for seedlings must be done at the earliest possible date, no later than February, and preferably in January or even December.
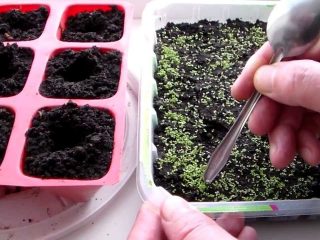
It is worth paying attention to the size of eustoma seeds. She has them even smaller than those of the same petunia. They can simply be called dust-like. For example, while one gram contains about 6-8 thousand petunia seeds, eustoma seeds account for about 15-20 thousand for the same unit of weight. You can see what eustoma seeds look like in this photo.
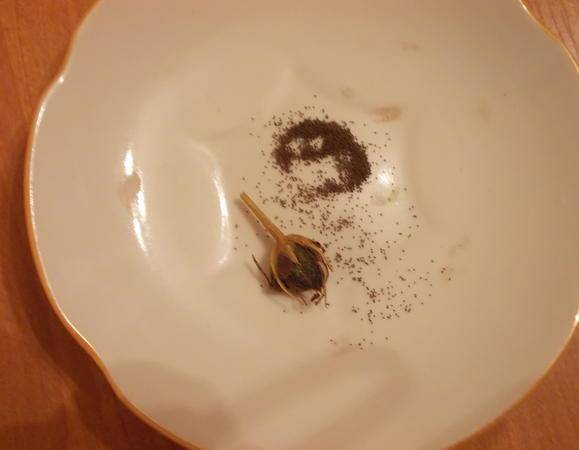
Due to the microscopic size of the seeds, manufacturers often subject them to additional processing by wrapping them in special granules. In addition to being easy to handle, granules also help seeds germinate and survive in the first stage of life, since they contain special fertilizers and growth stimulants.
Different sowing methods
There are several ways to plant eustoma seedlings. The article below will describe all possible methods and techniques to facilitate seed germination. You can choose any method you like, or, if you plan to plant a lot of seeds, then try partly all of them to see which one is best for your conditions.On average, they all work, so it’s difficult to call any of them the best; a lot depends on the habits of the gardener himself, as well as on the conditions that he can create for the seedlings and on the amount of time that he can devote to them.
Peat tablets
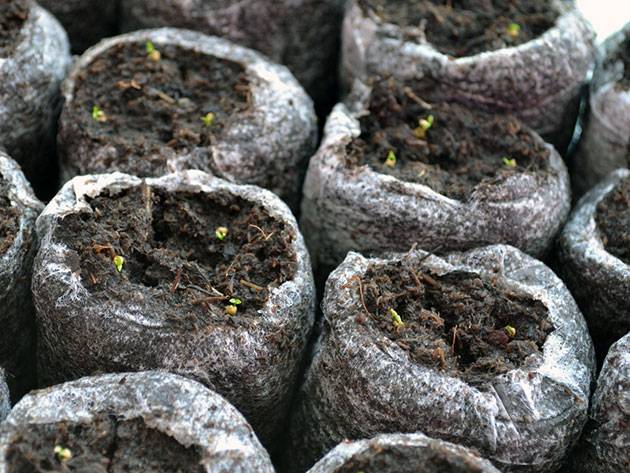
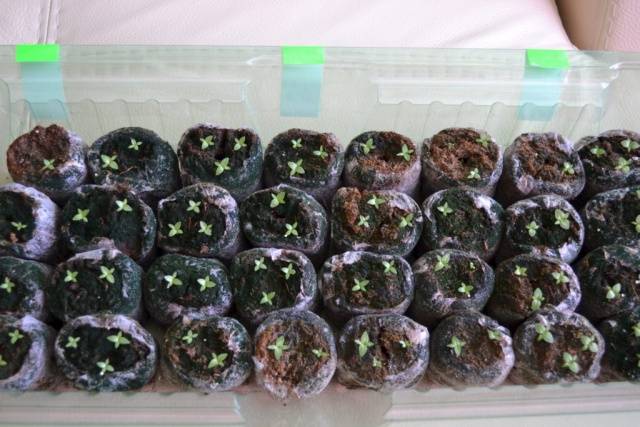
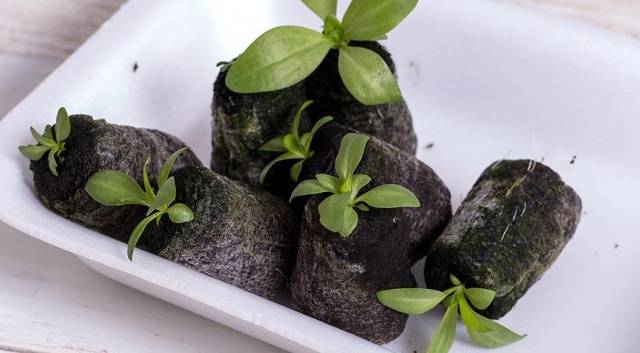
For beginning gardeners who do not yet have sufficient experience in growing seedlings, but nevertheless really want to grow this flower at home, we can recommend sowing eustoma seeds into peat tablets for seedlings. In general, with the average germination rate of granular eustoma seeds being about 80%, in peat tablets the percentage of germination can reach 100%. Yes, and the further process of caring for seedlings and picking becomes somewhat easier. The only drawback can be considered the high price of good quality peat tablets, but with small volumes of crops, this price is more than justified.
To sow in this way, in addition to the actual peat tablets and eustoma seeds, you will also need either a general, relatively deep container, such as a tray, or a number of disposable cups according to the number of peat tablets used. After all, peat tablets increase in size by 6-8 times after soaking.
So, the scheme for sowing eustoma seeds in peat tablets is as follows:
- Place the required amount of dry peat tablets in a deep tray without holes, equal to the number of seeds you are going to sow.
- To maintain optimal humidity conditions, you can add about a centimeter layer of vermiculite to the bottom of the tray before placing the tablets there. Please note that in most cases, one bag of granulated seeds contains five (rarely ten) eustoma seeds.
- Carefully and gradually pour a small amount of settled warm water into the tray with tablets. If desired, instead of water, you can take a solution of epin, zircon, HB-101 or energen-extra.
- You wait until the tablets begin to become saturated with moisture and increase in size. If necessary, add water until the tablets stop growing in height.
- Leave the tray with tablets for complete absorption for 15-20 minutes.
- If there is very little liquid left in the pan, you don’t have to drain it. Otherwise, it is better to carefully remove it from the pan.
- If you poured vermiculite on the bottom, add water gradually, constantly monitoring the increase in the volume of the tablets as you add water.
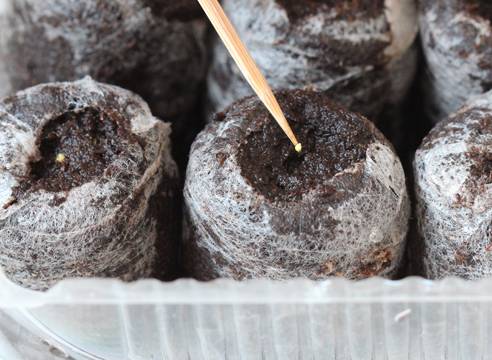
- Pour the eustoma seeds from the bag onto a saucer and carefully, using tweezers or a wet match, move each seed into the recess located in the center of the swollen tablet.

- Lightly press the granule into the swollen peat.
- There is no need to cover or sprinkle the seeds with anything.
- Place a piece of glass or polycarbonate on top of the pallet or cover it with any other transparent material.
- Place the tray with tablets in a warm (+21°+24°C) and always bright place.
As already mentioned, you can place each tablet in a disposable cup, soak it in the same way, and after placing the seed in the upper recess of the tablet, cover the cup with a plastic bag.
Therefore, do not place the tray with seeds on a cold windowsill, but for good lighting, it is advisable to immediately place it under a lamp with an additional light source.
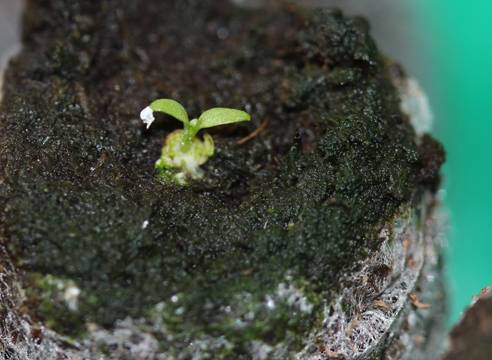
Often after seed germination, if the required humidity has not been maintained, “caps” of granules remain on the tips of the sprouts. Under no circumstances attempt to remove them mechanically. Tiny sprouts just need to be sprayed thoroughly using the finest spray bottle possible. When wet, the “caps” will fall apart on their own.
But if you do not want this effect to repeat, you can additionally sprinkle the seeds a little after they are placed on the top of the peat tablet. And after waiting a minute, carefully, using a match, spread the contents of the granules over the surface of the tablet.
The video below shows in detail the process of sowing eustoma seeds into peat tablets.
Traditional sowing method
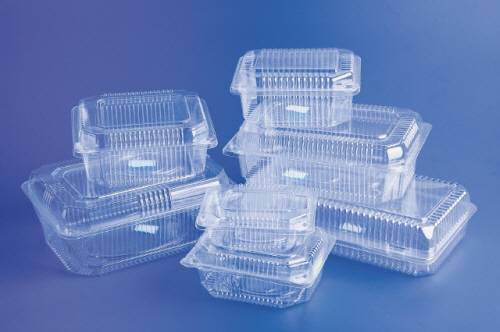
If you are dealing with a fairly large volume of seeds, more than 5 - 10 packages, and you have a lot of other seedlings that require space under the lamps, then you can use the most traditional method of growing in small plastic containers with transparent lids.
In this case, you will also need nutritious soil.
If you prefer to deal with ready-made soil mixtures, then you can use soil for Saintpaulia or indoor violet to sow eustoma seeds. The process then proceeds as follows:
- Before sowing seeds, sift a small part of the soil through a fine sieve.
- Fill the prepared container about halfway with the soil mixture and tamp it down quite tightly.
- At the first stage, it is not necessary to make drainage holes in the container for germination, since eustoma needs a lot of moisture for germination.
- Moisten the soil mixture very well with a spray bottle so that it becomes almost wet, but still do not allow it to become swampy.
- Sprinkle a 0.5 cm layer of sifted soil on top and compact it slightly too.
- Lightly moisten the top layer with a spray bottle.
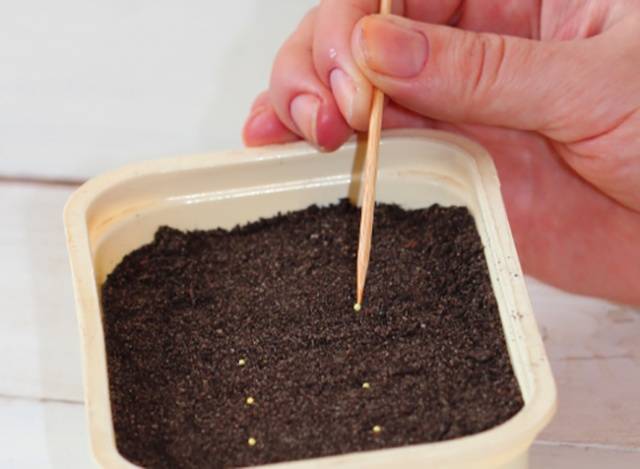
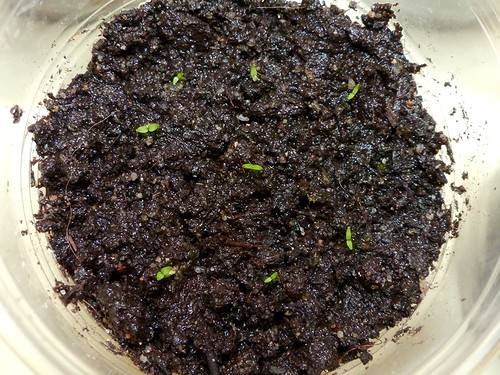
- Carefully spread the eustoma seeds over its surface, slightly pressing them into the soil.
- The top of the seeds should also be slightly moistened with a spray bottle and the container should be closed with a transparent lid.
Seeds can be placed on the surface of the substrate in different ways. You can simply lay them out, pressing them slightly. If there are quite a lot of seeds, then it is better to use two other methods:
- Prepare a small board and pour out the seeds in rows every 1-2 cm, then press them down a little with the end of the board.
- Using the end of the board, you make depressions in the ground in the form of rows, 2-3 mm deep. Place the seeds in them and sprinkle them with a microscopic layer of calcined river sand.
Sprinkling the seeds with river sand calcined in the oven or microwave is very useful, since it allows you to eliminate some problems in the future when sprouts appear. On the one hand, sand dries quickly after watering, on the other hand, it retains soil moisture underneath. Thus, the bases of the sprouts themselves are kept relatively dry, while the roots are constantly moistened.This reduces the risk of blackleg and other fungal diseases to which eustoma seedlings are susceptible.
Other variations on the theme of planting
The previous option for sowing eustoma seeds is good for everyone, except that the seedlings will have to be planted sooner or later. For those who are prejudiced about this procedure, it is advisable to sow the seeds directly into separate cups. These can be any fairly tall containers. Recently, a method of sowing small seeds in homemade cups twisted from dense polyethylene or even from a thin (2 mm) plastic backing under the laminate and secured with a stapler or tape has become widespread.
The advantage of the latter is that the seedlings develop in them before planting in the ground, and before planting, the fastening of the cups is removed, and the eustoma bushes, while preserving the entire root system, can be relatively painlessly moved to the flowerbed.
Containers with ready-made, well-compacted soil are placed in a deep tray, drained well, and the subsequent sowing method resembles planting in peat tablets.
This method of sowing eustoma is well shown in the following video:
Experienced gardeners often spill the soil with boiling water before planting seeds. It is claimed that this technique can help seeds germinate faster.
In recent years, another interesting way of planting eustoma seeds has appeared - in glass jars. Usually, to plant seeds of one variety, an ordinary half-liter jar is taken from one bag, as for twisting. A 2-3 cm layer of vermiculite is poured onto its bottom, then 7-9 cm of light but nutritious crumbly soil. Everything is well moistened from above, and through the transparent walls of the jar it is easy to trace the level of soil moisture.Eustoma seeds are placed on the surface of the moistened soil, sprayed on top and the jar is tightly closed with a light nylon lid.
Caring for eustoma after germination
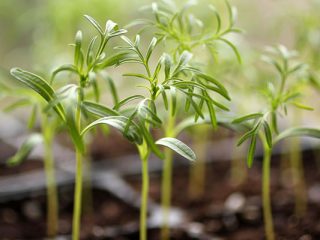
Eustoma seeds can germinate for quite a long time, up to 20 days. Although in some favorable conditions the first shoots may appear as early as 8-10 days. After the emergence of seedlings, if possible, the temperature can be reduced to +18°+20°C, at night it can even be down to +15°C.
It is important to regularly, once a day, remove it for ventilation and remove condensation from the inner surface of the lid. This must be done before the seeds germinate, while simultaneously controlling the humidity of the substrate.
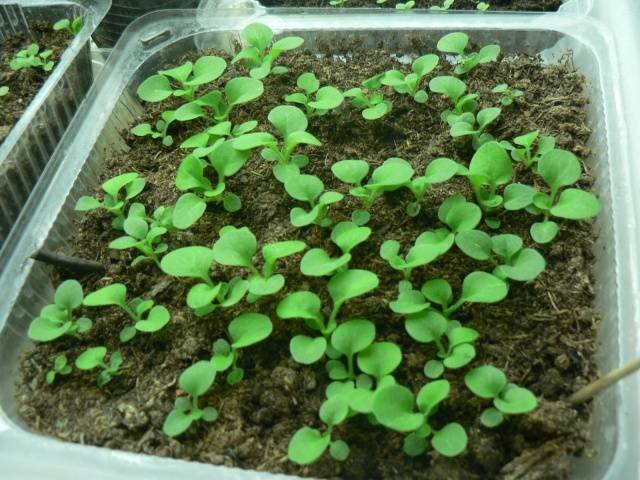
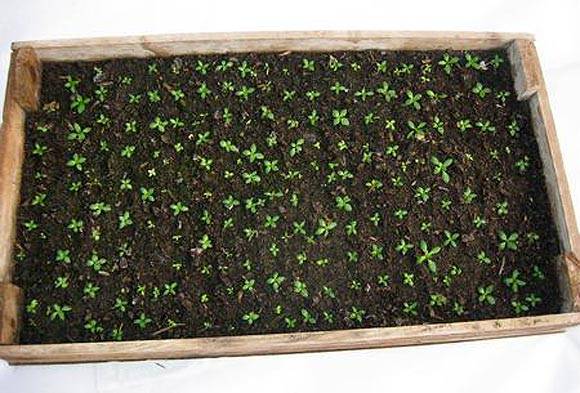
The first sprouts of eustoma are as tiny as the seeds themselves. They are even difficult to distinguish on the soil surface. And the development of plants in the first weeks occurs very slowly. But, given that eustomas are incredibly demanding of the nutrient medium, the first feedings can be started quite early, literally 1-2 weeks after emergence.
When watering to moisten the soil, it is best to use not just water, but a solution with Energen or other nutritional stimulants (EM preparations, Chlorella, Agate, vermicompost, etc.)
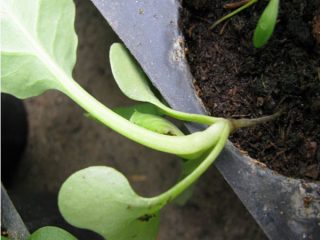
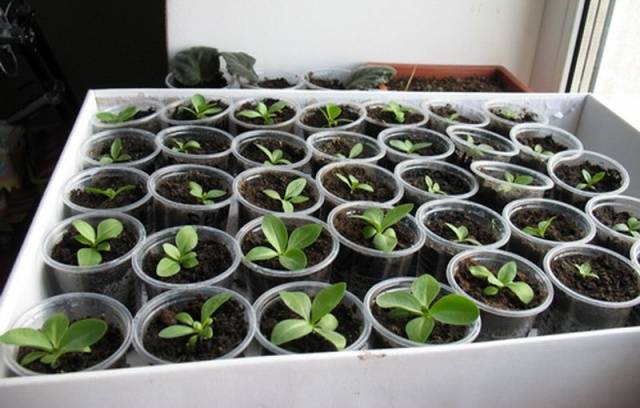
When 4 small leaves appear on the seedlings, this is the most suitable moment for picking, since it is during this period that eustoma is relatively good at this procedure, which cannot be said about the later stages of its development. If you grow eustoma in peat tablets, then picking should begin when the first roots appear from below.In the case of peat tablets, you simply transfer them along with the plants into larger containers.
In other cases, picking is done using toothpicks or a suitable tool from a manicure set.
The next day after the seedlings are picked into separate containers or when they are about 2-3 weeks old, it is advisable to feed the eustoma with a solution of calcium nitrate.
To do this, first prepare a mother solution (1 tablespoon per 1 liter of water), which is infused in a dark bottle for a day. To feed eustoma seedlings, 10 ml of this solution is added to 0.5 liters of water.
If after picking the eustoma feels unwell or is not growing well, you can spray it with any stimulant and place it again under a bag or in a greenhouse.
In the future, eustoma seedlings need regular feeding every week. To do this, you can use solutions of any complex water-soluble fertilizers diluted twice as much as according to the instructions (Uniflor Rost, Fertika, Crystallon, Plantofol, Mortar and others).
Thus, it is quite possible to grow eustoma from seeds; you just need to be persistent and patient.