Content
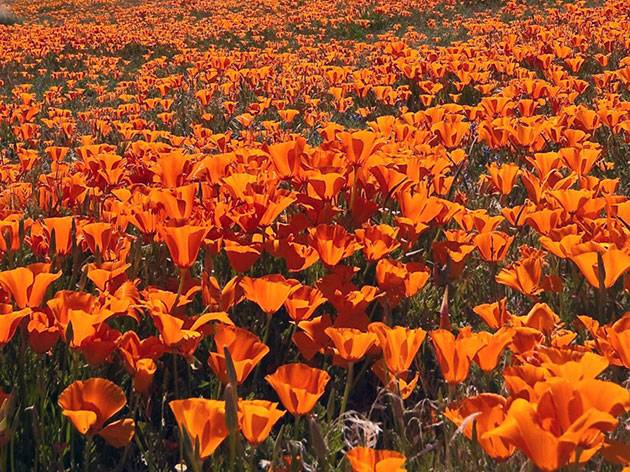
About 500 years ago, in the 16th century, a ship carrying gold prospectors landed on the shores of North America. Travelers had heard a lot about lands “filled with gold.” Back on the coast, treasure hunters saw a bright golden glow. But when they got there, they were very disappointed. After all, the source of the radiance turned out to be the blooming flowers of Eschsolzia. Since then, in Spain this plant has been called “Copa de Ora”, which means “golden cup”.
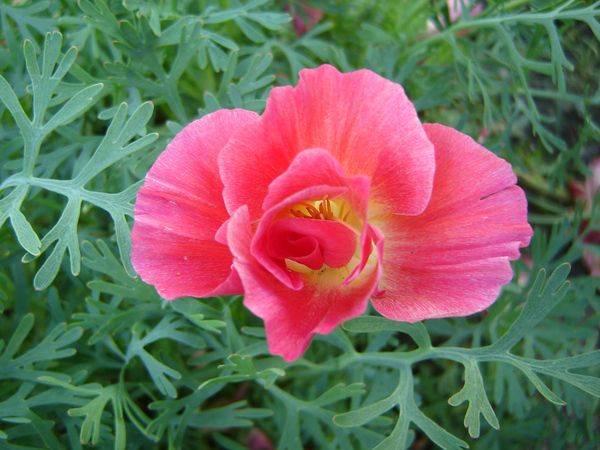
Description of the plant
Eschscholzia received its name in honor of the Russian zoologist, doctor, naturalist and biologist I.F. von Eschscholz. After all, it was he who brought the first seeds of these unusually beautiful flowers to Russia.
Many gardeners have already fallen in love with this beautiful alien for its ease of care, beautiful flowers and long flowering period. The flower beds in which Eschscholzia grows decorate front gardens from the beginning of June until almost winter.
Each flower opens its petals within 3-4 days. But to replace the fading inflorescence, several more bright buds are blooming.
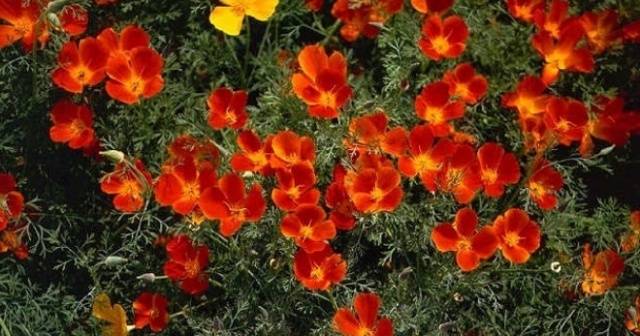
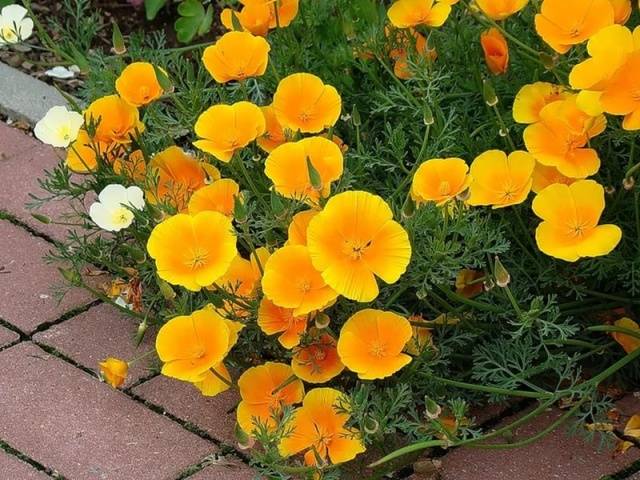
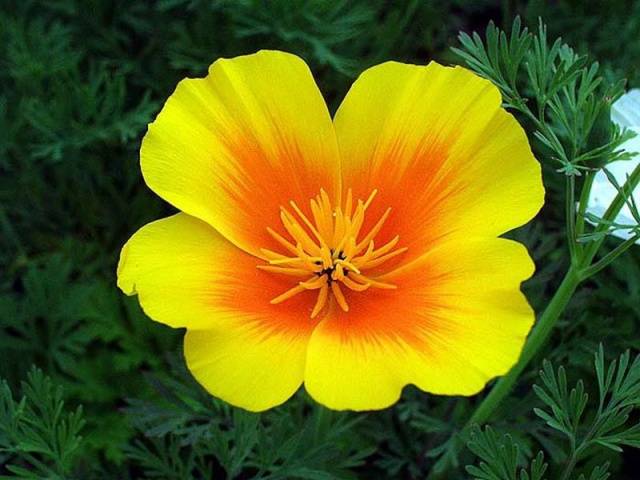
The Eschscholzia flower belongs to the Poppy family. It has several other names - “California poppy” and “Wormwood”.The birthplace of flowers is sunny California, where more than ten species of plants belonging to the Poppy family grow.
Over the past few decades, thanks to the efforts of breeders, many new varieties of Eschsholzia have appeared, which delight flower growers with bright inflorescences of a wide variety of shades.
Eschscholzia flower is a herbaceous, bushy, perennial plant with a tap root system. The average height is up to 40 cm. In Russia it is grown as an annual.

The flower is distinguished by thin and numerous shoots. Openwork leaves of faded green color are located on long petioles.
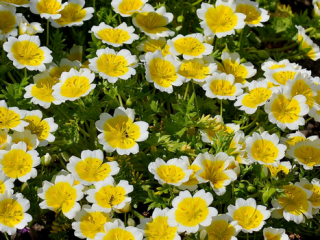
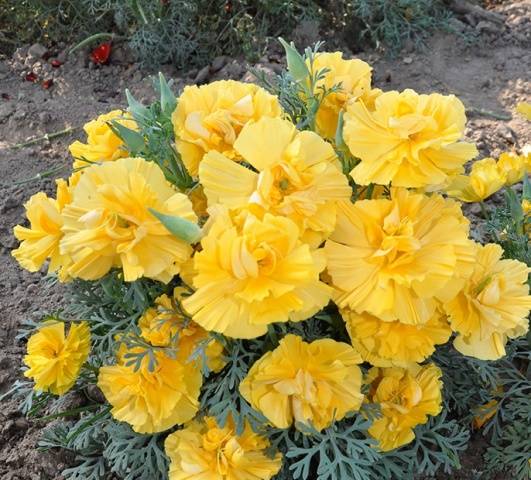
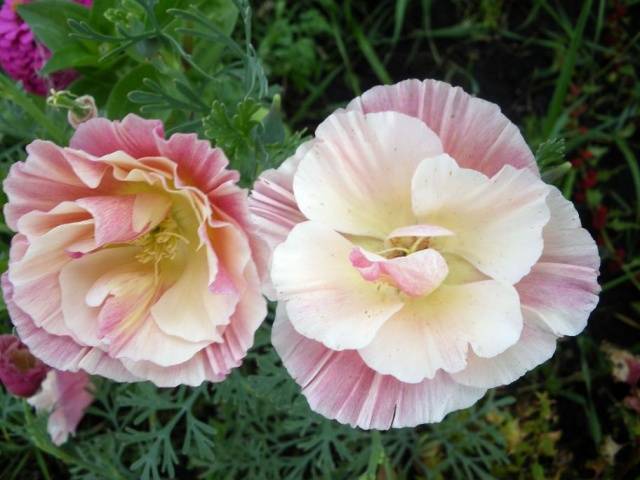
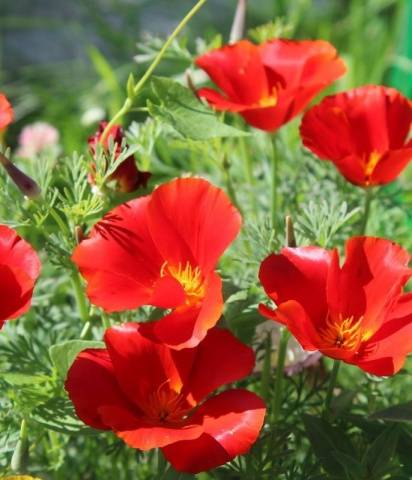
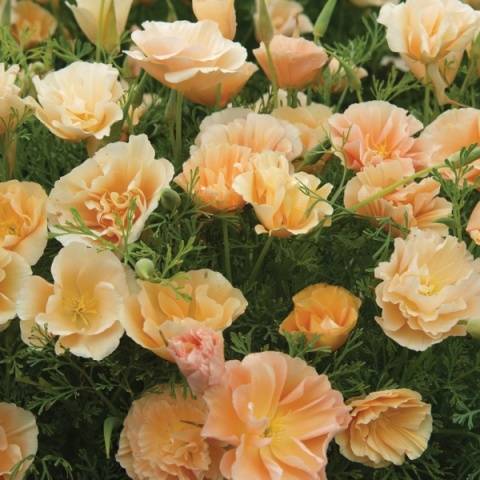
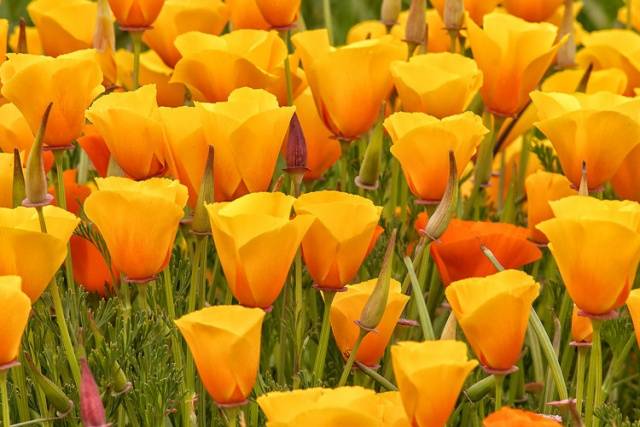
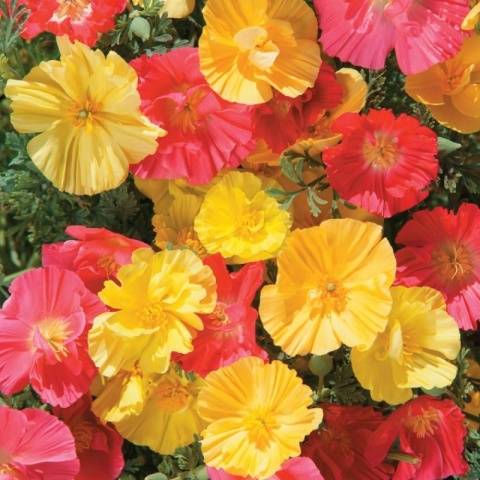
Eschscholzia bushes are covered with numerous single flowers in the shape of a bowl. The diameter of the flowers reaches 8-10 cm depending on the variety. Simple, terry, white, matte, orange, red or yellow - the appearance and color of each variety is amazing!
A special feature of Eschszolzia flowers is their blooming. In sunny weather, the buds open and give flower growers the opportunity to enjoy the enchanting beauty. But in bad weather or with the onset of evening, its petals are tightly closed.
After flowering, in place of the withered bud, a seed box with a diameter of 3 to 9 cm is formed, which contains small Eschsholzia seeds.
You can collect and prepare flower seeds yourself. To do this, the seed pods are collected in the ripe phase and dried in a dry, dark place.

Types and varieties of flowers
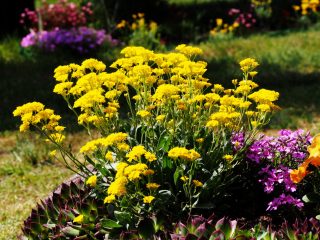
In the wild, Eschscholzia flowers are golden in color. Petals in the amount of 4-6 pieces are arranged in the form of a bowl. But at the moment, thanks to the hard work of breeders, many new varieties have appeared, distinguished not only by their varied colors, but also by their inflorescences. Varieties with double and densely double flowers appeared in orange, yellow, red, white, and burgundy tones. Look at the photo how beautiful Eschsholzia grown from seeds are.
Ivory Castle

Russian size Golden (terry variety)
apple blossom
Mikado Californian
Cranberry juice
Pink champagne
Pink chiffon

Pay attention to the following varieties, which have recently appeared on the market, but have already gained popularity:
- Carmine King - bright pink flowers with a white center;
- Terry dwarf - double flowers of 2-3 shades with bright flashes;
- Ballerina - soft white flowers with silky petals;
- Plum wine has simple, purple-violet flowers.
It would take a long time to list the varieties of Eschsolzia. But not a single photo can fully reflect the enchanting beauty and delicate trembling of flowers.
Secrets of growing
Despite the fact that the flowers are unpretentious, there are still several secrets of growing Eschscholzia from seeds that every gardener needs to know:
- Before planting, California poppy seeds must be subjected to mandatory stratification;
- You can sow seeds in the fall, which is called “before winter.” Thus, the seeds will undergo natural, that is, natural, stratification. But you can plant flowers in early spring, or grow them using seedlings.

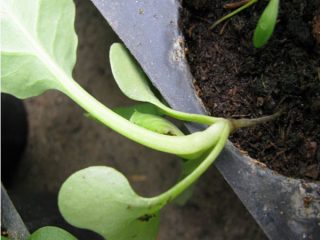
- The root system of flowers is very fragile. Therefore, when growing seedlings, the picking process is eliminated.
- Flowers react very painfully to excess moisture. The roots begin to rot and the plant may die.
- The site for Eschsolzia should be sunny.
In general, growing Eschscholzia will not be difficult. And even a novice florist can cope with this.
Sowing Eschsolzia in autumn
Sowing flowers in open ground in the fall is one of the easiest ways to grow Eschscholzia from seeds, when planting plants will not take you much time and effort.
The advantages of autumn flower planting are as follows:
- Over the winter, the seed material will undergo natural stratification.
- In the spring, as soon as the snow melts, friendly, green shoots will appear in your flowerbeds.
- Eschscholzia, planted before winter, blooms much earlier than spring or grown from seedlings.
- Autumn planting greatly simplifies the process of planting and caring for flowers.

Before planting Eschscholzia seeds in the fall, determine a sunny area for the future flowerbed. It is very important that melt water does not stagnate in the chosen location. Finding a suitable site is very simple - remember where the snow melts fastest in the spring. Plant flowers in this place.
Eschscholzia loves light, sandy, fertile soil. It is advisable to add a little sand (3-5 kg per m²) and humus or peat (2-3 kg per m²) to the soil before sowing. A week before planting, dig up well and level the area so that there are no holes or bumps on it.
Seeds should be sown in dry or slightly moist soil. Make shallow grooves, 6-8 cm deep. Eschscholzia seeds must first be mixed with sand so that later the plantings are not too thick.Sow the seeds, level the furrows, and mulch the area with dry leaves, peat, and spruce branches.

In the spring, you only need to thin out the seedlings if necessary.
When planting Eschscholzia in open ground in the spring, it is not necessary to mulch the plantings. But if there is a threat of frost, cover the plantings with lutrasil or film.
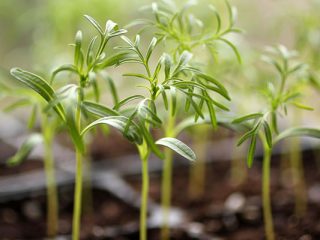
Growing flowers by seedling method
If you decide to grow Eschscholzia from seeds at home, place the seed material in the lower section of the refrigerator. This way you will both save the seeds and stratify them.
Do not forget that when growing Eschscholzia flowers for seedlings, the picking process is eliminated. This is due to the peculiarity of the root system of the Californian poppy. The slightest damage to the roots and the plant will inevitably die.
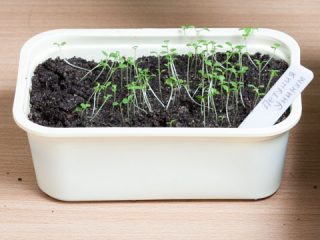
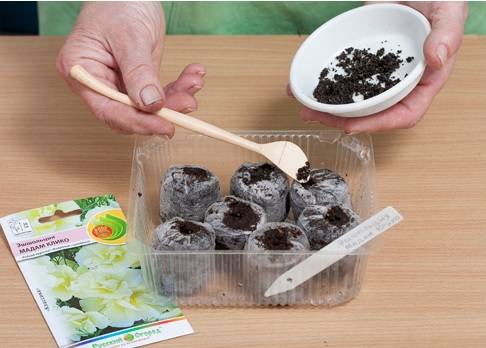
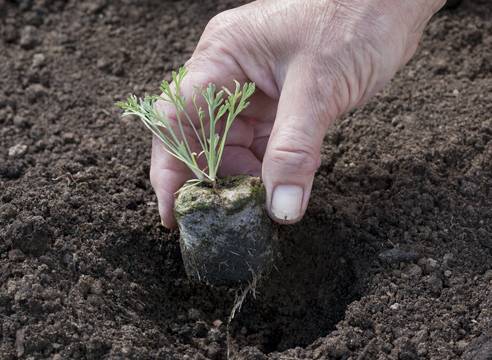
Therefore, experienced gardeners when growing Eschscholzia, when it’s time to plant seeds, prefer to use peat tablets, plastic disposable or collapsible cups for growing seedlings, as in the photo.

The main thing is to keep the root system intact when replanting.
Growing seedlings
Planting Eschsholzia seedlings does not present any particular difficulties. When sowing flowers in peat tablets, you need to properly prepare the containers:
- Place the tablets in a plastic container.
- Pour water into the pan and wait until the tablets absorb the water. Add water if necessary.
- Peat tablets will be ready for use when they stop absorbing moisture. Drain excess water from the tray and begin planting.
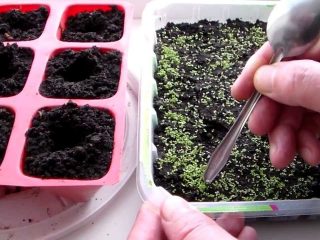
- Eschscholzia seeds are very small. It is very convenient to place them in planting containers using a wet toothpick. Place 2 seeds in each tablet and sprinkle them with a small layer of soil.
- Irrigate the plantings with a spray bottle and place them in a warm, bright place. It is undesirable for the seedlings to be exposed to direct sunlight.
When sowing Eschscholzia seedlings in plastic or collapsible cups, the planting method is no different from planting other flowers.
Seedlings need to be watered as the soil dries. Under no circumstances should you flood the plantings. Monitor the microclimate of the room. Optimum air temperature +21˚С +23˚С, humidity – no more than 40%-55%.
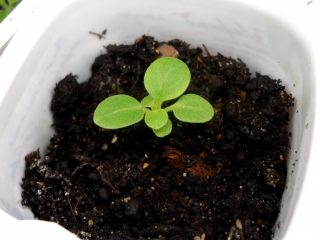
The first green shoots will delight you in 1.5-2 weeks. If you wish, you can feed Eschscholzia flower seedlings with complex mineral fertilizers 15-20 days after seed germination.
At least 2-3 weeks before the intended transplantation of Eschsholzia into open ground, the seedlings need to be hardened off. Accustomed to home conditions, Eschscholzia grown from seeds is not resistant to frost and sudden changes in ambient temperature.
Hardening should begin with an open window, near which you should place boxes or trays with seedlings. Subsequently, the plantings must be taken out onto the veranda or balcony. At first, the “walk” time is 30-40 minutes. Gradually increase the duration to 3-4 hours.After hardening, the seedlings will be able to withstand a temperature drop to –5˚C.
Transplantation into open ground
You can transplant Eschscholzia into open ground when the air temperature warms up to +18˚С +22˚С. The optimal planting time in the southern regions of Russia occurs in the second half of April. But in regions with a more severe climate, you should not start replanting before the second half of May.
The flower garden needs to be prepared in advance. Add sand and humus and dig the soil thoroughly. Prepare small holes 15-20 cm deep. The distance between planting holes should be at least 30-35 cm, since Eschscholzia bushes grow quickly.
Carefully, being careful not to disturb the earthen ball, place the seedlings in the planting hole. Fill the voids with soil. Compact the soil at the base of the flower and water the future flower garden.
It is advisable to water Eschscholzia from a watering can, early in the morning or late in the evening. Make sure that moisture does not accumulate in large quantities on the flower beds.
The first buds on young bushes will appear 30-40 days after sowing.
Aftercare
After planting in open ground, Eschscholzia flowers do not require special care. Every gardener has long known such activities as weeding and loosening.
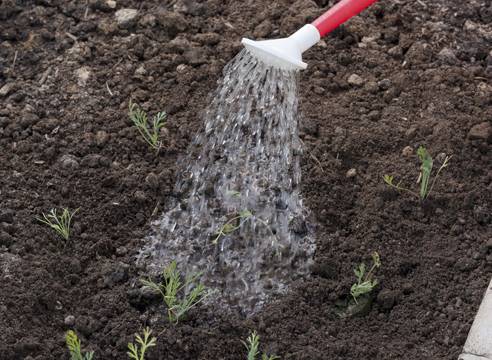
There is no need to water flower beds with Eschscholzia too often. Thanks to its long roots, the plant can absorb moisture from the deep layers of the soil. Therefore, flowers only need watering during dry periods. In normal weather, California poppy gets enough moisture from rain and dew.
To stimulate abundant and long-lasting flowering, you can fertilize Eschscholzia with mineral fertilizer, which contains potassium, nitrogen and phosphorus. The feeding scheme looks like this:
- 1st time - during transplantation into open ground;
- 2nd time - after 3-4 weeks.
As soon as the first buds appear on the bushes, fertilizers should be abandoned.
If you don’t have mineral fertilizers, you can fertilize the soil with ash when replanting Eschsholzia flowers. Just add a handful of ash to each hole.
Having grown Eschscholzia once, you can admire its bright, unique buds every year. Flowers reproduce well on their own by scattering seeds. If you do not plan or for some reason do not want Eschscholzia to grow randomly, remove wilted buds every week.
When the California poppy bushes have completely faded, remove old shoots from the flowerbed - Wormwood grows very quickly. In place of the old plant, young shoots will soon appear, which will bloom magnificently in a few weeks.
Diseases and pests
Despite the ease of care and high resistance to many diseases and pests, when growing Eschscholzia flowers from seeds, it is important to strictly adhere to the recommendations of gardeners.
Like all plants, Eschscholzia may be attacked by bean aphids in June. The drug “Commander” will help you cope with these insects.
In the hot, dry summer, many flower beds are attacked by spider mites, which you can remove with the help of Actellik insecticides.
Excessive watering will invariably lead to rotting of the root system and above-ground parts of the plant.When the first signs of rot appear, stop watering and remove damaged foliage. It is better to remove heavily damaged Eschscholzia bushes entirely to prevent the spread of the disease.
If flowers are infected with powdery mildew, plants should be treated with sulfur.
How to collect seeds
Collecting Eschscholzia seeds makes sense if you want to share it with someone or want to plant it in another location. To do this, thin cotton bags are placed on the seed pods. After the seeds ripen, that is, about a month after the buds wither, cut the boxes from the bush.
At home, you need to carefully shake out the seeds from the bags and seed pods and dry them. Place the prepared seed material in paper bags and place it in the refrigerator in the bottom drawer. The seed material should be stored there until spring. Eschscholzia flower seeds remain viable for 3-4 years.
If you want to admire the delicate and beautiful flowers of Eschscholzia next summer without much hassle, remove the old bushes and dig up the soil in the fall, before frost. In spring, thick, strong shoots will appear in the flower garden. A couple of weeks after the seeds germinate, you only need to thin out the plantings and add fertilizer to the soil.
In about a month, your flowerbeds will once again be decorated with the vibrant and beautiful flowers of Eschsholzia.
The author of the video will tell you more about the features of growing Eschscholzia from seeds: when to plant and how to care for them:
Conclusion
The rules of agricultural technology for growing Eschscholzia from seeds are so simple that even a novice gardener can cope with this matter.With the help of these simple but eye-catching flowers, you can not only decorate your garden plot, but also create various compositions in landscape design.