Content
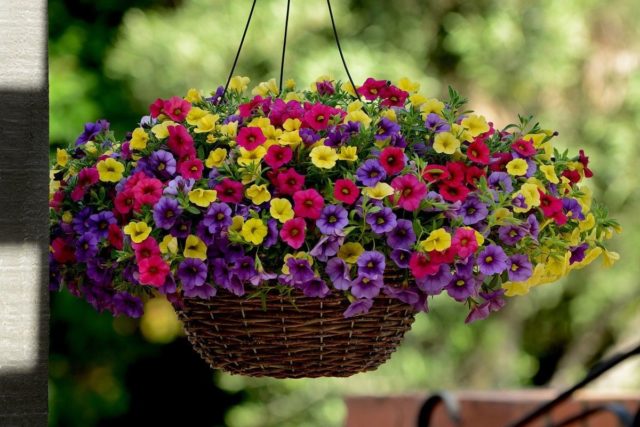
Calibrachoa is a semi-shrub herbaceous plant, which until 1993 was considered a type of petunia, then the culture was identified as a separate genus. In ornamental gardening, ampelous varieties are often used for vertical gardening; the crop is also grown as a ground cover plant. They propagate vegetatively, since calibrachoa can only be rooted by cuttings.
Is it possible to take calibrachoa cuttings?
The beautifully flowering plant is represented by numerous hybrids with all kinds of flower colors; they are used for landscape design and vertical decoration. It is unlikely that it will be possible to obtain seeds from an artificially bred variety.
The growing season of the crop is focused on the formation of flowers, and not on the laying of seeds. If the material was successfully collected, the young plant will be radically different from the mother variety. The generative method is used in breeding work to create new varieties.Seed germination is poor, seedlings are weak, require special care, and seedlings rarely survive to adulthood. Unlike petunia, which fully reproduces generatively and vegetatively, the only method of rooting calibrachoa is by cuttings. Cuttings are the optimal propagation method, taking into account the high survival rate of the plant.
Features of growing calibrachoa from cuttings at home
To obtain a well-developed, abundantly flowering subshrub, a number of rules must be followed during the cutting process. Plant the material in previously prepared soil:
- The basis will be the purchased soil for seedlings; it is rubbed through a metal sieve with large cells, resulting in a homogeneous substrate without hard fragments.
- To improve soil aeration, sifted river sand (30% of the total mass) is added to it.
- The next component will be agroperlite; it absorbs excess moisture and, if the soil moisture is insufficient, releases water back. Natural material is added at the rate of 600 g per 2 kg of soil.
Before cuttings, the composition of the nutrient mixture should not be dry or waterlogged.
It is necessary to choose the right moment for cuttings. The shoots should not be grassy or brittle. Such material takes root poorly or does not take root at all. Severely stiff ones are also not suitable. They take shoots that are strong, flexible, and resilient.
When propagating calibrachoa by cuttings at home, certain requirements must be met. To create a greenhouse effect, the cuttings are placed in a mini-greenhouse. Before planting, use a drug that stimulates root growth.
When is the best time to take calibrachoa cuttings?
Beautifully flowering hybrids are grown as an annual plant, so planting material is harvested twice per season. At the end of summer, cuttings are necessary to establish queen cells. In the spring they will serve as material for the next cuttings. The events are repeated every year.
Calibrachoa cuttings in autumn
Cuttings of calibrachoa for the winter are necessary to obtain queen cells. The work is carried out in July, when the plant is at its peak of flowering. At this time, the subshrub is considered the most powerful for cuttings. By autumn, the planting material will take root, give rise to several shoots, and be planted in separate containers. Plastic glasses (250 g) or disposable flower pots are suitable.
For winter, the containers are placed in a well-lit room with a temperature of +15÷17 0C. In this temperature regime, the growing season does not stop, but slows down; the plant forms shoots of sufficient strength for further cuttings, but at the same time does not have time to produce buds.
Calibrachoa cuttings in spring
Calibrachoa cuttings begin in the first half of March in the spring. For this purpose, all stems of the mother plant are used. 20 days after cutting and planting, the material should take root. The beginning of the formation of green mass becomes a signal for planting seedlings into separate pots. The mother plant is not preserved after cuttings.
After transplantation, calibrachoa not only takes root well, but also rapidly grows its root system. After placing the crop in its place of growth, micronutrients are completely used for crown formation and flowering.
How to propagate calibrachoa from cuttings
The key to 100% rooting of the crop will be correct cuttings.Autumn and spring cuttings are carried out according to the same scheme; the requirements for planting material also do not differ. In addition to the classic option of planting stems in the ground, propagation of calibrachoa by cuttings can be carried out by rooting the material in water.
Chopped tops 8-10 cm long are placed in a container, the water is changed once every 4 days. After 14 days, the first thin roots should appear. This method of cutting is unproductive; material planted in the ground does not always take root.
Rules for taking cuttings
At the end of summer, stems suitable for rooting are selected from the crown of an adult plant. In early spring, all shoots are suitable for obtaining planting material from the mother plant. Calibrachoa cuttings step by step:
- 3-5 leaf nodes are left on the top.
- Cut off the stem.
- All lower leaves are removed along with the beginnings of new shoots; if there are buds, they are also disposed of.
- Leave the top and two subsequent leaves.
- The cutting should be 4-5 cm long.
- To reduce the area of evaporation, the leaves left on the stem are shortened by ½ length.
Preparation of cuttings
The cutting should not be long; 2.5 cm will be used for grounding; another 1 cm should remain to the leaf node after planting. The excess part is cut off. If the stem is too short, you will have to cover the leaves, but they will rot in the soil, and such a cutting will not take root.
If the planting material is too long, the upper part will fall to the soil surface, which will lead to a violation of the integrity of the soil at the rooting site, which will lead to the death of the seedling.For better development of the root system, before placing it in the ground, the lower part is dipped in water and Kornevin powder.
Landing
Sequence of planting calibrachoa cuttings:
- Pour the prepared mixture into the container and compact it well.
- Make round indentations; you can use a ballpoint pen for this. Planting pattern 5*5 cm.
- A plant is placed vertically in each mini-hole and carefully sprinkled with soil so that there is no void near the stem.
- To prevent root rot, each seedling is watered with a Fitosporin solution.
- After watering, the soil should settle and the leaf heel should remain on the surface.
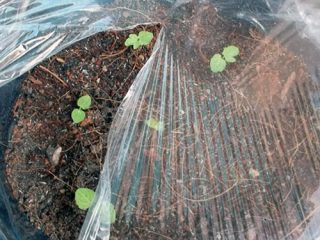
If the plant is planted in a special mini-greenhouse, it is covered with film on top; if in a simple container, then it is placed in a plastic box and covered with film with pre-made ventilation holes. When planting in spring, the structure is placed in a bright room with a temperature not lower than + 20 0C. When cutting in autumn, the material is left in a shaded place.
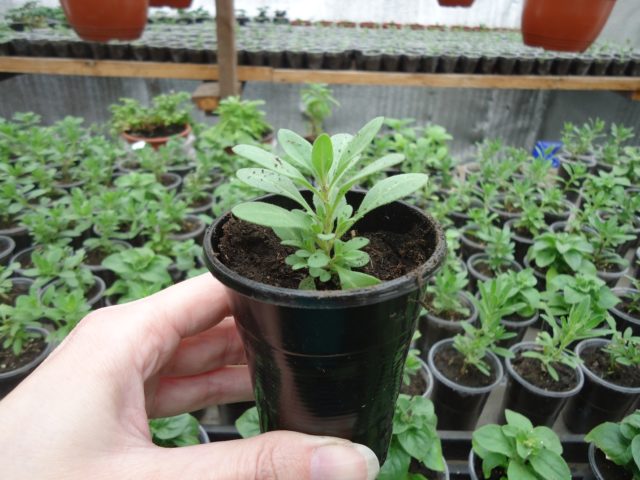
After 30 days, the rooted plant will sprout and become cramped in the planting container. Seedlings are planted in separate containers.
Care
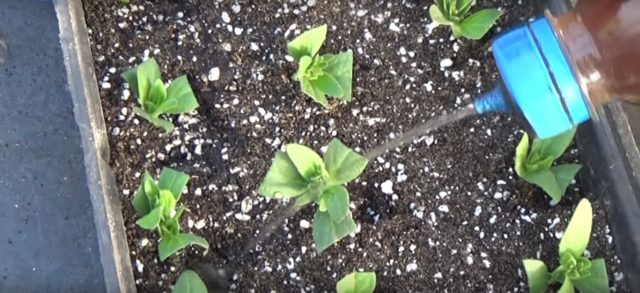
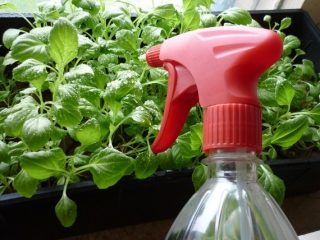
Water the plant at the root with warm water once every 4 days; the substrate should not be moistened excessively, but it should not be allowed to dry out. The correctness of the regime is determined by the film; the humidity under it should be high, but without condensation accumulation. Every day in the morning or evening the plant is sprayed with a spray bottle. 1 week before planting, add Zircon to the water.
Every three days, the covering material is lifted for air circulation; after 20 days, the film is completely removed.To ensure that the crown becomes rounded in the future, the crown of each stem is broken before diving the calibrachoa.
Transplantation into open ground
After the cuttings are carried out correctly, the plant will take root completely and in the spring it will be ready for planting in a pot or on a plot. If there is no threat of return frosts in May, calibrachoa is planted in the ground.
The plant is heat-loving, but does not respond well to completely open space. The planting site should be periodically shaded. The soil should be fertile, slightly acidic; neutral, moderately moist soils with satisfactory aeration are suitable.
If the purpose of planting is vertical gardening, the pots are chosen taking into account the fact that the crown of the bush reaches a diameter of 0.5 m or more, and the stems can grow up to 1.5 meters. The bottom of the flower pot is covered with expanded clay; the soil mixture is the same as that used for cuttings. If calibrachoa is planted on a plot, the recess is made 10 cm wider than the picking pot and 15 cm deeper.
Landing:
- If the container is disposable, it is cut.
- Carefully take out the seedling.
- Part of the substrate is poured on top of the drainage, and the calibrachoa is placed along with a lump of earth.
- The pot or hole is filled with the substrate gradually so that there is no emptiness.
- After planting, the plant is watered with organic fertilizer.
Conclusion
Calibrachoa can be rooted in autumn and spring using cuttings. The plant has a high survival rate and responds well to transplantation. Grows quickly, forms numerous shoots. It blooms from late June to September, blooming profusely. The plant is used as a ground cover option for landscape design and for vertical gardening of loggias, verandas, and gazebos.A video on cutting calibrachoa will help you correctly propagate the decorative herbaceous subshrub and achieve a high rate of rooting of planting material.
