Content
Growing amaranth from seeds has practical value, since the plant is beneficial for the body. Decades ago, the crop was one of the leading grains. And today people are returning to their roots, planting the plant not as decoration, but as a vegetable, medicinal, and fodder crop. It is worth understanding in more detail when and how to grow amaranth.
When to sow amaranth for seedlings in 2023
Cultivation of seedlings takes 60-70 days. Taking this into account, the recommended planting period starts from February 15 and ends on March 10. At home, amaranth seeds ripen faster. However, timing varies across regions.
When to sow amaranth for seedlings in the Moscow region
Residents of the Moscow region can start growing from the end of February. The same terms apply to cities and villages in the middle zone.
When to sow amaranth for seedlings in Siberia
Siberian frosts allow you to sow amaranth seedlings only at home. The container with the seeds is placed on the windowsill at the end of March. Caution should be maintained: seedlings may be vigorous and outgrow the normal mark. Overgrown ones do not get along well and recover more slowly when picking.
Planting amaranth seeds for seedlings at home
Amaranth seeds have good germination, so planting does not cause problems. However, there are several factors that even professionals forget to take into account. Amaranth is grown in stages, starting with the preparation of planting material and container.
Seed selection and preparation
Most often, seeds are purchased in stores. They remain viable for 4-5 years, then the chances drop rapidly. The gardener needs to look at the seed production date as well as the variety. Amaranth seeds can be dark or light. The former produce red leaves, the latter – green.

Both dark and light seeds are equally beneficial for the body
Before growing, it is recommended to mix seeds with a porous substance (wood shavings, sand, ash), this is due to the fact that in the natural environment the material grows on light substrates with good throughput.The proportion is 1:20, where 1 is the seed, and 20 is the amount of substance. Thanks to ventilation and permeability, amaranth growth will be more intense.
Soil preparation
There are several options for where to plant seeds:
- Own soil. If you have a summer cottage, there are no problems with the supply of raw materials. If necessary, you can go into the forest and collect quality soil. Experts advise not to limit yourself to this: for optimal seed development, the substrate is mixed with peat, rotted manure, and bird droppings.
- Purchased soil. Such soils are already saturated with useful substances. The gardener only needs to control the acidity - it should be medium.
After collecting your own soil, it needs to be calcined (disinfected) in the oven. In addition to calcination, the earthen lump is treated with one of the following agents: potassium permanganate, copper sulfate, Fitosporin.
It will be easier to plant amaranth from seeds if potassium and phosphorus are present in the soil. The substances stimulate growth and, unlike nitrogen, do not turn into nitrates harmful to the body. Fertilizer is applied before planting day.
Selection of capacity
Growing amaranth seeds must comply with natural growing conditions. Choose a small container with a side height of 10 cm.

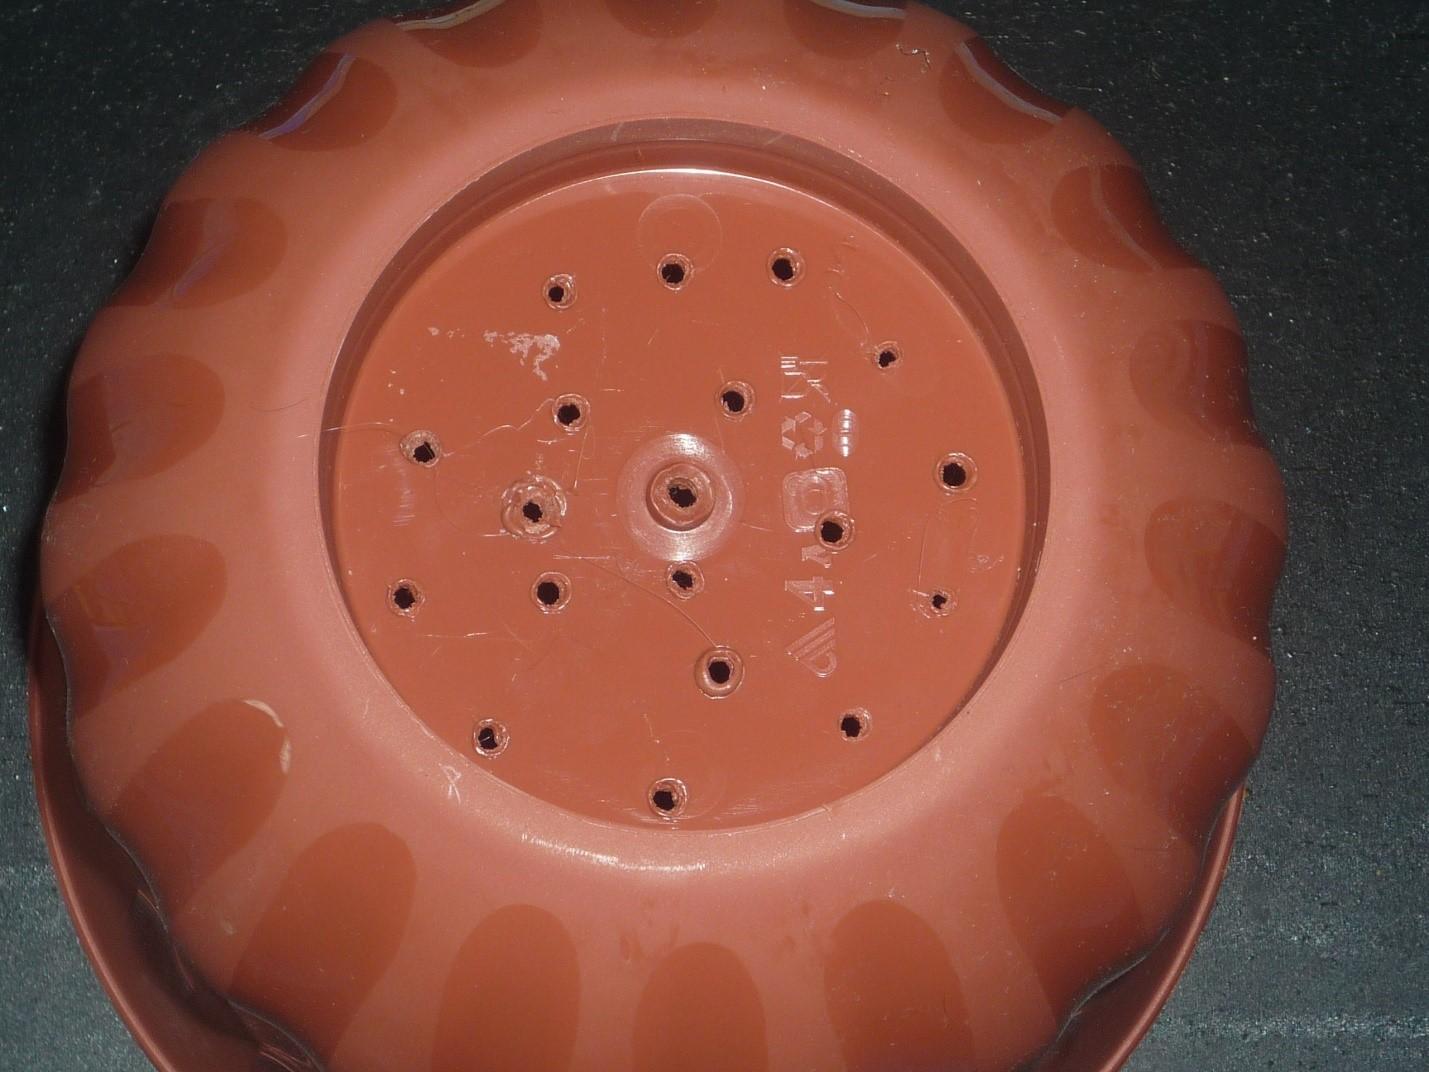
If there are no drainage holes in the container, do it yourself - drill or drive nails along the edges of the bottom
The container can be anything, the following are allowed: boxes, pots, cups, food boxes. Regardless of the origin, the container must be disinfected. To do this, fill a bottle with water, mix it with potassium permanganate and rinse.
Rules for sowing amaranth seeds for seedlings
The planting process is simple; after the preparatory procedures, drainage material (expanded clay, perlite) is placed at the bottom of the container. Thanks to this, moisture will not stagnate in the ground during cultivation. Afterwards, the pot is filled with fertile soil, leaving 2 cm of free space on top.
The seeds are poured out in one layer and pressed down onto the soil with your hand, without exerting excessive pressure. There is no need to provide holes for amaranth seeds; cultivation should be superficial so that the material hatches faster.
The crops are moistened with a sprayer and covered with film. Amaranth seeds are ventilated every day, otherwise they rot. The film is removed for half an hour and, while the seeds are enjoying the oxygen, droplets of water that have accumulated on the surface as condensation are removed.

When the soil begins to dry out, water the amaranth seeds from a spray bottle.
On what day do amaranth shoots appear?
After 5-7 days of cultivation, seedlings will begin to grow from the seeds. At this time, the shelter is removed (if you do not remove the lid, burns will appear). Since the planting was superficial, the amaranth root system will only go halfway into the ground; it needs to be sprinkled with a light substrate. If there is none, use the same soil, but pass it through a sieve.
Care and cultivation of seedlings at home
Further cultivation does not cause problems. Since the seedlings will be eaten, it is important to saturate the amaranth seeds with useful substances. The plant will grow faster if the temperature and lighting are appropriate, and it will also need to be watered and fed.

At home, the plant does not get sick, preventive treatments are not needed
When a certain height is reached, the seedlings are planted. This is a separate stage that needs to be carefully studied.
Temperature and lighting
Growing seedlings at home means that the amaranth will receive less sun. Therefore, the sprouts should stand on a illuminated - eastern or southern - windowsill. When there is a lack of sunlight, phytolamps are used. They are very helpful on cloudy days.
The recommended growing temperature is +20-24 °C. At lower elevations, amaranth grows weakened.
Watering
Seeds need to be watered as the top layers of soil dry out. This is also true for sprouted seedlings. Watering is done at the root, otherwise the leaves will become covered with burns.
How to pick amaranth
Picking (transplanting) helps seedlings develop large roots, since as they grow, there is little space in the container, and amaranth sprouts are forced to compete for better growing conditions. The benefits of picking have been proven by many years of practice.
The procedure is carried out when the sprouts form two leaves. To separate the bushes, water the ground with warm water and leave for 2-3 hours. At this time, you can start preparing individual containers: they are sterilized; filled with fertile soil, similar in composition to seedling soil.
Seedlings are removed from the ground using a toothpick, ice cream stick or other suitable tool. They need to be transferred to individual containers as soon as possible.After transplantation, the amaranth sprouted from seeds is irrigated with warm water (under the root) and placed in a sunny window.

When the soil settles a little, you will need to add soil to the roots; this may be necessary several times during cultivation.
Top dressing
Fertilizers are applied after 1.5-2 weeks of cultivation. You can use wood ash: it contains a small amount of nitrogen, which is enough to prevent the development of blackleg. The substance is passed through a sieve, forming a uniform 5 mm layer. To ensure that the ash is absorbed, the soil is actively watered.
Hardening
The procedure is carried out during cultivation, usually 15-20 days before planting in open ground. You need to harden gradually: first, open the window for 30 minutes, increasing the time by 20 minutes every day. In recent days, the pots are left out at night.
Planting seedlings in open ground
Planting amaranth seedlings with seeds and planting sprouted seedlings in open ground are not the same thing. In addition to hardening, sprouts are prepared by reducing watering, which should also be gradual and safe.
The place where the transplant is planned is chosen to be well-lit and protected from drafts. Amaranth is a light-loving crop, and its flowers will be more beautiful and its shoots will be greener in open areas. Special attention is paid to soil moisture; for example, ravines, deep holes and coastal strips are not suitable for cultivation, since they are abundant in moisture.
Amaranth grown from seeds is replanted in the evening. In cloudy weather, landing is allowed at any time of the day.

Removal from the pot creates a stressful situation for the crop, and unsuitable growing conditions can destroy the sprouts
The first three days the amaranth is shaded.When the weather begins to get gloomy, the shelter is removed. It is known that light shade accelerates growth, allowing the roots to adapt better.
The seedlings are removed in the same way as when picking: first they are moistened, allowed to stand for several hours and dug up with a miniature spatula. The hole should be ready by the time of transplantation. It is dug out according to the size of the earthen clod. The holes are formed in increments of 30 cm, but if a full-fledged fence is planned, the distance can be reduced. In this case, a distance of 80 cm is kept between the rows.
The underground part is carefully removed from the ground and transferred in the same position to a new location. Experts advise tilting the amaranth slightly to the side - according to them, this increases the growing speed. The seedlings need to be buried down to the bottom leaf and the soil near the stems compacted.
What to do if amaranth seedlings stretch out
Beginning gardeners are scratching their heads as to why the seedlings suddenly began to stretch out, although there were no prerequisites for this. This may be due to several reasons.
Firstly, the timing of sowing amaranth seeds for seedlings was violated. When planted early (in January or early February), the seedlings will tend to the sun, as they lack solar heat and light.

An increase in height always leads to thinning of the shoots, as a result of which the amaranth becomes weak
On the other hand, late cultivation periods are also harmful. The date for transferring seedlings to open ground has shifted, and weather conditions are no longer as favorable as they were a few weeks ago.
Secondly, pulling occurs due to the lack of hardening of amaranth before planting on the territory.Seedlings need time to adapt to new growing conditions. Immediately moving it into the garden is a bad idea. With a high probability, the seedlings will simply die, and those that remain will begin to stretch, trying to get more heat.
Conclusion
Growing amaranth from seeds must comply with the rules of agricultural technology. Planting takes place from February to March, the exact dates depend on the region. By that time, the container should be ready and disinfected. You can buy soil for seedlings at the store or use your own. The requirements for growing are simple: timely watering, fertilizing and picking. They begin replanting into the garden after hardening.


