Content
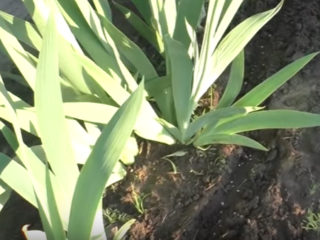
Planting and caring for Siberian iris in open ground is so simple that even an inexperienced gardener can handle it. Even swamp and wild-growing species can envy the sophistication, drought resistance, and winter hardiness of the crop.
Features of growing Siberian irises
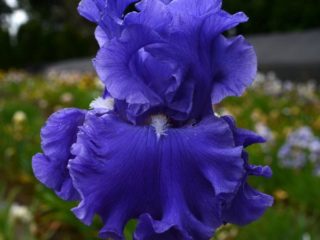
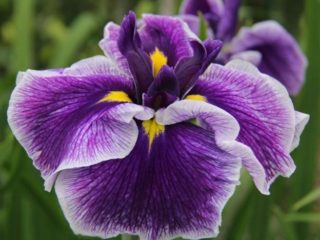
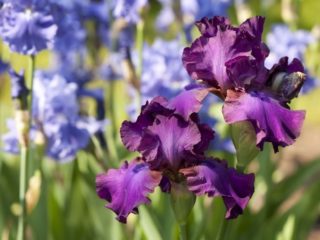
Siberian iris is a material for breeders to work with. More than 800 varieties of cultivated flowers are known that do not have a beard. Its petals are narrowed and long, diverging in one plane. The top is covered with small hairs resembling fluff. Color: lilac, blue, white, yellow, as well as a mixture of these colors.
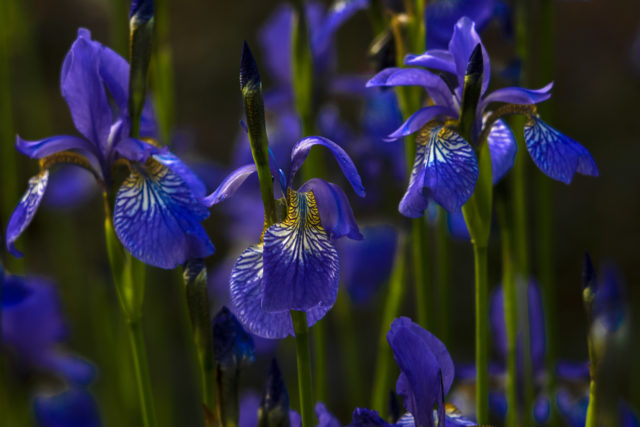
Siberian iris is popularly called “cuckoo’s tears”
Siberian iris (Iris Sibirica) is considered the hardiest. It is able to survive in harsh climatic conditions that can be found in Siberia. The variety is resistant to diseases and pests. The culture is growing rapidly, but its diversity is amazing.
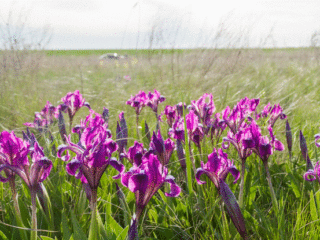
Another feature of growing Siberian irises is their different flowering periods, which is very valuable in landscape design. Some varieties bloom in June, while others bloom in July and August. Late are the remontant varieties, which manage to throw out peduncles twice per season.
An interesting fact is that some types of Siberian iris open their inflorescences in a bouquet, others alternately, thereby extending the flowering period. There are low, medium and tall specimens.
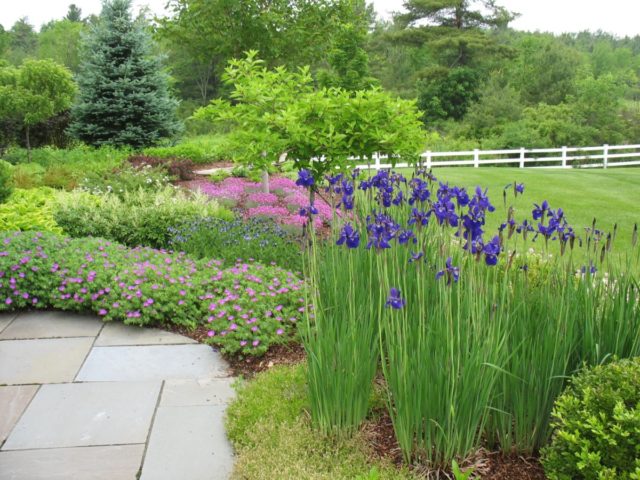
Irises planted in a dense bush look especially impressive. They can be higher than the foliage, level with it, or even lower. The first ones float in weightlessness, the second ones are beautiful framed by greenery, and the third ones seem to be hiding among the arrow-shaped tops.
Planting and caring for Siberian iris
Both planting and caring for Siberian iris will not be difficult. The main thing is to do everything on time and provide it with optimal conditions, which are: moderate humidity, illumination of the site and soil with neutral acidity. There are simple growing rules that will allow the iris to reveal its beauty.
Planting dates for Siberian irises
Iris can be planted several times per season:
- From March to May. It is necessary to plant Siberian iris in the spring after the soil has completely warmed up, when the threat of frost has passed.
- In autumn, from August to September inclusive. It is important to plant before low temperatures set in so that the irises take root well.
- Summer: June, July. Iris can also be planted during these months, but it requires special care. Timely watering and fertilizing will ensure rapid growth and successful development.
Rhizomes planted in spring and summer do not require winter shelter, and autumn seedlings should be slightly covered so that young cuttings do not die from severe frosts. Next year this procedure may not be performed.
The Siberian iris loves space, an abundance of light, and it does not sag from strong winds, so it does not require the installation of supports.
Site selection and soil preparation
Siberian iris is very sensitive to light, especially when cultivated in the middle and northern zones, so gardeners advise planting the plant in well-lit, warm areas. In the southern territories, flowers need places where partial shade will fall on them at midday.
Irises feel great near groundwater. Sometimes lilac flower beds can frame the banks of artificial reservoirs, while the root system does not suffer, which cannot be said about the elite of bearded irises.
How to plant Siberian iris
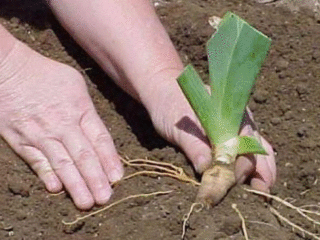
Having decided on the place and time of planting the iris, they begin to prepare the soil. Light loams with high fertility are an excellent option. If the soil layer is depleted, it is necessary to add black soil or compost, dig and make holes. The following landing steps:
- The holes should be slightly larger than the root of the Siberian iris seedling, so that they do not have to be bent when planting.
- Typically, the planting cutting of the rhizome in the ground is located horizontally, so it is also placed in the hole. Under no circumstances should you place it vertically. They are buried 7 cm into the soil, then sprinkled with earth.A distance of 60 cm is maintained between adjacent iris seedlings.
- The soil around the Siberian iris is compacted and watered well so that there are no air spaces left inside.
- To retain moisture in the ground, add a layer of mulch (5 cm), in the form of peat or mowed and shredded grass.
Iris planting material must meet certain requirements: foliage shortened to 1/3, rhizome segments no more than 12 cm.
Aftercare
The rhizome of the Siberian irises is significantly different from bearded irises. It practically crawls along the surface of the flowerbed, which makes it difficult to weed and loosen. Therefore, the main care techniques remain: feeding, watering and wintering.
Watering and fertilizing
To get maximum flower stalks, irises require timely feeding. The procedure is carried out twice per season:
- the first time - in early spring, after the snow melts;
- the second - before or after flowering.
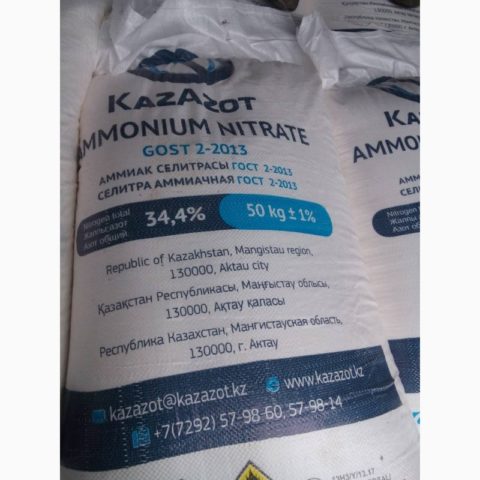
Ammonium and potassium nitrate are excellent as mineral fertilizers for irises.
To maintain soil fertility, mulch should always be present on the surface of the tree trunk circle. It not only retains moisture, but also nourishes the soil and provides coolness in the hot season.
Water the irises as the earthen ball dries out. The plant tolerates drought well. It is necessary to water once every 2-3 weeks, but with plenty of water. During the flowering of irises, irrigation is increased, once a week. Siberian irises are also responsive to overhead sprinklers, especially in the morning.
Wintering of the Siberian iris
The moment of preparing the Siberian iris for wintering is very important.Pruning of foliage is carried out with the onset of the first cold weather. At this time, the process of laying flower buds ends, and the foliage stops developing. The leaves are cut off so that stumps of 10-15 cm remain. A layer of mulch is poured on top of the rhizome so that the exposed areas are not damaged by the bright winter sun.
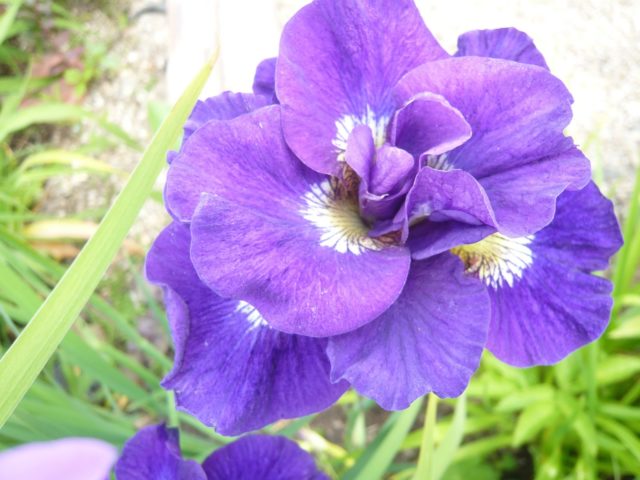
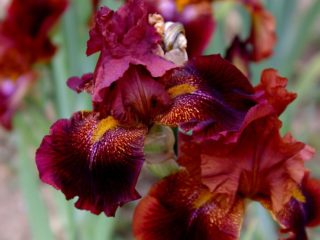
More than 800 varieties of Siberian iris have been bred, differing in flower structure and color
The need for replanting Siberian irises
Transplantation is necessary in the fifth year of iris growth. By this time, in the center of the bush the rhizome dries out, only the outer shoots remain.
When and how to replant Siberian iris
It is better to start replanting in the fall, after the Siberian iris blooms. By this time, young roots and annual growths are formed, which can take root well before the onset of frost.
Transplant procedure:
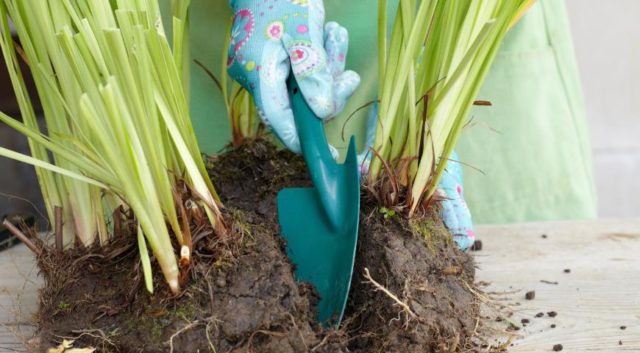
- The rhizome of Siberian iris is carefully dug out of the ground.
- To determine future divisions, the roots are washed with a hose, removing any remaining soil.
- Iris foliage is cut off, leaving petioles of 15 cm.
- If the rhizomes are separated in long sections, they are shortened with a sharp knife.
- The prepared bushes are transplanted to a new location.
When cutting seedlings, the foliage should resemble a fan, which will serve as a means of feeding the Siberian iris until wintering.
Reproduction of Siberian irises
Reproduction of Siberian iris is possible by separating independent segments from the rhizome or dividing the bush and seeds. The second method is more labor-intensive and is used less frequently.
Dividing the bush
The time for propagation of Siberian varieties of iris can be autumn or spring. The period is chosen depending on the climatic conditions of the region.In early winter, the procedure is performed in the spring, and in areas with late cold weather, iris can be propagated a couple of months after flowering.
Before dividing the iris bush, the foliage is cut off, leaving the lower part. Next, the root is divided so that each division contains 2-3 growth nodes. Root cuts are made with a sharp knife.
The chopped material is kept in a dark place for a week so that the wounds heal, and before planting it is soaked in water so that the roots swell slightly.
Dividing the bush is the most effective method of propagation
Growing Siberian iris from seeds
Many gardeners grow irises from seeds. There is no increased difficulty, but it will take time for the young plant to begin to bloom. Reproduction algorithm:
- The seed box is wrapped with gauze so that after ripening the seeds do not fall to the ground.
- Planting material is sown in the garden bed. Planting depth – 2 cm.
- The ground is covered with insulation (agrofibre, padding polyester, isospan, etc.) so that young shoots do not die from frost in winter and spring.
- With the onset of spring, the shelter is removed.
You can sow iris seeds at home, but to do this they must undergo stratification. They are wrapped in gauze, packaged in a plastic container and put in the refrigerator. Sowing begins in February. Sow in individual pots. Future sprouts are provided with warmth and light. It is best to plant Siberian iris in the spring; it is best to do this when it becomes warm outside.
Pests and diseases
Diseases often occur due to improper care. The most common diseases of Siberian iris are:
- Alternaria blight. Symptoms include black spots or spots on the foliage.The greens weaken and dry out. In case of heavy damage, the flower is eliminated from the flowerbed. At the initial stage of fungal development, irises are treated with Bordeaux mixture.
- Ascochyta blight. A fungal disease that can be recognized by brown spots that resemble burns. Irises are treated with products containing copper. In addition to vegetation, the soil should be sprayed.
- Heterosporiasis. With high humidity, irises may become covered with white-gray speckles. The foliage becomes watery, which indicates a disease. The fungus spreads quickly, so treat with a fungicide and cut off diseased leaves.
- Mosaic. If there are white oblong spots, treatment should begin. Treatment is carried out with any insecticide. For preventive purposes, spraying can be done in the spring.
The root part can also be damaged by fungi or viruses (root rot, bacteriosis, fusarium). In case of severe damage, Siberian irises are dug up and destroyed. If the symptoms were detected in the early stages, then various means are used: potassium permanganate, copper sulfate, folk remedies, fungicides.
Siberian iris can become a favorite food for some insect pests:
- bot aphid;
- onion mite;
- nematode;
- iris fly;
- thrips;
- scoops.
Destruction is carried out using insecticides: Iskra, Inta-Vir, Actellik, Decis, etc. Suitable folk remedies include: soap solution, infusions of bitter and odorous herbs. Carrots, garlic, and other herbs that repel insects are planted next to the Siberian iris.

Frequent diseases of Siberian iris that occur in the absence of care
Conclusion
Planting and caring for Siberian iris in open ground does not cause any particular difficulties.Severe frosts and winds cannot destroy the beauty of a flower, but protection from diseases and pests must be ensured.