Content
The genus of anemone consists of 150 species. Most of them are rhizomatous plants that are easy to care for; all the problems lie in their dislike of transplanting, since the fragile roots break easily. A small part of the genus consists of tuber-bearing anemones. They are very different from their relatives both in appearance and care. Capricious beauties with large, catchy single flowers attract the attention of others, but many gardeners refuse to get involved with planting them.
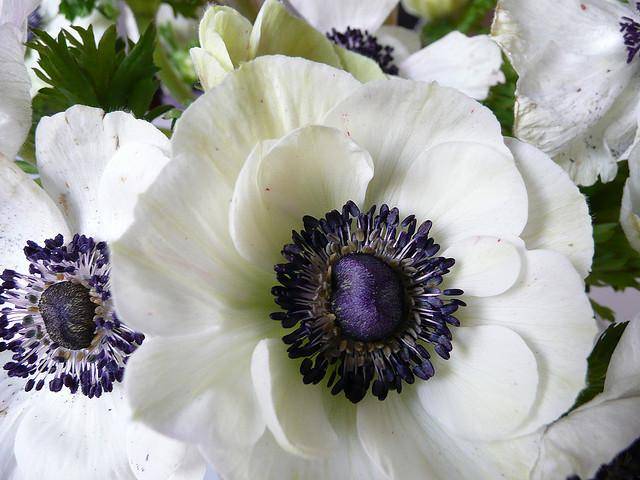
True, the most difficult thing to grow is the crown anemone. It is this flower that adorns articles about anemones and is sold in garden centers as wrinkled, dry bulbs with a beautiful picture on the label. But there are other tuberous anemones, planting and caring for which is much easier. True, they look simpler and cannot compare in beauty with the crowned anemone. Not all of them need to be dug up. winter.
Features of tuberous anemones
Anemones with tuberous rhizomes, most often grown in garden plots, include:
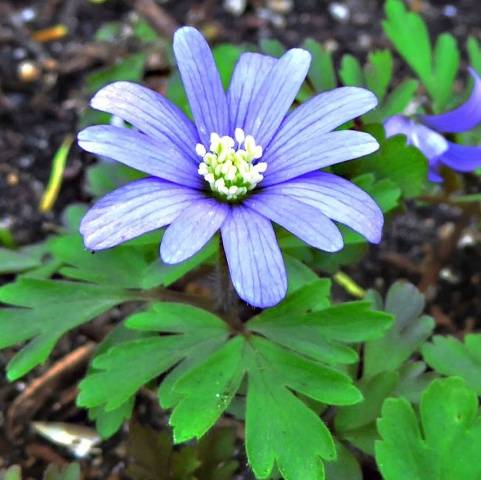
- Caucasian anemone. It grows high in the mountains and does not require digging for the winter.This anemone does not need frequent watering; it can grow in open areas. Its height reaches 10-20 cm, blue flowers do not exceed 3 cm in diameter, by the beginning of summer the above-ground part dries out and dies.
- Anemone Apennine. It is very similar to the Caucasian anemone, but its flowers are not blue, but blue, and the size does not exceed 15 cm. This anemone is not as frost-resistant as the previous one, but overwinters well in the ground if the temperature does not drop below 23 degrees. In cold regions where little snow falls, plantings should be mulched. There are garden forms of Apennine anemone with different colors and flower sizes.
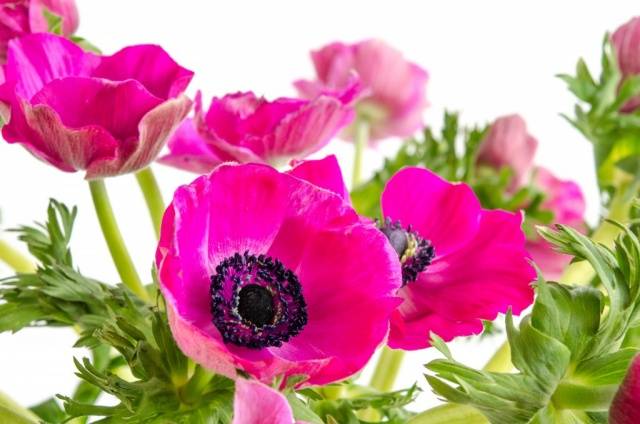
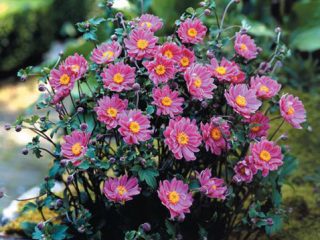
- Garden anemone. Its flowers are larger than those of previous species, they reach a diameter of 5 cm and are pink or red in color. The bushes can grow up to 30 cm. The tubers of this anemone do not overwinter in the flowerbed.
- Anemone is tender. Despite the name, it can withstand frost up to 25 degrees. The bushes grow up to 15 cm, the flowers of wild anemone are blue in color, garden varieties can be pink, white, lavender, red or bicolor. The plant is light-loving and can withstand drought well.
- Crown anemone. The most beautiful and most capricious of anemones. Its homeland is the Mediterranean and the Middle East; their warm climate cannot be compared with ours. Even in southern Ukraine one has to dig up this anemone for the winter, with the exception of the Black Sea coast. Numerous varieties and hybrids of crown anemone with double or simple flowers up to 8 cm in diameter and of various colors are usually grown in gardens and greenhouses. Its height is about 45 cm. Look at the photo how beautiful the crown anemone is.
All of the listed types of tuberous anemone are distinguished by the fact that after flowering the above-ground part dies off. After a short period of time, it is impossible to even find the place where the plants were planted. Therefore, an anemone tuber of a species that does not overwinter outside must be dug up before the above-ground part is washed away by rain or blown away by the wind.
Selection of anemone tubers
We are talking about choosing planting material in garden centers. If you grow anemones yourself, then you are confident in the quality of the bulbs, you know the storage conditions when they were dug up - last fall or five years ago.
Unfortunately, the only advice we can give is to buy anemone tubers from large garden centers. It is better if they are packaged and labeled by the manufacturer. So there is at least some guarantee that the planting material is of high quality.
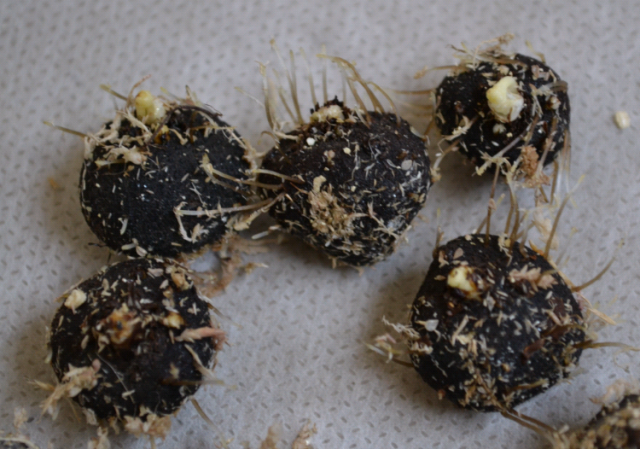
Unfortunately, only well-dried anemone tubers are sold. Look at the photos, they are wrinkled and deformed. There is one way to check germination - plant it in the ground and wait to see whether it will grow or not. We can only rely on the conscience of those who grew the anemones and sold the tubers.
When to Plant Anemones
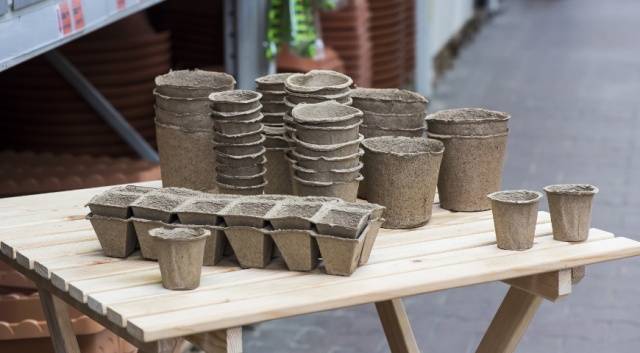
You can plant anemone tubers in the ground only in the spring, when it warms up well. But then the anemones will bloom, depending on the region, only by the middle or end of summer, and this does not suit everyone. For the early appearance of buds, the tubers are planted in peat cups and kept in a cool room. When warm weather sets in, they are buried in the ground level with the soil surface.
There is no need to use plastic or plastic containers to germinate anemone. When the time comes to plant anemones in the ground, they will have to be removed from the containers.It’s so easy to damage the roots, besides, the earthen lump can crumble in your hands, and all the work will go down the drain, and you’ll have to throw out the tuber. It is better to use peat cups; anemones are planted with them.
Anemones can be used for forcing. Then the question “when to plant” disappears by itself. You can force anemones at any time, which is what people have been doing for many years who have been growing crown anemones from tubers for cutting.
Choosing a place to plant anemones
Almost all anemones grow well in partial shade. But tuberous anemones are light-loving species. In the northern regions, anemone grown in a shaded area will not bloom at all or its color will be pale. In the south, on the contrary, it is impossible to plant plants under the scorching sun, but it is best to place them so that at noon they are protected by trees or shrubs with an openwork crown.
Absolutely all anemones do not like drafts. They received their second name due to the fact that the flower stalks sway at the slightest air vibration, and the petals can fly around even in a light breeze. For the anemone, you need to choose a quiet place, protected from bad weather.
Planting anemone tubers
Planting anemone itself is simple; it is much more difficult to properly prepare the tubers.
Soil preparation
Before planting anemones, prepare the soil. Flowers do not like stagnation of water at the roots, so they should not be placed in a damp place. If you absolutely must plant them where it is always wet, arrange drainage from gravel, crushed stone or broken red brick.
The second requirement of tuberous anemones is alkaline, loose soil. You can deoxidize it yourself by adding lime, ash or dolomite flour to the digging.Peat or well-rotted manure will help make the soil water- and breathable. It is often recommended to add sand to the soil for this purpose. But there is a nuance here - only large river leaves are used as a baking powder. If you add fine sand to the soil, it will not only not loosen it, but, on the contrary, will make it dense and unyielding, as if cementing it.
Before planting anemones, dig up the area, remove pebbles and roots of weeds.
Preparing to plant anemone tubers
If you immediately plant dry, wrinkled tubers in the ground, you will not be able to grow anemones from them. The bulbs must be pre-soaked. Each experienced gardener who successfully grows anemones has his own method. Here are some of them:
- Anemones are immersed in water so that the liquid covers only half of the tuber (this is done to prevent rotting) for 5-6 hours.
- A wet cloth is placed at the bottom of a shallow vessel, and anemone bulbs are placed on top.
- Place anemones in damp sand or sphagnum.
- Wrap the tubers in a wet cloth and place them in a cellophane bag.
Surely there are many more ways to soak anemone. The main thing is not to place the tubers completely in water. Once moistened, they should swell. It is very good to add epin or zircon to the water for soaking anemone tubers.
Planting in containers
In order for the anemone to bloom not by the end of summer, but much earlier, it needs to be germinated in peat pots. Further preparation is needed before planting. For this:
- Take a shallow container, pour a little soil mixed with sand on the bottom, moisten it and place the swollen anemone tubers on the surface.
- Cover the bowl with glass or wrap it in transparent cellophane and place it in a cool place with a temperature of about 5 degrees.
- Ventilate the anemone tubers daily and keep the substrate moist.
- After about 10 days, roots and growth points should appear. If they are not there, keep the anemone tubers in the same condition for another week or a little more. Then the bulbs can be thrown away.
- Plant the sprouted anemones in peat cups with a light soil mixture to a depth of 5 cm so that the growing points are directed upward.
- Keep the pots at a temperature of approximately 12 degrees.
- Anemones are planted together with cups when weather conditions permit.
Landing in the ground
If you plant anemones directly into the ground, additional germination of the tubers after soaking is not necessary. Dig shallow holes, add humus to each handful, if you did not add it for digging, and mix well with the soil.
Anemone tubers should be planted to a depth of 5 cm. It is recommended to place them with their growth points up, with the blunt end down. But you are unlikely to find them on swollen tubers. Of course, try to figure it out, if it doesn’t work out, plant anemones, see what happens, the sprout will find its way to the light on its own, although it will take a few extra days.
Water the holes well and immediately mulch with peat or humus.
Caring for anemone in the ground
We have already done the most important work - we planted anemones. Now let's find out how to grow them.
Watering
This is the most crucial moment in caring for anemone. The soil should not dry out, but stagnation of water at the roots is dangerous. In the spring, plantings of anemone species that have not been dug up for the winter are watered no more than once a week, even if there is no rain for a long time.
In summer, if the weather is hot and dry, watering should be done daily. This is due to the fact that the root system of anemones is located close to the surface of the soil - it has dried out, and the flowers lack moisture. To save energy and time, mulch the soil. It will help retain water.
Feeding
Anemones are fed in the spring (species that overwinter in the ground) immediately after the first leaves appear with fertilizer containing a large amount of nitrogen. You can simply mulch the soil with dry mullein and scatter ash over the surface. At the moment of bud formation, the anemone is fed with a mineral complex. In the fall, after flowering, apply potassium monophosphate or another nitrogen-free fertilizer.
This feeding scheme is suitable for all anemones except crown anemones. They require additional doses of fertilizer during flowering.
Soil treatment
Anemones have a shallow root system. You cannot process the soil near them with a hoe or flat cutter. Weeding will have to be done manually. To make your work easier, mulch the soil with peat or dry mullein.
Conclusion
Of course, growing anemones from tubers is not so easy, especially those that need to be dug up every year for the winter. But how much joy these beautiful flowers can bring! Believe me, anemones are worth the effort spent on their maintenance.
