Content
Automatic watering is in demand not only in the garden or in the greenhouse. Owners of a large collection of indoor plants cannot do without it. Let's say you are a very busy person or you are going on vacation with your family for a month. In order not to ask strangers to water your flowers, you can simply get this simple system. Now we will look at what automatic watering for indoor plants is and what you can use to make it yourself.
Secrets of maintaining moisture without using automatic watering
When leaving your home for a short time, do not immediately panic and start designing a complex automatic watering system for 3-5 flowers. You can try to solve the problem quickly without cost.
The essence of the method under consideration lies in a number of procedures aimed at maximizing the preservation of moisture in the soil. What should be done:
- First of all, indoor flowers are flooded with water. If the plant is easily removed from the pot with a lump of earth, then its root system is dipped in water for a short time.As soon as the lump of soil begins to soak, the flower is immediately returned to its place in the pot.
- After water procedures, all plants are removed from the windowsill. They need to be placed in a semi-dark place. Here you need to be prepared that with limited lighting, plant growth will slow down, but evaporation and absorption of moisture by the plant will significantly decrease.
- The decorativeness of the flowers will suffer from the following action, and they will then take a long time to recover, but this procedure cannot be avoided. If flowers open on the plant or buds appear, then they all need to be cut off. If possible, it is advisable to thin out the thick green mass.
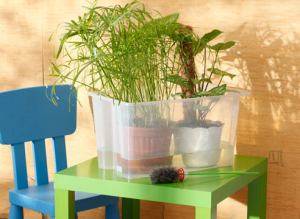
- Plants that have gone through all the stages of rigorous preparation are placed together with the pots in a deep tray, at the bottom of which a 50 mm layer of expanded clay is poured. Next, water is poured into the pan so that it covers the stone filler.
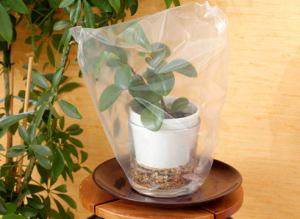
- The last stage is the creation of a greenhouse. The plants displayed in the tray are covered with a thin transparent film.
When the owners return home, the flowers will need to be reaccustomed to room air. To do this, the film is gradually opened slightly until complete adaptation of the plants occurs.
Types of automatic watering
If the considered method of preserving moisture is not suitable, you will have to assemble an automatic watering system for indoor plants with your own hands, and we will now look at how to do this.
Automatic drip irrigation
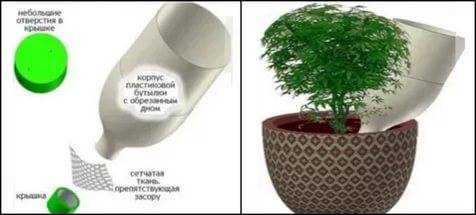
The simplest automatic watering can be made from PET bottles:
- Cut off the bottom of a plastic container with a knife. It will be convenient to pour water into the resulting funnel.
- A hole is made in the cork using a drill with a diameter of 3–4 mm.
- A thin mesh fabric is applied in one layer to the threaded part of the bottle neck. This will prevent the drain hole from becoming clogged.
- Now all that remains is to screw the plug onto the thread so that it secures the mesh.
I turn the finished structure upside down. There are two options for fixing the dropper: bury the neck of the bottle in the soil under the root of the plant or hang it on a support so that the cork is slightly pressed against the soil surface.
Now all that remains is to fill the bottle with water, and the automatic drip irrigation will work.
Automatic watering using a wick
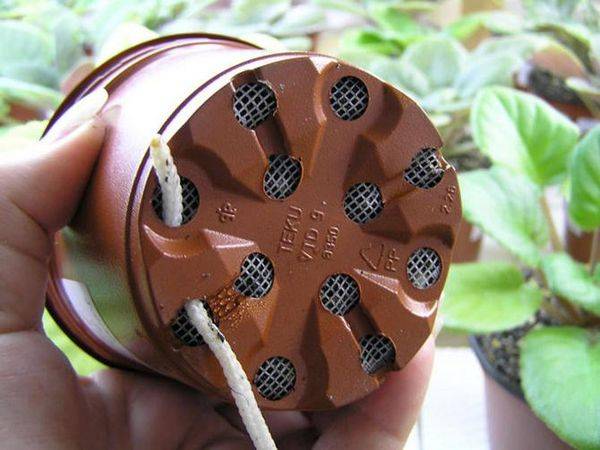
Another simplest method of automatic watering is the ability of an ordinary rope to transport water. A wick is made from it. One end of the cord is lowered inside a container of water, and the other is brought to the flower. The rope begins to absorb moisture and direct it to the plant.
The automatic watering wick can be fixed to the surface of the soil or inserted into the drainage hole of a flower pot. The second method is more suitable for violets and other ornamental plants planted on a light substrate.
For such automatic watering, you need to select synthetic cords with good water absorption. It is not advisable to make wicks from natural ropes. In the ground they will quickly dry out and tear. The good thing about the automatic watering system with wicks is that it can be adjusted. By raising containers of water above the level of the flower pots, the intensity of watering increases. We lowered it lower - the transport of moisture through the wick decreased.
Automatic watering without worries
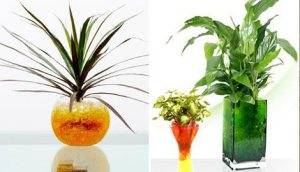
Modern technologies have made it possible for flower growers to abandon the invention of primitive automatic watering systems. After all, a flower with a plastic bottle sticking out of the pot or water containers placed around it looks ugly. The essence of self-watering technology is to use granulated clay or hydrogel beads, sold in any specialized store.
Each substance is capable of quickly accumulating a large amount of moisture, and then slowly releasing it to the plant as the soil dries. It should be taken into account that when absorbing water, granules or balls greatly increase in volume. Before using them, select a spacious pot. Clay or hydrogel is poured onto the bottom of the container, a plant with a lump of earth is placed, after which all the gaps near the walls of the pot are also filled with the selected substance.
Balls or granules will last a long time. Occasionally you will need to add water to the flower pot.
Automatic watering from a medical dropper
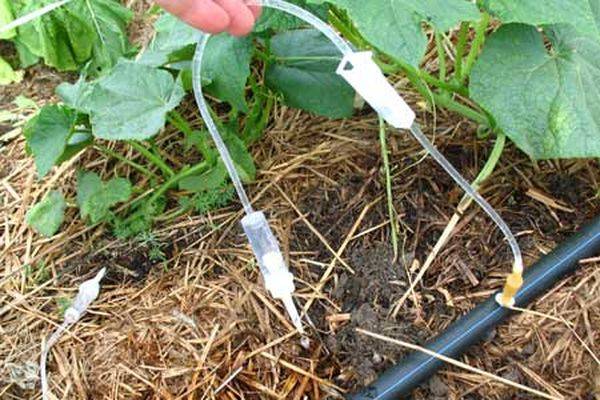
Medical drip systems are often used by gardeners when arranging automatic watering of beds in a greenhouse. The same droppers are suitable for indoor flowers. For each plant you will need to buy a separate system.
The connection diagram for drip irrigation resembles the use of a wick:
- A weight is attached to one end of the hose so that it does not float to the surface of the water, and the other end is fixed above the ground near the root of the plant.
- A container of water is secured above the level of the flower pot and the end of the hose with a load is lowered inside.
- Now all that remains is to open the dropper and adjust the water flow rate.
Automatic drip irrigation can be automated by purchasing an arduino controller in the store. The device, using sensors, will monitor the level of soil moisture and the amount of water in the container, which will create optimal conditions for the development of the plant.
Automatic watering using cones
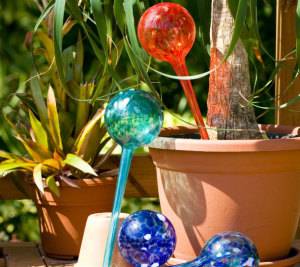
You can easily organize automatic watering with your own hands using colored cones. Such a system will additionally decorate the interior of the room. Plastic flasks are sold in different colors and shapes, but they all have a long spout. Simply fill this container with water, turn it upside down and stick it into the ground under the root of the flower.
As long as the soil in the pot is damp, water will not flow out of the flask. As the soil dries, more oxygen begins to pass through, and it enters the spout. In this case, water is pushed out of the flask.
Automatic watering using capillary mats
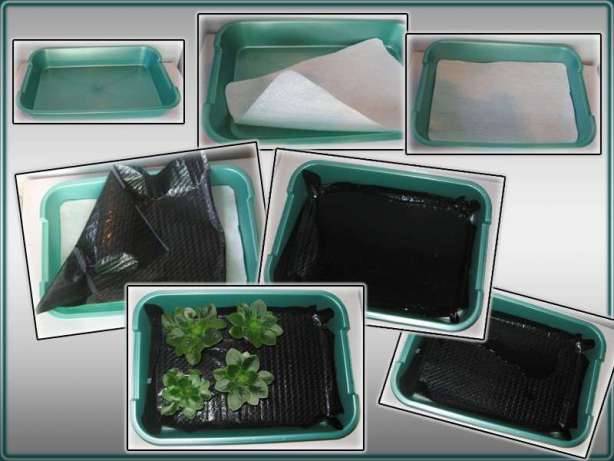
You can create a modern automatic watering system using capillary mats. These are ordinary rugs made of material that is highly hygroscopic. The mats absorb water well and then release it to the plants.
The automatic watering system uses two trays. Water is poured inside a larger container. Next, a smaller pallet with a perforated bottom is loaded. The bottom of the second container is covered with a mat, on top of which the plants are placed.
Alternatively, the capillary mat can simply be laid out on the table surface and pots with a drainage hole can be placed on it. One edge of the mat is lowered into a container of water. It begins to absorb liquid, moving it to the roots of the plants through the hole in the pots.
The video demonstrates automatic watering of flowers:
Pots with automatic watering system
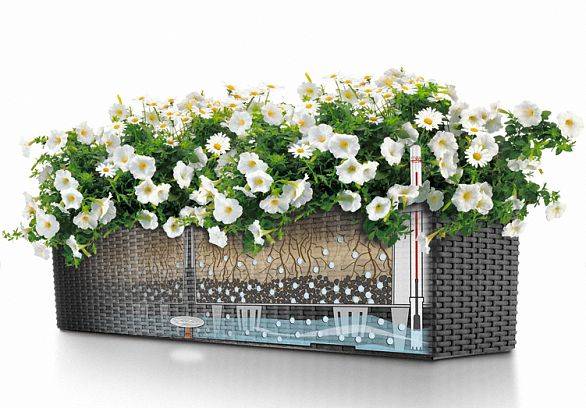
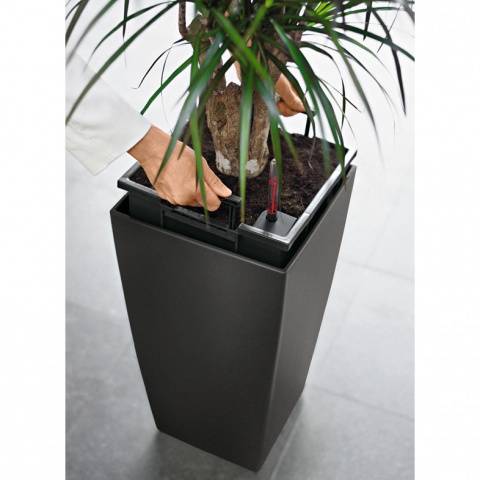
When growing indoor flowers, a pot with automatic watering is used, which allows you to provide the plant with moisture for about a month. The design consists of a container with a double bottom. Sometimes there are models made from two pots of different sizes, where the smaller part is inserted inside the larger container.
It doesn't matter what the design is. The essence of automatic watering is a double bottom. Water is poured into the lower reservoir. Through a drainage hole in the bottom of a smaller container, moisture enters the substrate, from where it is absorbed by the roots of the plant.
Using a flower pot with an automatic watering system is easy:
- The bottom of the inner pot is covered with a drainage layer. A young plant is planted on top of the prepared substrate.
- The lower reservoir is not yet filled with water. The flower is watered from above until it grows and its root system reaches the drainage layer. The duration of the period depends on the plant variety. This usually takes about three months.
- Now you can use automatic watering. Water is poured into the lower reservoir through the protruding tube until the float rises to the “max” mark.
- The next addition of water is performed when the signal float drops to the lower “min” mark. But you shouldn’t do this right away. The soil will still be saturated with water for several days.
You can determine whether the soil is drying out using the same float. It needs to be removed from the chamber and wiped with your hand. Drops of moisture on the surface indicate that it is too early to top up. When the float is dry, a thin wooden stick is stuck into the ground.If it does not stick to the damp substrate, then it’s time to add water.
The video demonstrates the making of a pot with automatic watering:
Conclusion
The automatic watering system is very convenient for caring for indoor plants, but you cannot overdo it. Otherwise, the flowers will simply get wet due to improper adjustment of the water supply.
