Content
Many people would like to decorate their summer cottage or local area with evergreen coniferous shrubs. One possible option in this case could be juniper. This plant not only has a beautiful decorative appearance, but also has many useful properties. Isn’t planting and caring for juniper difficult? and even the most inexperienced gardener can cope with them.
When to plant juniper
Juniper seedlings are grown and sold, as a rule, in special containers filled with nutritious soil. Their age at the time of planting should be 3-4 years. Such seedlings can be planted in open ground in the spring, from early April to late May.A good period for planting juniper is autumn, the period from early September to late October. However, at this time it is possible to plant seedlings only with a buried root system.
Later dates are undesirable, since the bush may not have time to acclimatize in a new place and will die in the winter. Planting juniper in summer is also undesirable.
Where to plant juniper
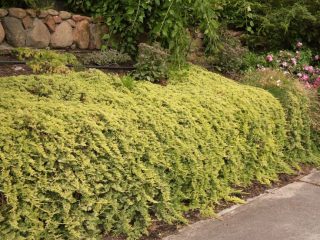
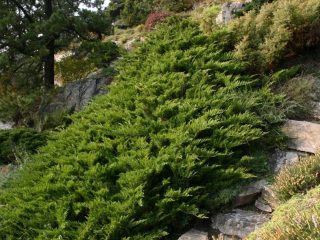
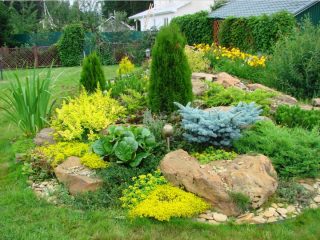
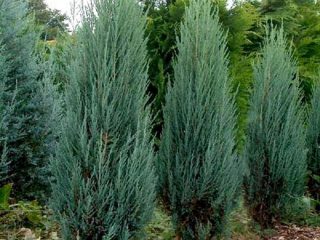
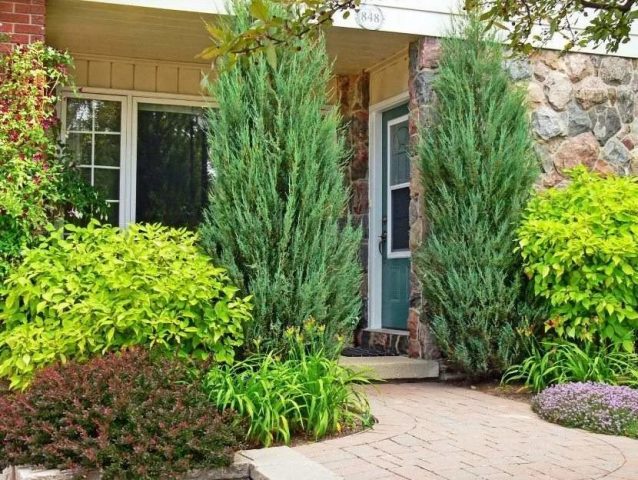
Most often, juniper is grown in the garden, using it as an element of landscape design. Tree-like varieties are planted along paths and alleys, dwarf and creeping varieties are used in the design of alpine hills, rockeries, and juniper plantings are used to strengthen slopes and embankments.
Is it possible to plant juniper near the house?
On the south side of the house, juniper bushes will feel relatively good. In such a place they will have enough sunlight, and the building will protect them from the cold north wind. When planting juniper near the house, you should take into account the dimensions of the future shrub. Some tree-like species can reach significant sizes, both in height and in volume, so planting them close to the house is undesirable.
Some gardeners are afraid to plant juniper near their homes because of its toxicity. Indeed, all species of this shrub, with the exception of common juniper, are poisonous to one degree or another. However, poisoning can only occur if any parts of the tree are ingested, for example, its berries. Irritation can also occur if juniper resin comes into contact with exposed skin.However, if you follow basic precautions when planting, these bushes can be grown near your home quite calmly, including their most poisonous (but also the most decorative) variety - Cossack juniper.
Where is the best place to plant juniper on the site?
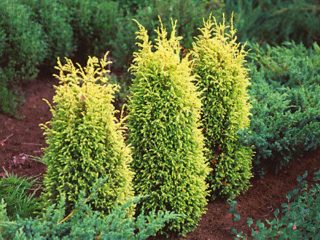
Juniper is light-loving, it does not like shade and grows well only in the sun or light partial shade. In the wild, it grows in pure coniferous and mixed forests, in clearings, forest roads, forest edges and clearings, i.e. where it gets enough sunlight. Therefore, you should look for an open, clean place to plant it. It is also permissible to plant shrubs in places where the sun is present most of the daylight hours. If the bush feels a lack of sunlight, its crown will be loose and the color will be faded.
What to plant next to juniper
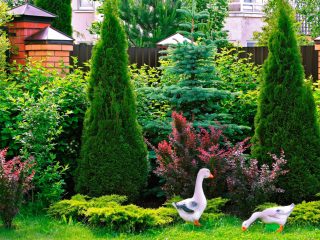
Juniper bushes can be planted either alone or in a group with other plants. Juniper compatibility is good and it tolerates the proximity to other plants calmly. For decorative purposes, it is often planted next to other larger coniferous trees, such as fir or pine. Roses, peonies and clematis are good neighbors with this evergreen shrub, but they need to be planted at some distance. As part of flower arrangements, bulbs are often planted nearby: tulips, daffodils, hyacinths.
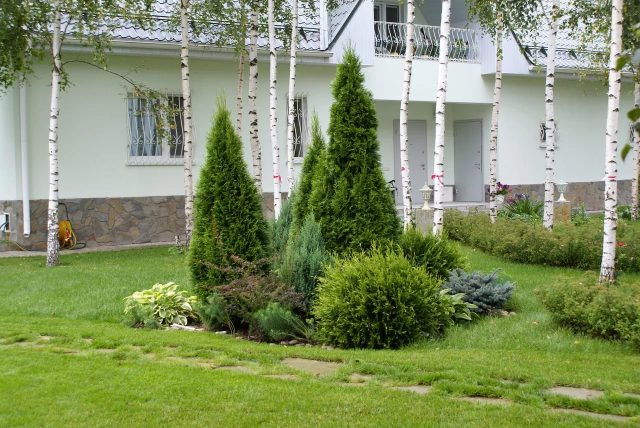
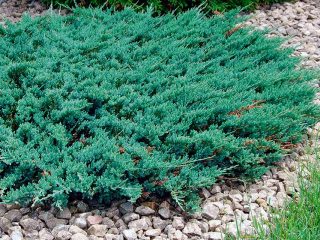
When designing alpine hills, rockeries or Japanese-style gardens, creeping varieties of juniper go well with heathers of different colors.This composition looks very advantageous against the background of stones and large pebbles. It can be supplemented with dwarf spruce or weeping larch.
How to plant juniper
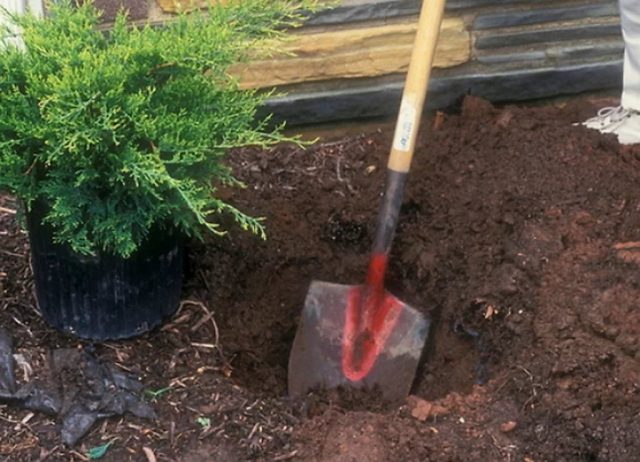
There is nothing complicated about planting juniper in open ground and caring for it. Ready-made seedlings can be purchased in specialized stores or nurseries. They are usually sold in special individual containers filled with nutrient soil. When planting, the seedling is removed along with a lump of earth. At the same time, the nutrition of the roots is not disturbed, and the plant experiences much less stress when planted in open ground. The technology for preparing the site and a step-by-step description of the process of planting juniper in the spring are given below.
Preparing the soil for juniper and planting site
In most cases, the soil on a personal plot will not be ideal in composition for planting juniper. Different species of this shrub react differently to soil acidity. For example, Virginia prefers clayey, acidic soils, while Central Asian or Cossack varieties feel better on calcareous soils, and Siberian or Daurian will grow only on sand.
Moisture-loving Chinese and common junipers are best planted next to natural bodies of water. However, excess moisture is contraindicated for any variety of this shrub. In wetlands, where water stagnates after rain or in spring, it is better to avoid planting. The soil should be loose, well-drained and moderately moist.
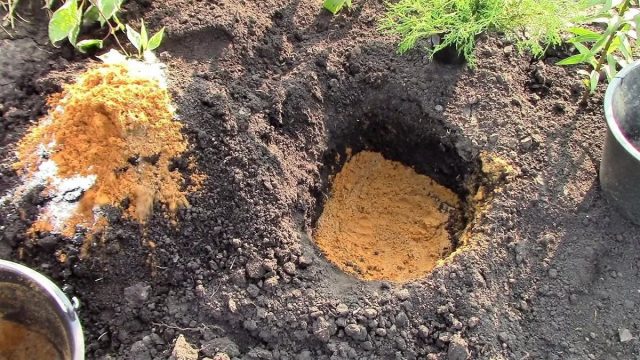
As a universal option for planting seedlings, you can prepare special soil with which the planting hole will be filled.To prepare it you will need coarse river sand, turf soil and peat. All components are taken in equal proportions and mixed. It is preferable to take the soil from under an adult juniper or from under any coniferous tree.
Planting holes must be dug several weeks before the planned planting date. A layer of drainage 15-20 cm thick must be laid on the bottom. Pieces of crushed stone or fragments of bricks are quite suitable for this purpose. You can pour a little nutrient soil over the drainage and leave the holes like that until planting. During this time, the ground will be saturated with air, and the loose soil will settle.
How to plant juniper correctly
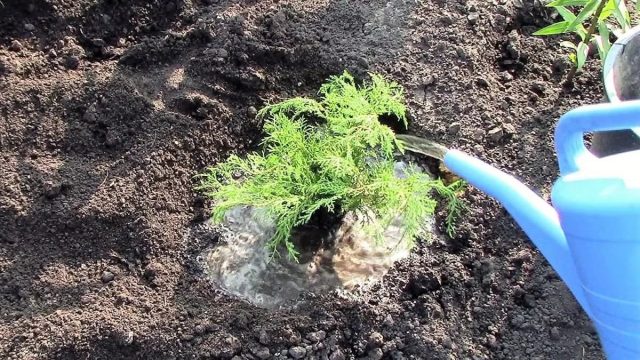
Half an hour before planting, the container with the seedling must be watered so that the soil is completely saturated. After this, removing the bush along with a lump of earth on the roots will not be difficult. The seedling is placed in a hole, adding soil so that the root collar is slightly above ground level. After the soil shrinks after watering, it will be just at the right level. The root collar cannot be buried in the ground. The remaining space in the planting hole is filled with soil mixture, periodically compacting it. After the hole is completely filled, the root zone of the juniper must be watered and then mulched with pine needles, bark or sawdust.
This measure will protect young seedlings from dogs, who love to mark coniferous trees. Animal urine has a sharp alkaline reaction and can completely destroy fragile plants.
Educational video about planting and caring for juniper in the garden - click on the link below
Distance when planting junipers
Juniper can only reach significant sizes in the wild. In garden conditions, even tree-like varieties rarely grow higher than 3-3.5 m. To prevent the crowns of neighboring plants from competing with each other, the distance between them when planting should be at least 1.5-2 m. For low bush forms and creeping species, it is enough distances 0.5-1 m.
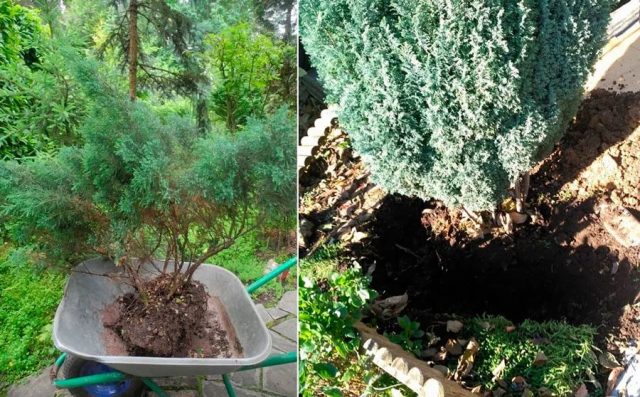
How to transplant juniper to another place
If for some reason the bush needs to be transplanted to a new place, then this can only be done at a young age. Adult plants tolerate this procedure much worse. Replanting juniper can be done in spring or autumn, the main thing is to keep an earthen ball of sufficient size on the roots.
Preparations for transplantation must begin a year before the planned work. The ground around the trunk at a distance of 40–50 cm must be pierced in a circle, cutting off the surface roots. This measure will give impetus to the development of a large number of small roots that will help hold the soil. It is also necessary to take care in advance about the planting holes, the volume of which must be guaranteed to accommodate the earthen ball of the transplanted plant.
For transplantation, choose a cloudy, cool day. The bush is dug up from all sides, after which it is carefully removed from the ground, trying to preserve the earthen lump on the roots as much as possible. It is best to transfer the plant to a new planting site on a piece of dense fabric, such as tarpaulin. Such a load will have significant weight, so it is not recommended to transplant large junipers alone.
After the bush is installed in the planting hole, all the same measures are carried out with it as when planting a young seedling. After spring transplantation, juniper must be shaded to reduce moisture loss. If the procedure was carried out in the fall, the transplanted bush must be watered regularly, and before the onset of cold weather, cover the root zone with a thick layer of mulch. This will avoid physiological drought - a condition when the plant evaporates more moisture than the root system supplies. This problem may arise in the plant in the first spring after transplantation. At this time, the damaged root system of the shrub will not yet be able to provide the plant with moisture, and the bright spring sun will intensively evaporate it from the needles. If this happens, the juniper will simply dry out.
How to care for juniper in the country
Juniper is not a plant that requires constant care. This is why many lovers of ornamental gardening love it. Often this shrub retains its decorative appearance for a long time even without any intervention from the gardener. However, certain measures to care for juniper in the country after planting will not be superfluous. These include:
- watering;
- feeding;
- loosening;
- mulching;
- shelter for the winter.
Usually juniper is not covered for the winter. The only exceptions are heat-loving species, as well as plants that have not been planted or transplanted for more than a year.In addition to them, shelter is also built around plants with a decorative crown to prevent damage to branches under the weight of snow or burnout of needles from the bright spring sun.
How to water juniper
Regular watering of junipers is not necessary. Several times during the summer will be enough, and even then only during the hot, dry period. These shrubs have a very negative attitude towards waterlogging the soil, but they respond well to spraying the crown. Sprinkling cleans the stomata, and the plant begins to emit a more distinct pine smell.
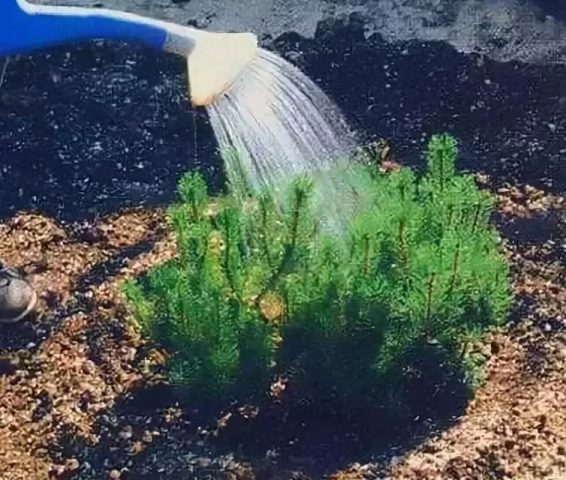
Spraying can be done only in the early morning or late evening so that the plant has time to dry before the sun appears. Otherwise, sunlight focused by drops of water can severely burn the needles.
Top dressing
The easiest way to give juniper everything it needs for growth and development after planting is to add dissolved complex fertilizer, such as Kemira-Universal, Khvoinka or Green Needle, to the root zone in the spring. There is no need to feed the plants with anything else, especially if the soil was prepared during planting and mineral fertilizers were applied.
Loosening and mulching
The root zone of juniper after planting must be cleared of weed and loosen regularly. Otherwise the plant will look sloppy. Mulch eliminates the need to constantly clean the tree trunks of weeds and significantly increases the decorative appearance of the planting as a whole. In addition to the aesthetic component, mulching significantly reduces the evaporation of moisture from the soil.
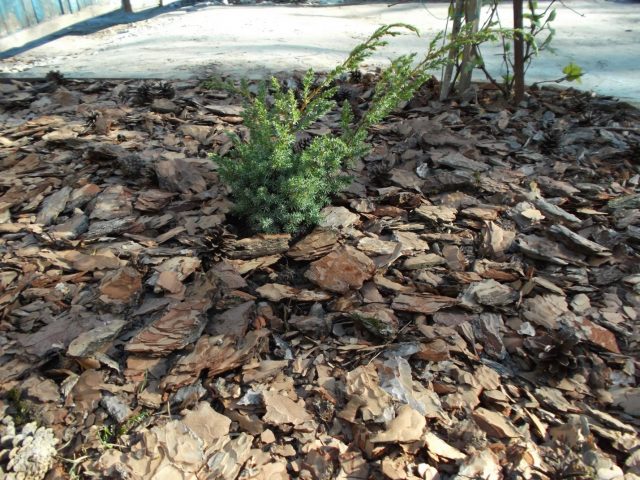
Tree bark, softwood sawdust, and peat can be used as mulch. The layer of such material must be increased before the winter cold. This will protect the juniper root system from freezing.
Pruning juniper in spring and summer
Pruning junipers in the spring is not a mandatory maintenance measure, but experienced gardeners never neglect this procedure. It can improve the health of the bush, rejuvenate it, and give it a more decorative appearance. There are several types of juniper pruning:
- sanitary;
- formative;
- thinning.
Sanitary pruning is carried out throughout the season. In spring and autumn, it is imperative to inspect the bush and cut out broken, dry, diseased and damaged branches. In some cases, it is necessary to do this in the summer, eliminating the consequences, for example, of unintentional mechanical damage to the bushes. The scheme for pruning juniper in spring is very simple. In addition to sanitary cleaning, at a young age the crown is formed and thinned out for better air exchange. Tree-like varieties with a narrow crown are pruned in the summer, keeping the bush from growing, as well as preserving its shape and dimensions.
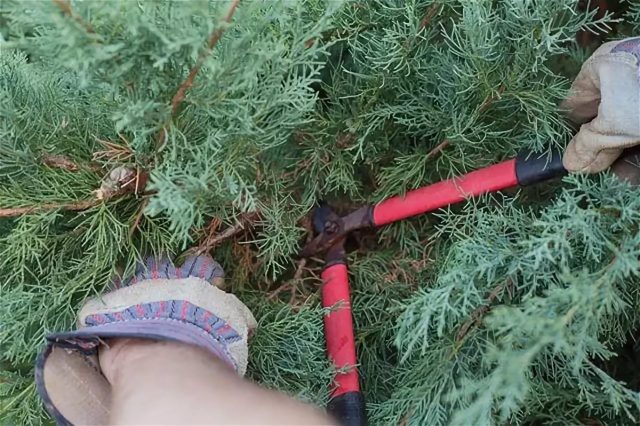
When pruning bushes, all work must be done with gloves. Resin that comes into contact with exposed areas of the body can cause painful skin irritation. It is also necessary to carry out work in special clothing, since things stained with resin are very difficult to wash off. It is very important to use a sharply sharpened tool, since even, smooth cuts are tightened much faster. All cutting edges must be disinfected with an alcohol-containing liquid or copper sulfate solution. It is recommended to treat open cuts with the same solution. After they dry, they need to be painted over with natural oil paint.
Protection from diseases and pests
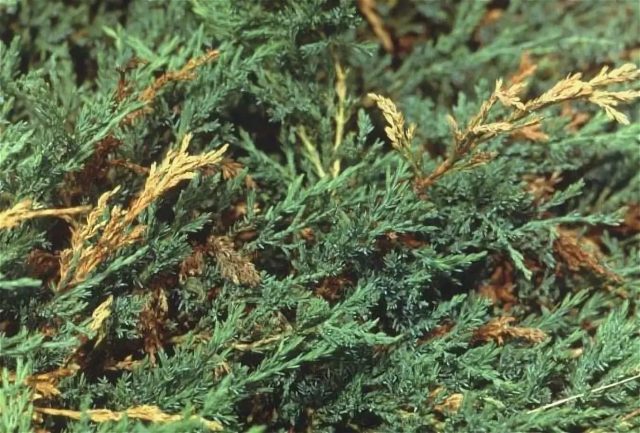
Diseases and pests quite often attack juniper. Shrubs in the southern regions are especially susceptible to this. The most common diseases include the following:
- juniper schutte (brown mold);
- fusarium;
- rust;
- drying out of shoots.
All these diseases are fungal and are associated, first of all, with improper care, waterlogging, and thickening of plantings. Also, the cause of the disease may be poor-quality planting material. To protect the garden, seedlings must be carefully inspected and any that cause suspicion should be discarded.
Of the insect pests, the greatest danger to juniper is the following:
- aphid;
- scale insect;
- mining moth;
- needle mite;
- Angled-winged moth.
The best way to prevent pests from appearing on juniper is to regularly carefully inspect the bush. It is very important to detect a colony of insects at an early stage, then the harm from their appearance will be minimal. If pests are detected, the juniper plantings must be treated with appropriate agents (insecticides, acaricides). Periodic spraying of the crown with folk remedies also gives good results: infusions of dandelion, nettle, tobacco or garlic.
Conclusion
Planting and caring for junipers takes up very little time in the seasonal gardening calendar. This evergreen coniferous shrub is a true long-liver among plants and can decorate an area for tens, or even hundreds of years. Therefore, despite the fact that he is quite unpretentious, you should not treat him according to the principle of “it grows and is fine.” With just a little care, the juniper will reveal itself in all its glory, giving not only aesthetic pleasure, but also a healthier atmosphere around the house.