Content
You can grow blue spruce from seeds if you follow the basic rules. Planting and care are associated with certain difficulties, but remain quite accessible even for beginners.
Is it possible to grow blue spruce from seeds?
Planting and growing blue spruce from seeds is a way to get a beautiful coniferous tree in your summer cottage without much expense. But the procedure cannot be called simple. The seeds of the crop germinate quite quickly when planted correctly, but the seedlings develop slowly and are sensitive.
The main disadvantage of this method is the negative attitude of blue spruce to transplantation. During cultivation, young seedlings have to be regularly transferred from container to container, and also planted in open ground, first in a temporary and then in a permanent place. Some plants may die in this case - the crop adapts slowly and poorly, and after 3-4 years it is not recommended to disturb it in principle.
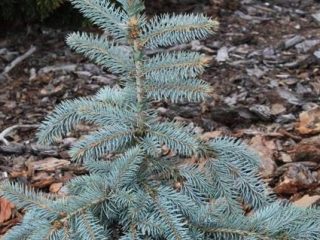
Another disadvantage of the seed method is that the spruce does not acquire a blue color immediately, but only after 2-3 years. At first, the needles of the seedlings are ordinary green. In addition, when using self-collected seeds, the original shade of the needles may not appear at all, or only 30-50% of the plants will acquire a bluish color.
Despite the disadvantages of planting seeds, the method is popular among summer residents. Blue spruce seedlings are quite expensive, but you can collect cones from mature trees for free and without much effort.
How long does blue spruce grow from seeds?
Blue spruce develops slowly; in the first 3-4 years, the increase in growth is very insignificant. Only at 7-8 years old does the young tree finally reach about 1 m in height.
What blue spruce seeds look like
Blue spruce bears reddish or purple cylindrical cones that turn brown over time. Under the outer scales are hidden the seeds - small black-brown grains up to 4 mm long. Each of them has a light wing up to 13 mm. In nature, spruce seeds are easily carried by the wind and spread over considerable distances.
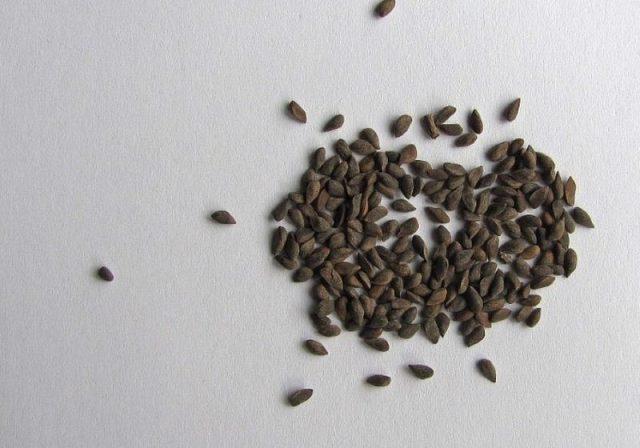
Quality spruce seeds suitable for planting should be smooth and shiny
Seed preparation
Before planting blue spruce seeds, it is necessary to carry out special preparation for the material. It includes the direct collection of cones, their opening and stratification of grains.
When and how to collect blue spruce seeds
To propagate blue spruce by seeds, you must first prepare material for planting. Even in the summer, you should identify a suitable tree on the site for collecting cones - it must be strong, healthy, without signs of disease, and over ten years old.
Direct procurement of material is usually carried out in November. More cones are collected from the selected tree - it is recommended to plant seeds with a reserve. Harvesting can be done until February. In this case, you need to choose only dense cones that have not had time to open.
Opening of scales
To obtain seeds for planting from collected blue spruce cones, it is necessary to stimulate the opening of the scales. They do it like this:
- Place the material in a narrow cardboard box.
- Place it on the radiator or on the top cabinet in the kitchen.
- Leave until the cones dry and fluff up.
After this, the material must be shaken thoroughly over a large sheet of paper. The seeds will spill onto the substrate and can be collected.
Before further processing, it is recommended to remove the planting material from the wings. To do this, the seeds are poured into a fabric bag and gently rubbed with your hands for several minutes without much pressure. Then you need to pour the material onto the paper again and separate the grains intended for planting from the remains of the wings.
Stratification of blue spruce seeds at home
Before planting blue spruce seeds, it is necessary to subject the material to stratification. The procedure is carried out as follows:
- Soak the planting material in a 1% potassium permanganate solution for 15-20 minutes.
- Wash the seeds and dry them on paper napkins.
- Place the grains in dry sand in a plastic container.
- Place in the refrigerator for 2-2.5 months.
Stratification accelerates subsequent seed germination and increases their resistance to fungal diseases.
Soil preparation
To sow blue spruce seeds, you need to choose the right substrate for the plant. The tree prefers moderately nutritious soil. The soil should be loose and breathable and light enough.
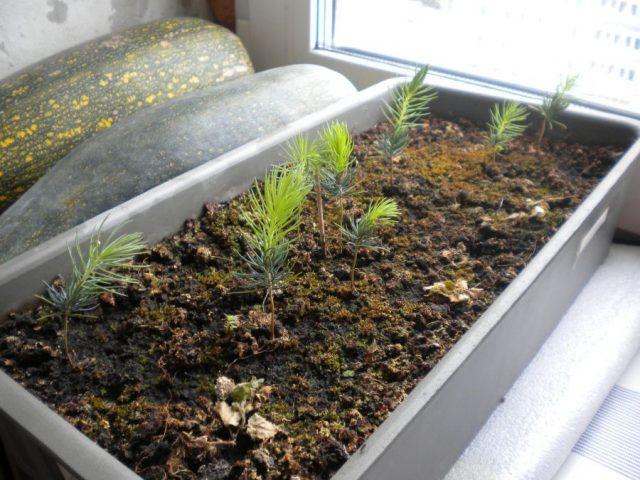
For planting blue spruce, it is allowed to use soil with a slightly acidic or neutral reaction.
To plant spruce seeds, you can take soil from a coniferous forest and dilute it with clean river sand. It is also allowed to add sifted peat and coconut to the substrate. To quickly develop seeds after planting, you can add a little ammophoska to the soil - no more than 20 g per 10 kg.
Before using for its intended purpose, the substrate must be disinfected. You can do this in several ways:
- Scalding. The prepared soil is spilled with boiling water. Most dangerous microorganisms are killed.
- Treatment with a fungicidal preparation. You can also spill the substrate with a dark pink solution of potassium permanganate or Fitosporin. The products effectively counteract bacteria and viruses.
- Calcination. The substrate is placed in the oven on a baking sheet and left for half an hour behind the closed door. The temperature is not set too high - only 70-90 °C.
Soil treatment helps protect spruce seeds from viruses and harmful microorganisms. Seedlings are less likely to suffer from diseases and the likelihood of their death is reduced.
How to plant blue spruce seeds correctly
Blue spruce seeds should be planted at home according to standard rules. Typically seeding is done in one of two ways.
In containers or pots
Like any plant, blue spruce can be planted from seed in plastic containers with drainage holes in the bottom. The height of the sides should be 10-12 cm; containers must be disinfected from bacteria before use.
The algorithm for direct planting of blue spruce when propagated by seeds looks like this:
- A small drainage layer is poured onto the bottom of the containers, and then the containers are filled 2/3 with nutritious soil with the addition of sand and peat.
- The soil is properly moistened and lightly pressed with your hands.
- Spruce seeds are laid out on the surface of the soil and pressed a little with your fingers.
- Spray the grains from a spray bottle and stretch a transparent film over the container.
The containers are placed in a warm place with diffused lighting. If planting is carried out according to the rules, then the first shoots will form after 2-3 weeks.
Rolled cigarettes
Sowing blue spruce seeds can also be done in homemade rolling papers. The following scheme is used:
- A piece of laminate backing with a width of no more than 15 cm is spread on the table.
- Place a layer of toilet paper or napkins on top and spray the structure generously.
- Spruce seeds are placed along the edge of the tape at intervals of 3-4 cm and sprinkled with a thin layer of soil.
- Roll the structure into a tight roll and secure it with rubber bands or ribbons.
The resulting rolled-up cigarette should be placed vertically in a saucer. After planting, spruce seeds should protrude slightly above the top edge of the structure. The rolled-up fruit is covered with polyethylene to create greenhouse conditions and sent to a warm place for germination. Lighting should be moderate; the structure should not be placed in direct sunlight.
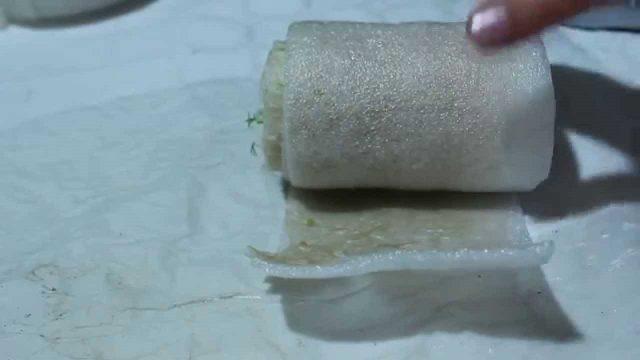
The advantage of planting seeds in rolling papers is that the rolls take up very little space on the windowsill
Caring for blue spruce seedlings
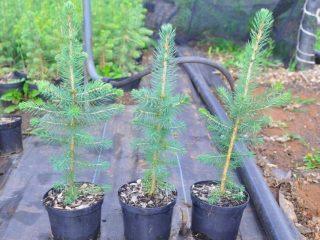
To grow seedlings from blue spruce seeds, you need to provide the crop with quality care after planting. In the first weeks you need to focus only on daily ventilation. For about 20 minutes a day, remove the cover from containers or rolled-up papers, wipe off excess condensation from the film and, if necessary, re-moisten the soil.
When the first blue spruce shoots appear, you will need to pay attention to several points:
- Watering. The soil in containers and rolling papers should not dry out. From time to time, blue spruce seedlings are moistened with lukewarm, settled water. In this case, it is necessary to avoid waterlogging, since in this case the plants may suffer from root rot.
- Temperature regime. Blue spruce needs to be grown in moderately warm conditions. The optimal temperature is 15-17 °C. In a cold room, seedlings develop reluctantly, but the heat also has a detrimental effect on them.
- Spraying. Blue spruce, after planting and when growing, does not like dry air. Seedlings should be sprayed 2-3 times a week in the morning or evening with clean, soft water.
- Lighting. For normal development of blue spruce after planting, a daylight period of 12-14 hours is required. In the first stages, you can install a phytolamp above the seedlings.
- Ventilation. To grow blue spruce from seed, you need to provide the seedlings with an influx of fresh air. Ventilation is carried out with caution; cold drafts must be avoided.
From time to time, when growing at home, plants are transshipped.The procedure is carried out at the moment when the previous containers become too cramped for the seedlings. Blue spruce must be replanted carefully, preserving as much of the earthen ball as possible at the roots.
Transplanting a seedling into open ground
Germination of blue spruce seeds at home is carried out throughout the year. In the first season, seedlings cannot be transferred to open ground - they are highly sensitive and may die if conditions change abruptly.
To plant seedlings on the site, choose a well-lit, warm place with neutral or slightly acidic soil. Blue spruce should not be planted in low areas due to the risk of waterlogging. It is necessary to ensure that groundwater lies away from the selected location.
Before planting, the area is dug up and the soil is fertilized with pine litter and peat. To increase looseness, sand can be added to the soil. For blue spruce, holes are dug that are approximately twice the size of the roots. The transplant algorithm looks like this:
- A drainage layer of broken bricks or pebbles is placed in the prepared recesses.
- Fill the hole halfway with nutritious soil and properly moisten the substrate.
- Seedlings in containers are watered abundantly to make them easier to remove from containers.
- If the roots of the plants are exposed, immediately before planting they are soaked in a clay mash.
- Place the seedlings in the center of the holes and fill the remaining voids with soil.
- Properly tamp down the soil in the tree trunk circle and water abundantly.
At first, after planting in the ground, blue spruce seedlings need to be shaded from the bright sun. In the future, they are cared for in the standard way - watered, loosened the soil, treated for diseases.
You can plant a blue spruce on the site immediately in a permanent place. But usually in the second year the seedlings are placed on a temporary bed for growing. In the third season, the transplant is carried out again and this time a permanent site is selected for the spruce trees. At least 1 m of free space is left between individual trees.
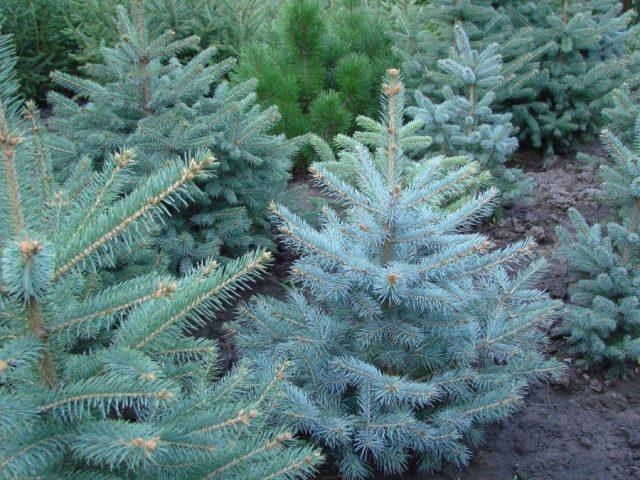
Blue spruce does not tolerate transplantation well, so up to 50% of seedlings are lost during the time from the first shoots to transfer to a permanent place
Conclusion
Growing blue spruce from seeds is easy. However, in the process you need to follow all the rules, and planting should be carried out with a reserve. Some plants will inevitably die during development, even with high-quality care.
