Content
In the process of breeding quails, every farmer faces the issue of incubating quail eggs very acutely. To timely replenish the number and increase the productivity of quails, it is necessary to ensure regular hatching of young animals. It is not economically profitable to purchase material for incubation. Therefore, every farmer must be able to handle incubation independently.
To obtain full-fledged offspring, it is important to comply with all the rules and regulations of incubation. And in the process of this simple but troublesome event, a number of important questions arise: which quail eggs are suitable for incubation and which are not, what temperature conditions must be observed, do quail eggs need to be turned over during incubation? After all, any deviation from the norm leads to a decrease in the number of chicks hatched and the production of weak offspring incapable of reproduction.
Benefits of home incubation
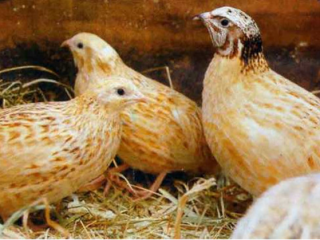
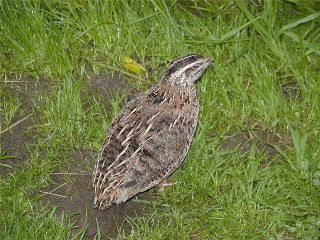
Over the past half century, quail breeding has reached incredible proportions. The precocity of the bird and the undoubted beneficial properties of eggs and tender quail meat played a big role in this.
But in the process of domestication of quails and the further development of this industry, the bird lost the ability to independently breed offspring. Therefore, poultry farmers, wanting to ensure a regular increase in the number of birds, often resort to artificial incubation of quail eggs at home. What are the pros and cons of home incubation?
The advantages of raising chicks at home are as follows:
- Elimination of financial costs for the purchase of material for subsequent incubation.
- There is no one hundred percent guarantee that you will get really high-quality eggs from healthy quails.

- To obtain full-fledged offspring ready for reproduction, it is important to select eggs only from young, healthy individuals.
- Incubation of eggs at home is important when breeding quails of different breeds.
- Regular replenishment of young animals in order to continuously obtain products.
- Incubation allows poultry farmers to increase the number of quails per year by at least 10-12 times.
However, incubating quail eggs is not just about putting selected material into the incubator. Preparatory measures are also of great importance, the implementation of which guarantees a high percentage of healthy chicks hatching:
- formation and proper maintenance of the parent stock;
- collection, storage and selection of quail eggs;
- processing of the incubator and eggs before laying;
- placing material in the incubator.
The only disadvantage of incubation is the fact that the process of hatching chicks is a rather troublesome process, and at first even experienced farmers can make mistakes. Therefore, the key to a positive result is collecting information about the rules for incubating quail eggs at home.
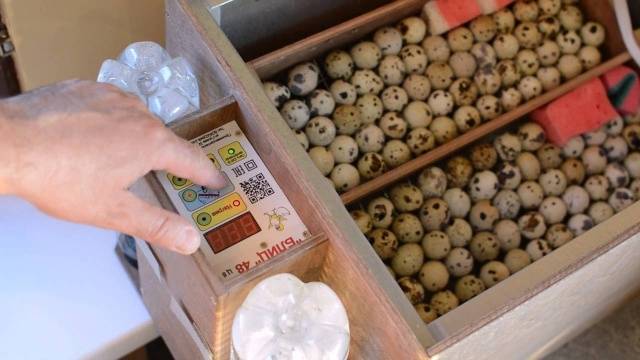
What kind of incubators are there?
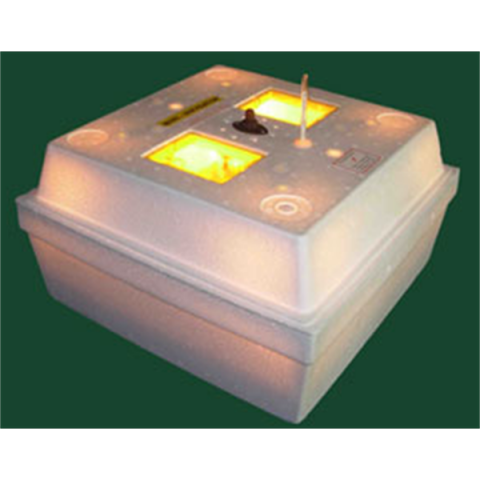
When choosing incubators, poultry farmers focus on the number of eggs laid. For small batches (20-30 pieces) you can use homemade incubators. Assembling such a simple mini-incubator does not take much time and does not require large financial investments. But home incubators more than pay for themselves.
When breeding quail in large batches, from 40 to 100 pieces, universal incubators such as “Nestka” or “Cinderella” are often used, which are designed for hatching eggs of any poultry.

There are many varieties of such small incubators. And they often differ according to the following criteria:
- maximum load, that is, how many eggs can be placed in the incubator in one laying;
- accuracy of maintained temperature;
- the ability to control and regulate the microclimate inside the incubator;
- the ability to incubate chicken, quail, goose eggs and other poultry;
- presence or absence of an automatic egg turning function;
- the presence or absence of water containers to regulate air humidity in the incubator;
- the presence or absence of ventilation holes;
- the presence or absence of a thermometer, its type (electronic or analog).
Modern incubators for hatching young animals are equipped with a built-in automatic egg turning function or a special grid for incubating quail eggs. But professionals note that this function is not fully developed by manufacturers. The turn is sharp, not soft and smooth.
During the incubation process, each quail egg must be turned regularly. It is almost impossible to control the automatic turning process when there are a large number of copies.
Throughout the entire incubation period, eggs must not only be turned over, but also changed places daily: those on the edge must be moved to the center, and vice versa. This need is due to the fact that in the center of the incubator the temperature is slightly higher than at the edges.
During the incubation process, each egg must be turned over very carefully, trying not to damage the integrity of the shell. This is exactly the case when even the most modern technology cannot replace a person. Therefore, it is advisable to turn the incubation material manually during the incubation process.
Summarizing all of the above, we can say that no matter what incubator you choose, you will have to do most of the work manually in order to be guaranteed to get healthy and full-fledged chicks.
How to properly form a parent herd
Before incubating quail eggs at home, you need to properly form a parent flock. After all, the quality of the subsequently obtained offspring depends on how competently you approach this process.
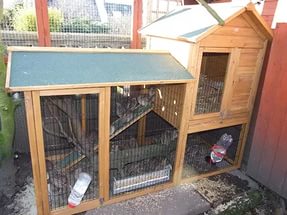
To obtain incubation material, the parent flock is formed exclusively from healthy and young individuals. Quails are placed in separate cages at the rate of 60-70 pieces. per m². It is not recommended to plant birds more densely. Remember that the fewer quails there are in one cage, the easier it is to care for them and monitor the food intake. An important factor in keeping any bird is good air exchange.
The parent stock should be kept in conditions as close to ideal as possible. Cleanliness in the cages, clean water, clean, not musty air and an abundance of properly balanced feed are mandatory conditions for keeping them.
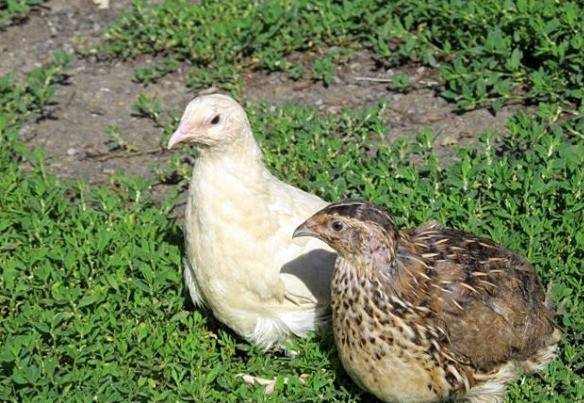
Experienced farmers pay great attention to the age of the bird. Quails and cockerels are selected at the age of 2 – 8 months. When females reach the age of 9–10 months, they are culled. They are no longer suitable for reproduction.
Males should be changed regularly. Upon reaching 4-5 months of age, they are removed, and young, 2-3-month-old cockerels can be added to the quails. In this case, the production of healthier and stronger young animals was noted.
The bird's egg production continues even after 6-8 months of age, but the quality of the incubation material is significantly reduced.
To obtain healthy offspring, the ratio of female to male quails should be 3-4:1.That is, no more than 5 quails can be added to 15 quails. Material for subsequent incubation can be collected only 7-10 days after the formation of the parent stock.
When forming a parent flock, please note that quails are very sensitive to inbreeding. Try to select females and males in such a way as to exclude the possibility of inbreeding. In most cases, a low percentage of hatchability of chicks and a very high percentage of death of young animals in the first 2-3 days after hatching were noted.
Proper feeding of the parent flock of quails, balanced in vitamins and minerals, is the key to obtaining healthy young animals. Therefore, it is not worth saving on feed, because not only the health of the poultry and the hatch rates of the chicks depend on it, but also the high resistance of their fragile organism, as well as their reproductive functions in the future.
How to properly select and store suitable material
The next stage hatching quails is the correct selection and storage of material suitable for incubation.
Freshness and storage conditions
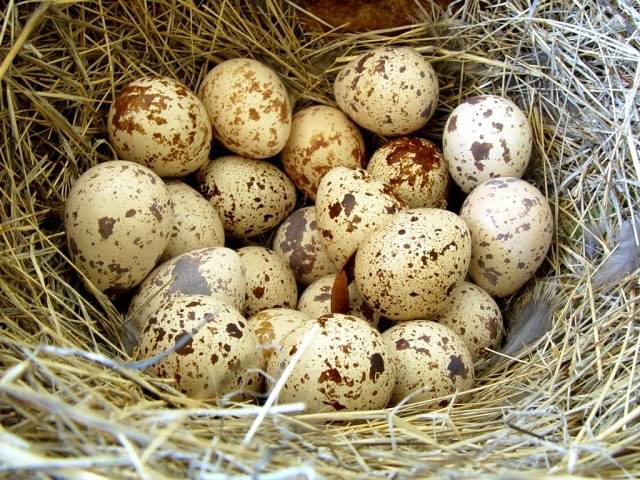
Only fresh quail eggs collected no more than 5-8 days before being placed in the incubator are suitable for incubation. Freshly collected material for subsequent incubation must be stored in a shaded, well-ventilated area at a temperature of +10˚С +15˚С and air humidity of 55-70%, placing them in a special tray vertically, with the sharp end down.
It is strictly forbidden to store material for subsequent incubation in tightly closed containers, plastic bags or buckets. The lack of access to fresh air reduces several times the quality of quail eggs intended for hatching, and, accordingly, the possibility of obtaining viable offspring.
Analysis and selection
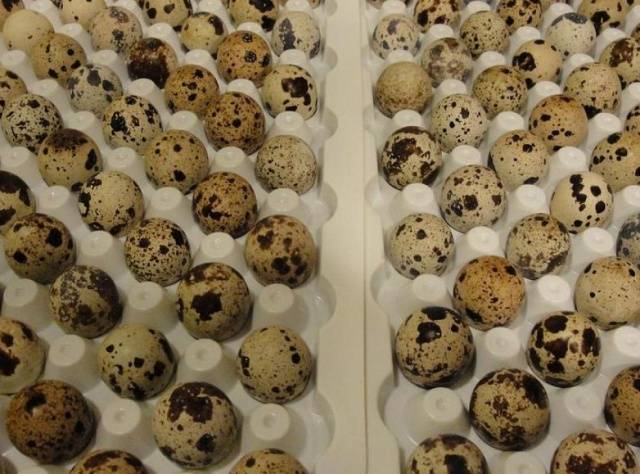
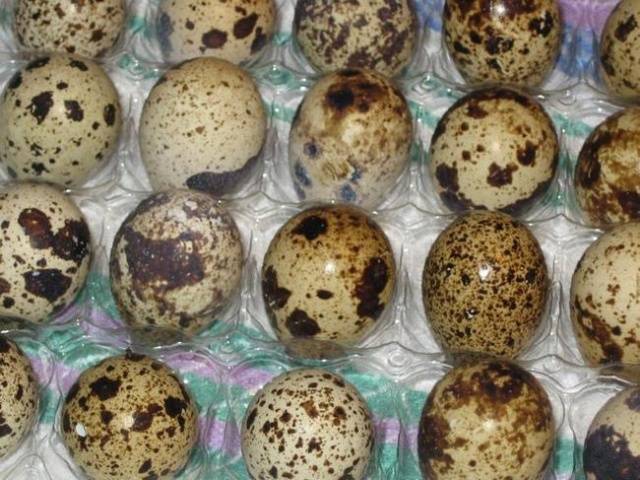
Before being placed in the incubator, each egg must be subjected to a thorough organoleptic evaluation. When selecting, much attention is paid to the size, shape, weight of each specimen, as well as the strength and color of the eggshell.
Shape, size and weight
Even if all standards for keeping and feeding the bird are observed, the shape and size of the eggs laid by a quail can vary significantly. Each egg selected for placement in the incubator must have the correct shape, without the slightest defect. Round or elongated specimens must be removed immediately.
You should also set aside material that is non-standard in size. Specimens that are too small will produce weak and small offspring. Chicks hatched from small eggs are characterized by low resistance, get sick more often and are practically unable to reproduce. According to data recorded by farmers, in this case there were high rates of chick mortality in the first three days after hatching.
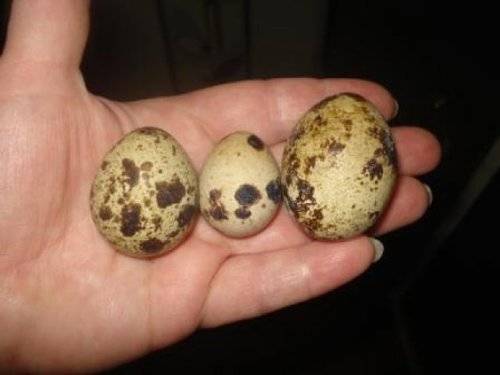
Often there are so-called dwarf eggs, characterized not only by their small size, but also by the absence of a yolk. Naturally, it makes no sense to expect chicks from such material.
A large egg often contains not one, but two yolks.As a rule, it is not possible to obtain healthy offspring from double-yolk eggs: chickens die in the embryonic phase or hatch with genetic mutations (so-called “freaks”).
When selecting, special attention should be paid to the weight of the material. For each breed of poultry and the direction of its productivity, there are certain standards. For meat quail breeds, the norm is considered to be an egg weight of 12-16 grams, and for egg breeds this figure is slightly lower - from 9 to 11 grams.
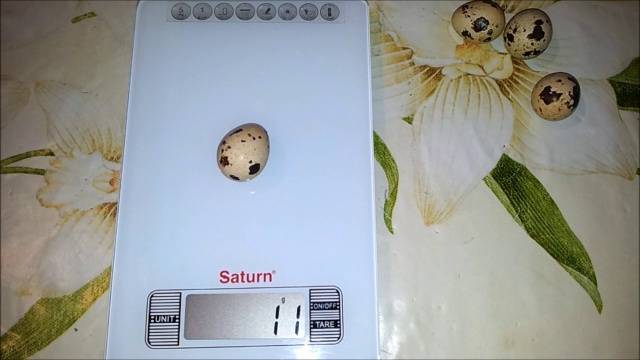
These indicators may vary slightly depending on the breed of bird and living conditions. Incubation material with any deviations towards increased or decreased weight should be discarded.
Shell strength
The strength of the shell is of no small importance when selecting quail eggs for subsequent placement in the incubator. Instances with an uneven surface, roughness, lime plaques, microcracks, chips and dents on the surface are rejected.
The fact that the shell shell is too thick is indicated by limescale deposits, which, in turn, indicates an excess of calcium in the feed. Such specimens are unsuitable for hatching: it is extremely difficult for the chick to peck through the durable shell, which causes a large number of suffocations.
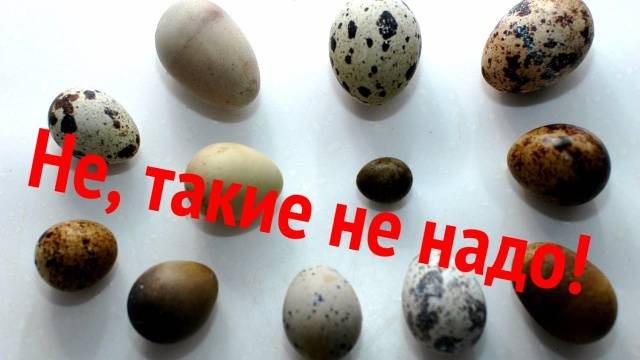
Professionals specializing in quail breeding note a direct relationship between irregular pigmentation and shell strength. Incorrect pigmentation is considered to be too dark or almost white shell color.
Lack of color or non-standard color indicates that the shell is too thin.With the slightest pressure, the shell is pressed and the integrity of the shell is broken. The shelf life of such material is very short.
Farmers who are faced with the problem of thin and fragile shells of quail eggs are advised to add finely ground shells, chalk or meat and bone meal to the bird feed. Feed with a high content of calcium and phosphorus should be given for no more than three days. With longer feeding with mineral supplements, quail will begin to lay eggs with a limescale coating.
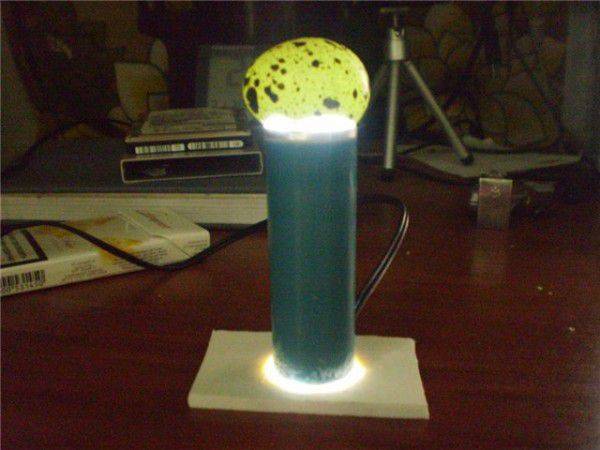
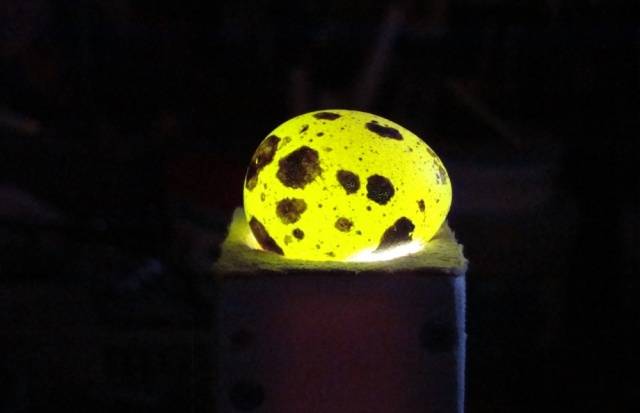
Ovoscopy
You can more carefully evaluate the quality of eggs intended for incubation at home using an ovoscope. It allows you to “look inside” the testicle and promptly reject unsuitable specimens.
At the moment, there are a large number of ovoscopes available on the market, varying in price and quality. But you can make an “X-ray” at home.
To do this, you need to select a cylinder whose diameter is several millimeters smaller than the egg. It is desirable that the material from which the cylinder is made does not transmit light. The light from a light bulb or flashlight is directed from below. An egg is placed on the top end.
Using an ovoscope you can see the following flaws:
- the presence of two yolks or their absence;
- presence of blood spots in the yolk or white;
- mixed yolk and white;
- cracks and chips on the shell;
- the presence of air chambers at the sharp end or side;
- if the yolk is at the sharp end or “stuck” to the shell.
Such specimens are also unsuitable for incubation and must be discarded.
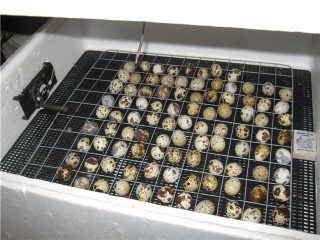
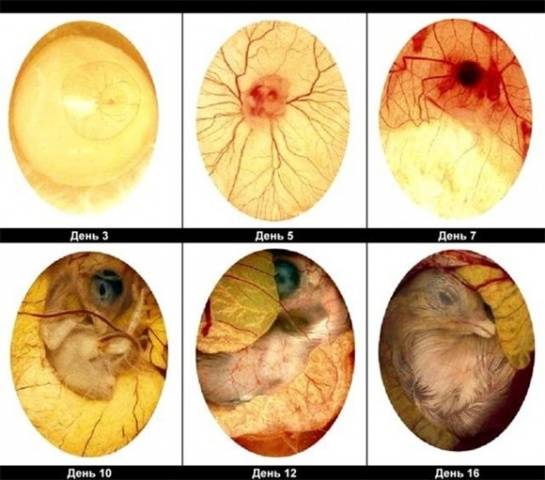
Quail eggs are also subjected to ovoscopy during incubation to determine how smoothly the embryo develops.In the process of hatching chicks, there is no point in viewing all the testicles on an ovoscope, and this procedure will take a lot of time. Therefore, 4-5 specimens are selected from each lattice and examined on an ovoscope.
Eggs are also scanned using an ovoscope if there is a low percentage of chicks hatching, in order to find out the reason and at what stage the embryos stopped in development.
This is what ovoscopy of quail eggs looks like during different periods of incubation in the photo
Adding material to the incubator
Before placing quail eggs in the incubator, both the device and the incubation material must be subjected to mandatory processing.
Preliminary preparation of the incubator
The incubator must be rinsed with warm, clean water. If desired, you can add a little potassium permanganate to the water to make the solution light pink. Dry the device thoroughly and proceed to the next stage of preparation - mandatory processing before incubation.

You can treat incubators before laying them:
- formaldehyde vapor - minimum treatment time is 40 minutes, after which the device should be left for a day for ventilation;
- chloramine solution. Dissolve ten tablets in a liter of water and generously spray the walls, bottom and lid of the incubator with a spray bottle. Leave the device in this state for 30-40 minutes, and then rinse thoroughly with clean water;
- quartz lamp for 30-40 minutes.
After these manipulations, the incubator must be dried again. The device is now ready for use.
If your incubator has water containers, fill them.If your device does not have such a function, select a small container that easily fits into the incubator in volume and pour water into it.
Immediately before adding the material, the incubator must be warmed up for 2-3 hours and ensure that it is in good working order.
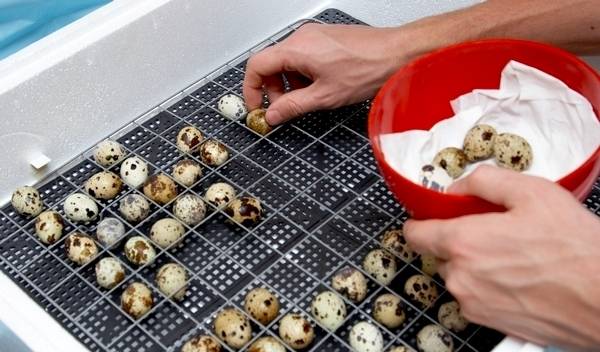
Material laying methods
You cannot wash or dry eggs intended for incubation. You even need to take the testicles carefully, with two fingers, by the blunt and sharp end. Try not to disturb the supershell membrane, which protects the shell and embryo from penetration of microbes.
Before laying, the material must be processed to destroy germs and microorganisms that could settle on the shell. There are several processing methods:
- disinfection with an ultraviolet lamp for 15-20 minutes;
- spraying with the preparation “Monclavit”, “Virosan”, “Virotsid”, “Brovadez”, etc.;
- hold the eggs in a weak solution of potassium permanganate (solution temperature 35-37˚C) for 15-20 minutes, place on a towel, dry;
- treatment with formaldehyde vapor for 20-30 minutes.

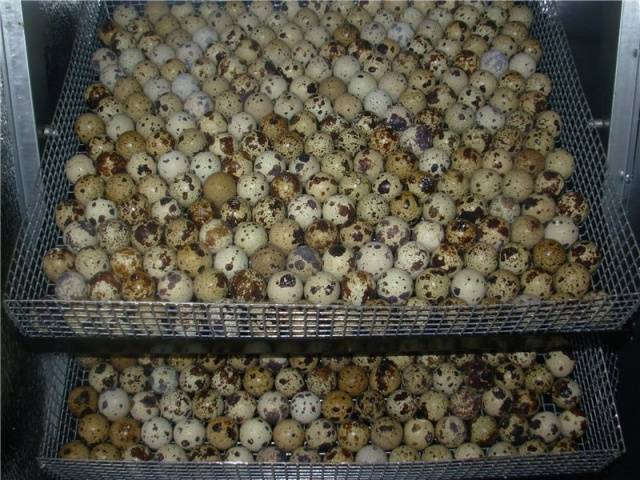
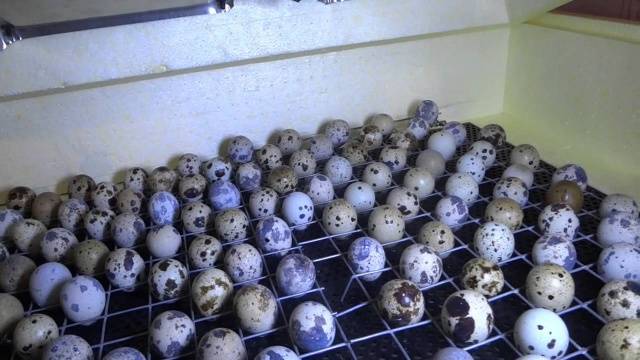
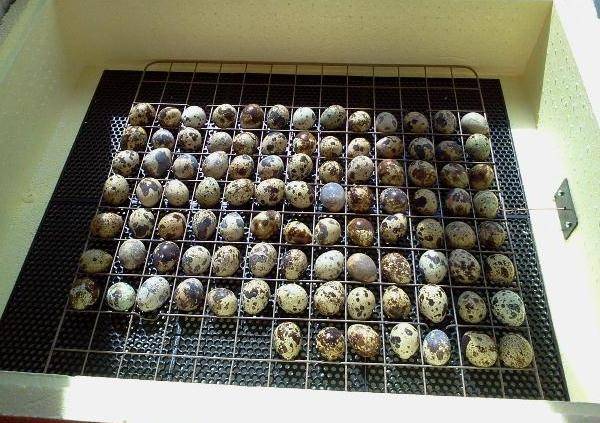
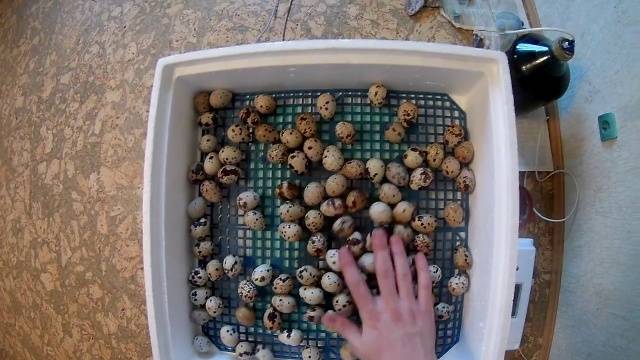
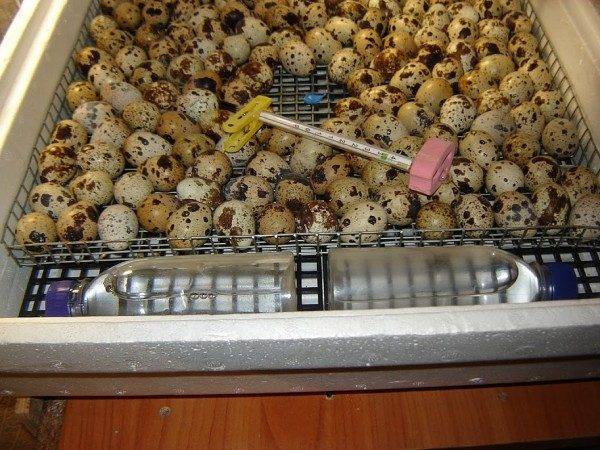
There are two methods of laying eggs in an incubator - horizontal and vertical.
The difference in bookmarking methods is as follows. Firstly, with vertical laying, the percentage of chicks hatching is slightly higher. If the average percentage of quail hatching is 70-75%, then with vertical laying this figure increases the hatching percentage by 5-7%.
When laying horizontally, much fewer eggs can be placed on the grill than when laying vertically.Moreover, during the incubation process, quail eggs need to be turned regularly. When laying horizontally at 180˚, when laying vertically – at 30-40˚.
Some poultry farmers are practicing a new method of incubating quail eggs without turning them over. In this case, a vertical bookmark is used. The hatching percentage of quails with this hatching method reaches 78-82%.
When laying horizontally, the eggs are simply laid out on a grid. But for vertical laying you need to prepare special trays, since it is difficult to place the eggs in the desired position. If your incubator does not have special trays suitable for vertical incubation, you can make your own.
Take ordinary carriages for quail eggs, make small holes at the bottom (pierce the holes with a hot nail). Eggs should be placed in trays with the blunt end facing up.
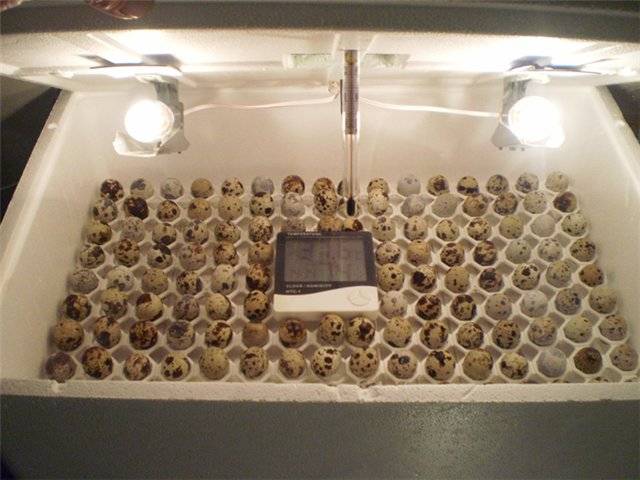
Incubation periods
The entire process of incubating quail eggs at home lasts 16-17 days and is divided into three periods:
- warming up;
- basic;
- output.
However, the incubation period for quail eggs may vary slightly. During short power outages, embryos retain their viability. But even with a slight delay, the hatching date for quails may be delayed by a day, a maximum of one and a half.
The main parameters of the microclimate and the activities that need to be carried out at each stage are given in the table.
Table: incubation modes for quail eggs.
Period | Duration, number of days | Recommended temperature in the incubator, ˚С | Humidity, % | Number of turns per day | Ventilation |
1. Warm up | From 1 to 3 | 37,5 – 37,7 | 50-60 | 3-4 | Not required |
2. Main | From 4 to 13 | 37,7 | 50-60 | 4-6, that is, every 6-8 hours | Not required |
3. Output | From 14 to 16(17) | 37,7 | 70-80 | Not required | Necessarily |
Now let's look at each mode in a little more detail.
Warming up
The duration of the first, warm-up period of incubation of quail eggs is three days. The temperature in the incubator should vary between 37.5-37.7˚C. A thermometer for measuring temperature is installed at a height of 1.5-2 cm above the quail eggs.
In the first three days, you need to turn the eggs regularly, 3-4 times a day.
There is no need to ventilate the incubator or spray the material. At this stage, the most important thing is to follow the recommended temperature regime for incubating quail eggs (see table).
Please note that you need to monitor the temperature for 2-3 hours after laying and connecting the incubator. At the initial stage of incubation, quail eggs warm up, and the temperature may vary.
Second period
The second period begins with the fourth and ends with the 13th day of incubation of quail eggs.
At this stage, it is important to maintain temperature conditions and regularly turn the eggs so that the embryos do not stick to the shell. Humidity also needs to be maintained within recommended limits.
The temperature for incubating quail eggs at home in the second period should be strictly at 37.7˚C. Even a slight excess of this indicator threatens to reduce the number of quail hatched.
Third period
The third period of incubation of quail eggs is the most troublesome and time-consuming. Starting from the 14th day of incubation, quail eggs need to be ventilated. Quails need ventilation so that they receive sufficient oxygen.
Airing quail eggs during incubation must be done in the morning and evening for 5-7 minutes. Subsequently, the ventilation time can be increased to 10-15 minutes.
Also in the third period, from the very first day you need to stop turning the eggs.
The incubation temperature for quail eggs is 37.7 °C (see table), but the humidity needs to be increased slightly - to 70-75%. First of all, this is necessary for embryos so that the exit is massive and problem-free. Otherwise, the quail simply will not have enough strength to peck through the shell.
Spraying eggs is only used if you do not have a moisture meter. You can spray the eggs twice a day, when the incubator is ventilated. Please note that the incubated material cannot be sprayed immediately after opening the device! Wait for the eggs to cool slightly.
There is no need to spray the eggs too much. Lightly spray some moisture over the surface. Wait 2 minutes before closing the incubator. Water for spraying should be clean and warm.
Compliance with the temperature regime during incubation of quail eggs is a guarantee of obtaining healthy and healthy young animals.
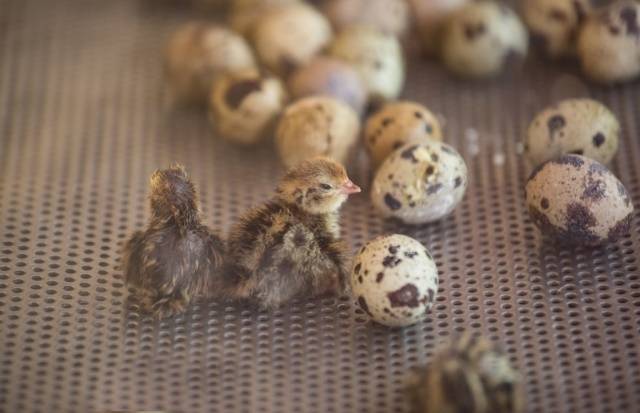
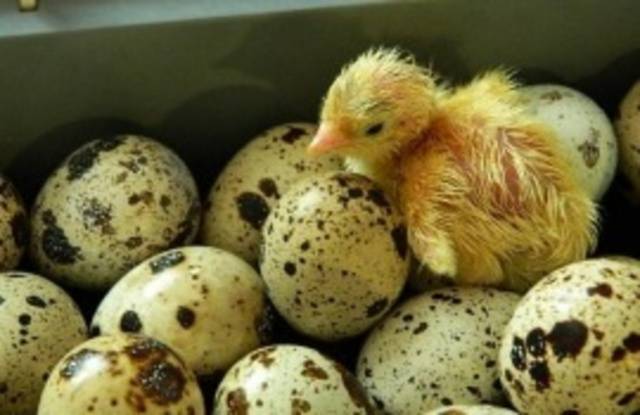
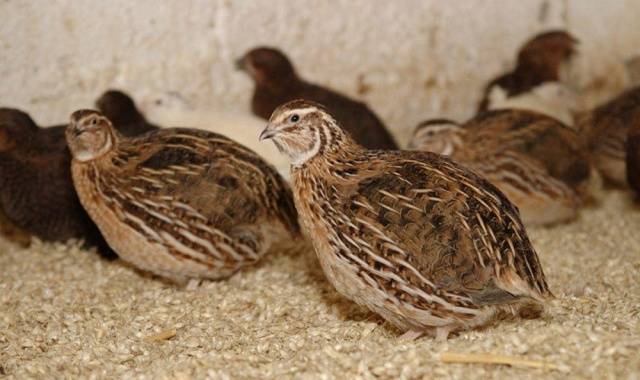
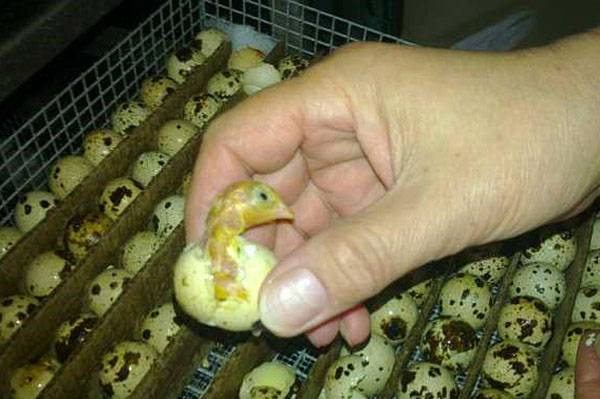
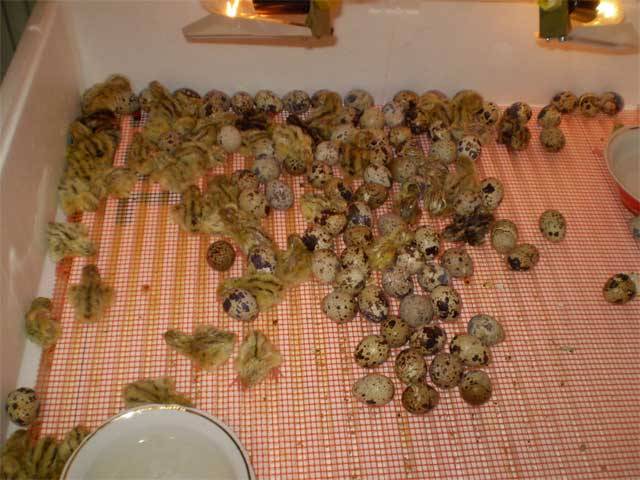
Mass hatching of chicks
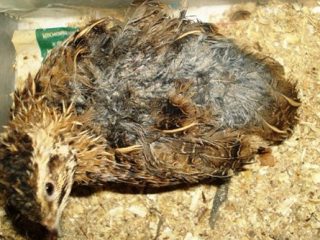
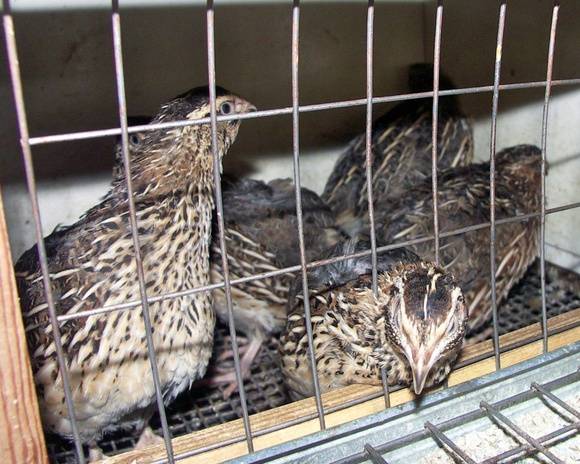
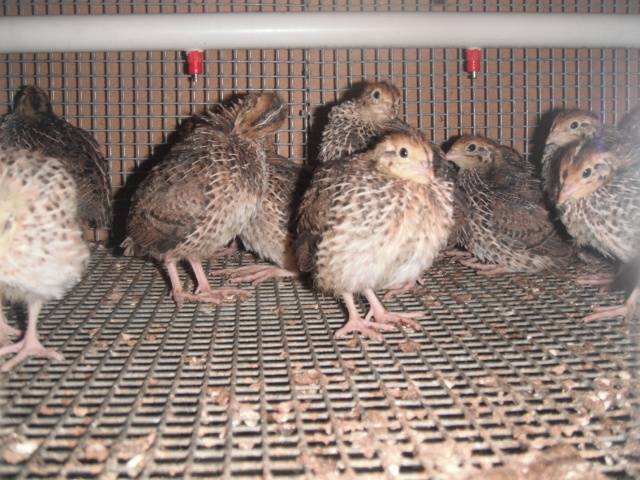
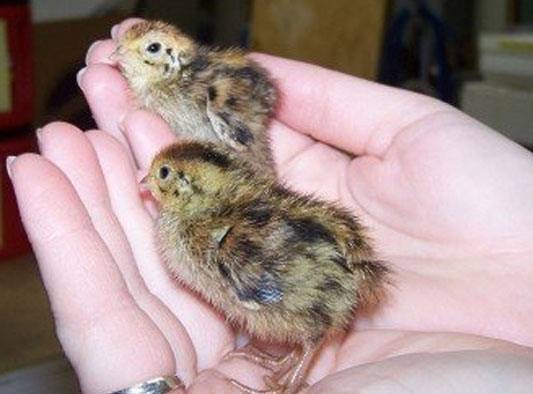
Hatching of chicks when incubating quail eggs at home begins, on average, on the 16th day. Quails hatch en masse, in just 3-4 hours.At this point, it is very important to let the quails dry out and take care of a special brooder for young animals.
In the first 4-5 days, quails should be fed with Baytril (5%) or a weak solution of potassium permanganate as a preventive measure for various diseases. The solution needs to be changed 2 times a day.
But what to do if the quails are not hatched on time? In this case, you need to wait 3-4 days. Do not turn off the incubator. If after this time the chicks have not hatched, then you need to look for the reason why incubation of quail eggs at home was unsuccessful.
Mistakes made when incubating quail eggs can be as follows:
- the parent stock was incorrectly selected;
- the rules of feeding and maintaining the parent flock were violated;
- failure to comply with the conditions for collecting and storing material for subsequent incubation;
- non-compliance with recommendations when preparing quail eggs for incubation;
- non-compliance with temperature conditions during incubation;
- neglect of the recommendations of experienced poultry farmers regarding the frequency of egg turning, humidity, ventilation.
Ovoscopy of quail eggs will help you find out at what stage you made a mistake. Carefully analyze each period to find out the reason for the unsuccessful incubation.

The author of the video will share his secrets of incubating quail eggs with you
Conclusion
Fluffy, small quails evoke such pleasant feelings! Anyone who has mastered the incubation of quail eggs can rightfully consider himself a fairly experienced poultry farmer. After all, despite its apparent simplicity, this matter has its own secrets. We will be glad if you share with us your tricks of breeding quails.